
There’s something quietly satisfying about bread baking, even when you’re pressed for time. This no knead bread dough recipe is one of those rare kitchen wins where you set things up, walk away, and come back to a loaf that feels like it took so much more effort than it actually did. I remember the first time I tried it—I mixed everything up before bed, then forgot all about it until morning. The dough had these bubbly patches that made me think, “Is this really going to work?” But when it came out of the oven, that crackly crust and chewy crumb made me want to slice off a piece immediately. It was kind of messy getting the dough from the bowl to the parchment paper—sticky and a little slippery—but that’s part of the charm, isn’t it?
– It requires almost no active hands-on time, which means more time for other things—or just a little break.
– The long fermentation gives the bread a wonderful depth of flavor without any complicated steps.
– The crust comes out beautifully crisp, though the texture can vary slightly depending on your oven’s quirks.
– It’s simple—and that’s kind of the point; no fancy equipment or skills needed.
– The dough is sticky and loose, so handling it can feel a little awkward if you’re used to traditional kneading.
If you’ve been hesitant about trying bread baking because it seems complicated or time-consuming, this recipe gently proves otherwise. The slow rise means your kitchen fills with a subtle, comforting scent overnight, and when you pull the bread from the pot, the golden crust is almost like a reward for your patience.
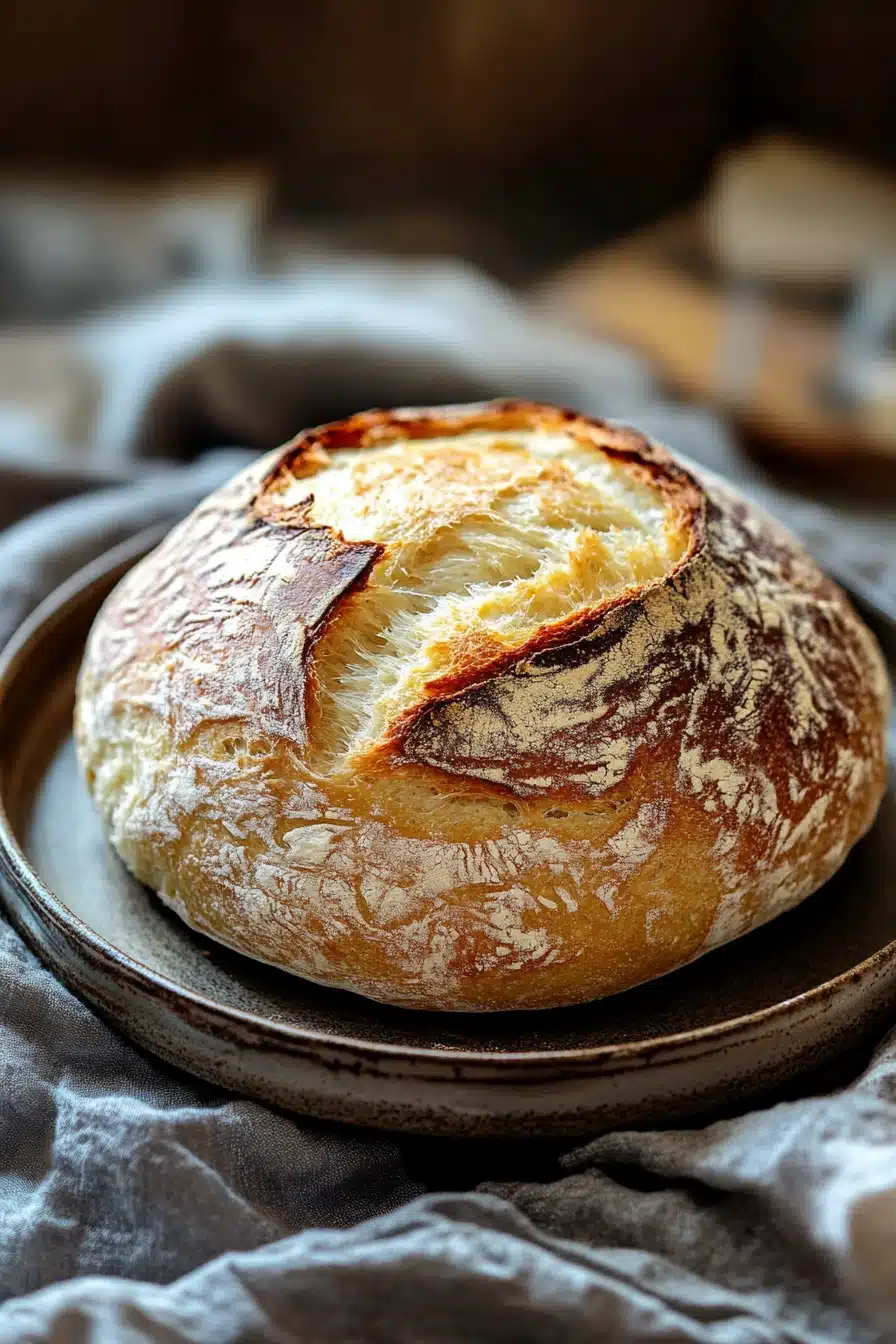
PrintNo Knead Bread Dough

A simple and easy no knead bread dough recipe that requires minimal effort and yields a crusty, flavorful loaf with a chewy interior.
- Prep Time: 10 minutes
- Cook Time: 40 minutes
- Total Time: 12 hours 50 minutes
- Yield: 1 loaf
Ingredients
3 cups (375 grams) all-purpose flour
1/4 teaspoon instant yeast
1 1/4 teaspoons salt
1 1/2 cups (360 ml) warm water (about 110°F / 43°C)
Instructions
In a large mixing bowl, combine the all-purpose flour, instant yeast, and salt. Stir to evenly distribute the ingredients.
Add the warm water to the dry ingredients and stir with a wooden spoon or spatula until a shaggy, sticky dough forms. Ensure all the flour is hydrated.
Cover the bowl tightly with plastic wrap or a clean kitchen towel and let the dough rest at room temperature for 12 to 18 hours. The dough should double in size and have bubbles on the surface.
After the resting period, lightly flour a work surface and scrape the dough onto it. Fold the dough over on itself once or twice to shape it into a rough ball. Do not knead.
Place the dough seam side down on a large piece of parchment paper. Cover with a clean kitchen towel and let it rest for 1 to 2 hours until it has risen again and passes the finger poke test (the indentation springs back slowly).
About 30 minutes before baking, place a heavy covered pot (such as a Dutch oven) with its lid in the oven and preheat to 450°F (230°C).
Carefully remove the hot pot from the oven. Lift the parchment paper with the dough and place it into the pot. Cover with the lid.
Bake covered for 30 minutes. Then remove the lid and bake for an additional 10 minutes until the crust is deep golden brown and crisp.
Remove the bread from the pot and transfer to a wire rack. Let cool completely before slicing.
Kitchen Notes: You don’t need any special gear beyond a heavy, lidded pot to get that perfect crust. I usually use whatever Dutch oven I have on hand, but honestly, any oven-safe pot with a lid should do the trick. Serving this bread warm with a swipe of butter is unbeatable, or try it alongside a simple soup or salad for an easy meal. Sometimes I add a handful of herbs or garlic to the dough just to experiment, but I haven’t tested those tweaks enough to say for sure how they change the texture. Also, if you want to switch up the flour, you could try half whole wheat, though it might make the dough denser and require a bit more water.
FAQ:
Q: Can I speed up the rising time?
A: The long rise is key to the flavor and texture, but if you’re in a hurry, a warmer spot can help shorten it slightly. Just keep an eye on the dough’s bubbles and size.
Q: What if my dough is too sticky to handle?
A: That’s normal! Wet hands or a little extra flour on your surface help, but try not to add too much flour or the bread might turn out dense.
Q: How do I store leftovers?
A: Keep the bread in a paper bag or bread box at room temperature for a couple of days. For longer storage, wrap it tightly and freeze—it thaws nicely at room temp.
This no knead bread dough is one of those kitchen projects that quietly becomes a favorite, especially when life feels a bit too busy. Give it a try, and see how simple moments like these can make your home feel even cozier.