
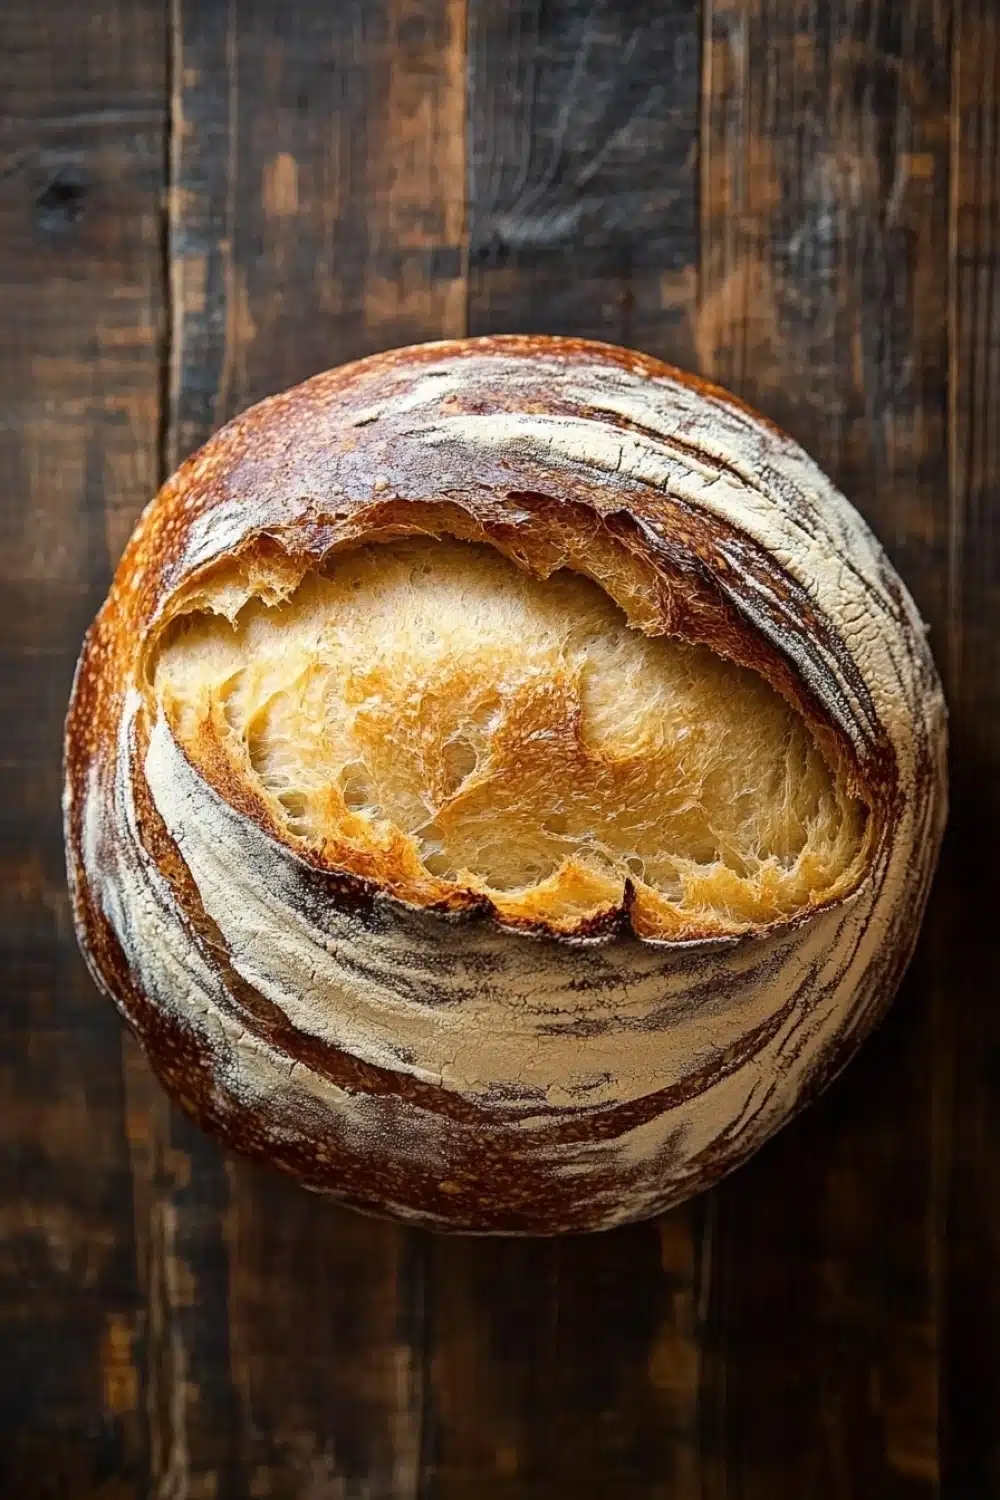
There’s something almost meditative about mixing a no-knead dough and letting it sit — no elbow grease, no stress, just time and patience. The kitchen fills with a cozy hum as the yeast works its quiet magic overnight, bubbling promise of crusty gold by morning. I remember the first time I tried this New York Times recipe: skeptical about skipping the kneading step, yet captivated by the rustic charm of the loaf that emerged. The dough’s sticky, shaggy texture feels like a rebel against traditional bread-making rules, but the payoff is worth every bit of that chill ferment. When you pull that heavy Dutch oven from the oven, the anticipation’s thick enough to slice with a knife. The crust crackles under the blade, sending a smoky, toasty aroma wafting through the air, making the wait feel like a small victory — no fancy gadgets, no baker’s arm workout, just simple ingredients and a bit of clock-watching. This is bread that talks back, with a chewy crumb and a crust that snaps like a clap in a jazz club. If you’ve ever thought bread baking was a chore, this recipe is the ultimate curveball — minimal hustle, maximum payoff.
If you’re looking to satisfy your sweet tooth after enjoying that crusty no knead bread from the New York Times, you might want to check out these delicious Sheet Pan Shortbread Cookies: Easy Slicing, Classic Flavor. They’re simple to make and perfect for a cozy treat!
Why I Stick to No-Knead Bread: Real-Life Wins in My Kitchen
- Hands-off prep means I can toss the dough together before bed and wake up to a ready-to-bake loaf — no elbow grease required.
- The long fermentation time (think overnight) gives the bread a depth of flavor that feels way fancier than the effort put in.
- Using a Dutch oven creates a crust that cracks with a satisfying crunch — it’s like a homemade bakery showstopper every time.
- Minimal ingredients and no fancy gadgets mean even my most novice friends can nail this recipe without breaking a sweat.
- Leftovers freeze like a charm — so I’m never caught without fresh bread for sandwiches or toast, even on busy days.
No-Knead Bread (New York Times)
A simple and rustic no-knead bread recipe from the New York Times that yields a crusty, flavorful loaf with minimal effort.
- Prep Time: 15 minutes
- Cook Time: 45 minutes
- Total Time: 12 hours
- Yield: 1 loaf
Ingredients
Scale
3 cups (360 grams) all-purpose flour
1/4 teaspoon instant yeast
1 1/4 teaspoons salt
1 1/2 cups (360 milliliters) warm water
Instructions
In a large mixing bowl, combine the flour, instant yeast, and salt.
Add the warm water to the dry ingredients and stir with a wooden spoon or spatula until a shaggy, sticky dough forms.
Cover the bowl tightly with plastic wrap or a clean kitchen towel and let it rest at room temperature for 12 to 18 hours, until the surface is dotted with bubbles and the dough has doubled in size.
Lightly flour a work surface and turn the dough out onto it. Sprinkle the dough with a little flour and fold it over on itself once or twice. Shape it loosely into a ball.
Place a large piece of parchment paper on a kitchen towel and dust it lightly with flour. Transfer the dough seam side down onto the parchment paper. Cover with another kitchen towel and let it rise for 1 to 2 hours, until it has almost doubled in size.
About 30 minutes before the dough is ready, place a 6-quart (5.7 liters) heavy covered pot (such as a Dutch oven) in the oven and preheat to 450°F (230°C).
Carefully remove the hot pot from the oven. Lift the dough with the parchment paper and place it into the pot. Cover with the lid and bake for 30 minutes.
Remove the lid and bake for an additional 15 minutes, until the loaf is golden brown and crusty.
Carefully remove the bread from the pot and let it cool on a wire rack for at least 1 hour before slicing.
Explore more:
Breakfast Recipes
Mastering No-Knead Bread: Tips and Tricks from the Trenches
Substitution Secrets
When it comes to no-knead bread, the ingredient list looks straightforward, but trust me—there’s wiggle room if you know where to tweak. For instance, all-purpose flour is the usual go-to, but swapping in bread flour can give your loaf a bit more chew and structure, thanks to its higher protein content. I’ve even thrown in whole wheat flour (about 25%) for a nuttier twist, though be warned—it’ll soak up more water, so nudge your hydration levels up a smidge. Instant yeast is the quick draw here, but if you’re stuck with active dry yeast, just dissolve it in the warm water first and you’re golden. Salt? Don’t skimp. It’s the unsung hero that tightens gluten strands and keeps yeast in check. As for water, tap water usually does fine, but if you live in a hard-water zone, filtered water can help avoid funky flavors creeping in.
The Science
The magic of this no-knead bread lies in time and hydration—think of it as a slow dance rather than a sprint. The minimal yeast combined with a high hydration dough (about 75%) lets enzymatic reactions and gluten development happen gradually. That’s why the dough looks shaggy and sticky at first—that’s your gluten network forming without you having to get your hands dirty. Over 12 to 18 hours, the yeast bubbles away, producing those delightful gas pockets and flavor compounds. The Dutch oven acts like a mini steam chamber, trapping moisture so the crust crisps up beautifully while keeping the crumb moist inside. Skip the pot? You risk pale, dense bread that’s more brick than baguette. This science-backed patience is what turns humble ingredients into a loaf worth bragging about.
Real-world Fix
Let me spill some street smarts from my kitchen escapades. Sometimes the dough refuses to double or looks less bubbly after the long rest—it’s a bummer, but not a lost cause. First, check your yeast’s freshness (yeast past its prime is a recipe for heartbreak). If the kitchen’s chilly, try putting the dough in the oven with just the light on—provides a cozy microclimate for fermentation. Also, when shaping, don’t fuss too much; overhandling can deflate your precious bubbles. Oh, and when pulling that hot Dutch oven from the oven—don’t be a greenhorn—use thick mitts and keep your wits about you. Finally, patience after baking is key. Let that loaf cool completely on a rack; slicing too soon is the rookie move that leads to gluey crumb.
No-Knead Bread FAQ
Why does this bread recipe take so long with hardly any kneading?
This is the magic of slow fermentation. The dough rests for 12 to 18 hours, letting wild yeast and enzymes work their mojo, developing flavor and texture without you breaking a sweat kneading.
Can I rush the rising time if I’m in a hurry?
Not really. The long ferment is key for flavor and crumb. You might get a loaf, but it’ll be flat and bland—definitely not worth cutting corners here.
Why use a heavy covered pot or Dutch oven?
That pot traps steam around the dough, mimicking a professional steam-injected oven. It helps form the crusty exterior and keeps the inside moist—total game changer for homemade bread.
Is it necessary to cool the bread for an hour before slicing?
Yes! Cutting too soon turns the crumb gummy because it hasn’t set properly. Waiting lets the structure firm up and the flavors settle. Patience, my friend.
What’s the deal with using instant yeast in such a small amount?
Instant yeast in tiny doses keeps the dough moving at a snail’s pace, which means more depth in flavor and a rustic texture. It’s a slow dance, not a sprint.