
Quick bread hacks rock.
I’ve always been a bit of a bread nerd—there’s nothing like that first crackling crust when you slice into a loaf fresh from the oven. But traditional bread baking? It can be a slog, with all those yeast proofs and fuss.
This recipe flips the script. Using self-rising flour cuts down the waiting game—no need to babysit the dough for hours. Just stir, knead a bit, and pop it in the oven. It’s a game changer for anyone who’s ever thought, “Bread? Too much work.”
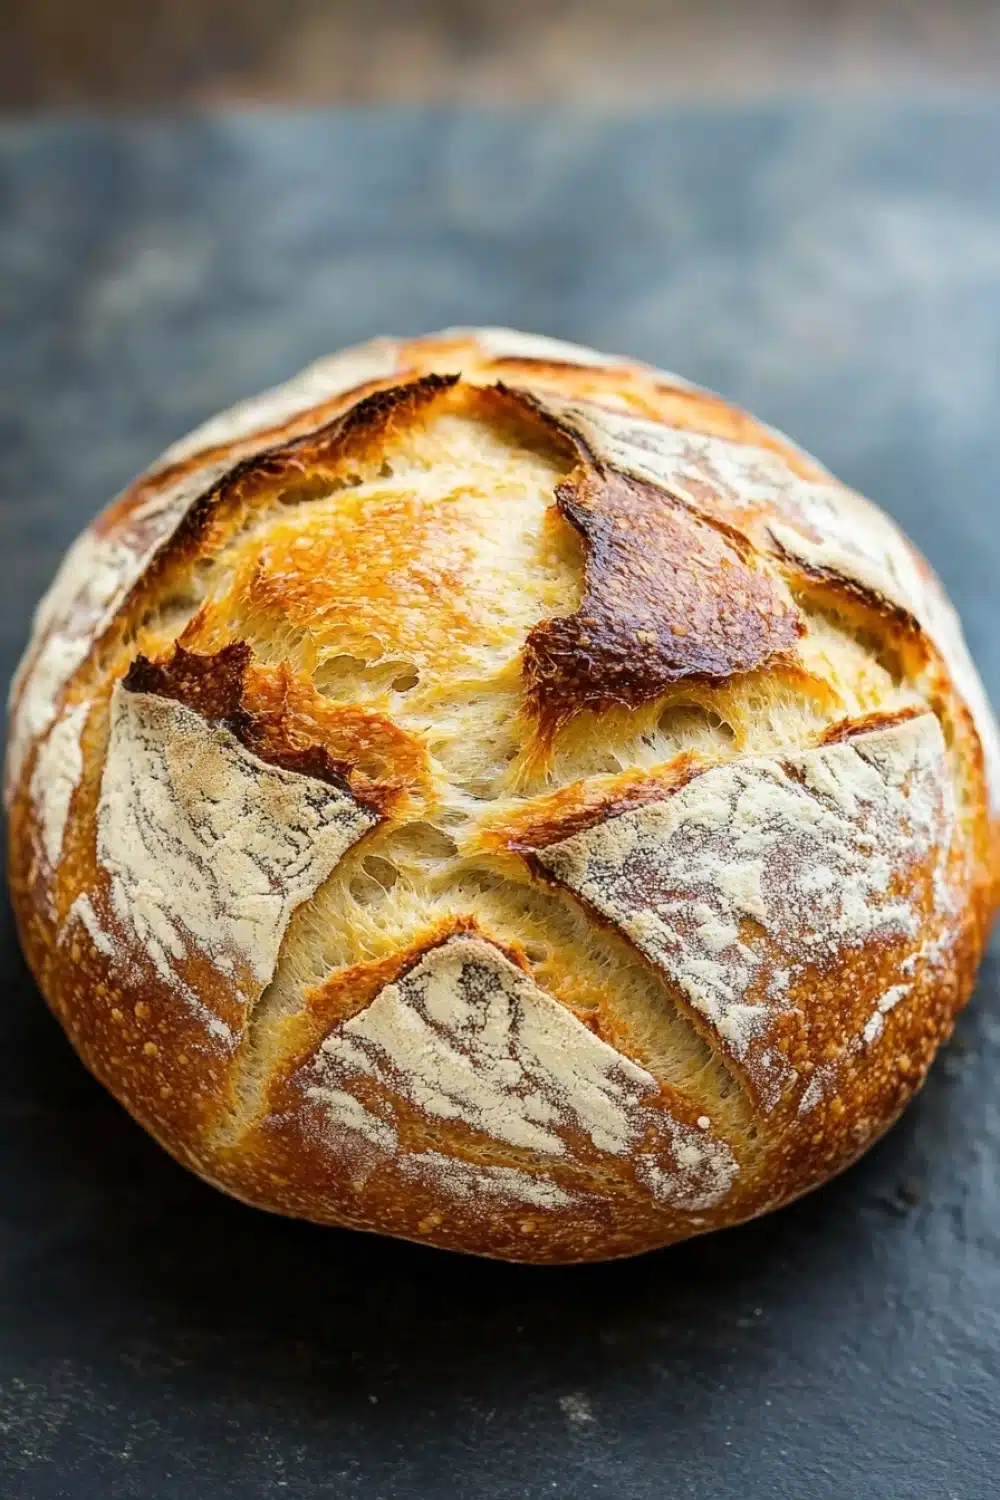
When I whipped up this loaf, the kitchen smelled like a bakery that actually cared about simplicity. The crust came out golden and crisp, the crumb surprisingly tender, with none of the usual yeast drama. If you’re short on time but crave homemade bread, this is your no-BS route.
If you’re looking to complement your meal, try making some High Protein Chicken Salad with Greek Yogurt for a Healthy Lunch Twist alongside fresh bread with self rising flour.
Real-Life Perks of Baking Simple Bread with Self-Rising Flour
- No-fuss baking: You skip the yeast drama—no proofing or waiting for hours. Just mix, knead, and bake. Perfect for those ‘I need bread now’ moments.
- Minimal ingredients, max impact: If your pantry’s looking bare, this recipe still has your back. Self-rising flour does the heavy lifting, so you’re not hunting for multiple components.
- Beginner-friendly hustle: I’ve seen folks new to baking nail this loaf on the first try. The dough’s forgiving—sticky but manageable—and the results reward the patience.
- Time-saver alert: From start to finish in just 40 minutes. That’s less time than binge-watching a sitcom episode—and you get fresh bread out of it.
- Snack hack: Warm, homemade slices go from oven to table faster than you can butter them. Toast, sandwich, or just tear and dunk in your favorite soup.
Simple Bread with Self-Rising Flour

A quick and easy homemade bread recipe using self-rising flour. Perfect for beginners and requires minimal ingredients.
- Prep Time: 10 minutes
- Cook Time: 30 minutes
- Total Time: 40 minutes
- Yield: 8 slices
Ingredients
3 cups self-rising flour
1 1/4 cups warm water (about 110°F)
1 tablespoon sugar
2 tablespoons olive oil
1 teaspoon salt
Instructions
Preheat your oven to 375°F (190°C).
In a large mixing bowl, combine the self-rising flour, sugar, and salt. Stir to mix evenly.
Add the warm water and olive oil to the dry ingredients.
Mix with a wooden spoon or your hands until a sticky dough forms.
Turn the dough out onto a lightly floured surface and knead for about 5 minutes until smooth and elastic.
Shape the dough into a loaf and place it in a greased 9×5 inch loaf pan.
Cover the loaf with a clean kitchen towel and let it rest for 10 minutes to rise slightly.
Bake in the preheated oven for 30 minutes or until the top is golden brown and a toothpick inserted into the center comes out clean.
Remove the bread from the oven and let it cool in the pan for 10 minutes.
Transfer the bread to a wire rack to cool completely before slicing.
Explore more:
Breakfast Recipes
Mastering Simple Bread with Self-Rising Flour
The Secret Behind Self-Rising Flour Magic
Self-rising flour is a sneaky shortcut that gets you halfway to bread nirvana without pulling out yeast or waiting all day. It’s pre-mixed with baking powder and salt, so you skip the proofing drama. But here’s the catch— it’s not just about convenience; it dictates your bread’s texture and rise. Using self-rising flour means the dough won’t have the same elastic bounce as yeast bread, so it’s denser but still surprisingly fluffy when done right. I remember once trying this bread and expecting a chewy artisan loaf—wrong! Instead, I got a pillowy, tender crumb that’s perfect for quick sandwiches or toast. If you’re used to classic yeast bread, this is a different game, but one worth playing for the speed and simplicity.
Why That Warm Water Temp Matters—And When to Bend the Rules
Warm water, about 110°F, is the sweet spot for awakening the chemical leavening agents in self-rising flour. Too cold? Your bread’s gonna loaf around without much rise. Too hot? You risk killing those tiny leavening particles before they even get started. I’ve eyeballed temperatures before, but I’ve learned that a quick touch test—warm but not hot—is clutch. But hey, life happens! If your water’s a tad cooler, just give the dough a longer rest after shaping. Let it chill under that towel, relax, and puff up a bit. It’s like coaxing a shy friend to the party. Patience pays off. On the flip side, don’t rush the bake—if the crust browns too fast, tent with foil to avoid a burnt top and undercooked middle, a classic rookie mistake.
Fixing Common Fails—From Dense Loaves to Dry Crusts
Dense bread? Most likely, you didn’t knead enough. That five-minute window isn’t just a random number—it builds gluten just enough for structure without yeast. Try kneading until the dough’s smooth but still slightly sticky, then let it rest. Over-kneading with self-rising flour can also backfire, leading to a tough bite. Dry crust? Olive oil’s your friend—don’t skimp on it. Brushing the top with a little oil or even water right before baking helps create that golden, slightly tender skin. And if your bread sinks in the middle after baking, it might’ve needed a bit more rest or you opened the oven door too early—don’t be that guy! Give your loaf the quiet time it deserves to set up properly. Lastly, always cool on a wire rack; cooling in the pan traps steam, making the crust soggy. That bread deserves to breathe—don’t hold it hostage in the pan.
Simple Bread with Self-Rising Flour: FAQ
A1: Nope, not a straight swap here. Self-rising flour already has baking powder and salt mixed in—regular flour doesn’t. You’d have to add those separately to get the same lift and flavor.
A2: Around 110°F (just warm to the touch) is ideal. Too hot and you’ll kill the yeast vibe—too cold and the dough won’t rise right. Even though this recipe uses self-rising flour, that water temp helps everything meld smoothly.
A3: Absolutely! This recipe is the easiest no-fuss loaf you’ll find. Minimal ingredients, quick steps, and no waiting for hours to let it rise. If you’re new to bread baking, this one’s your best wingman.
A4: Yes, this recipe is vegan by default—no eggs, dairy, or animal products involved. Just check your sugar and ensure your olive oil is pure. Simple as that.
A5: No. Let it cool completely on a wire rack before slicing, or you’ll end up with a gummy mess. Patience is key here—trust me, the crumb sets better once cooled.