
Craving that perfect crunch?
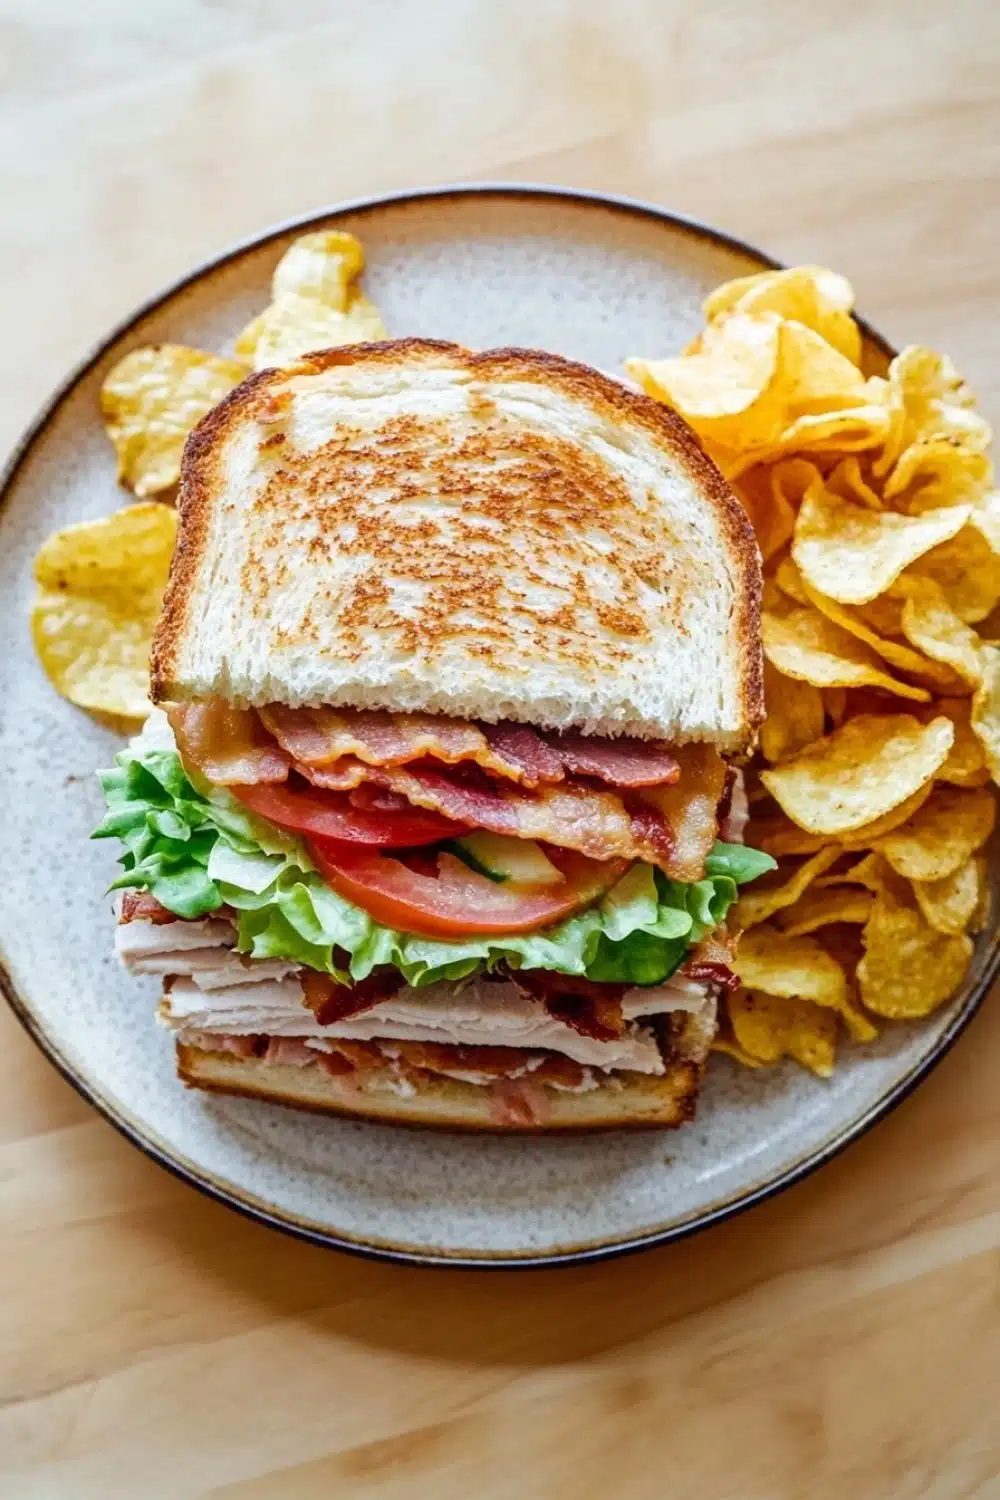
Nothing hits the spot quite like a classic club sandwich with chips. I remember the first time I stacked those layers—turkey, beef bacon that snaps with every bite, crisp romaine, and juicy tomato, slathered with just the right amount of mayo. It’s the kind of sandwich that makes you roll up your sleeves and dive in headfirst, no dainty nibbling here.
Meanwhile, the oven hums away, turning humble russet potatoes into golden, crispy chips that crackle under the teeth like a fresh campfire spark. The aroma alone is enough to pull anyone into the kitchen for a taste-test—chips hot and salty, ready to join the sandwich on this flavor-packed journey.
This isn’t just lunch—it’s a whole mood, a hands-on, no-fuss classic that brings the heart of deli counters straight into your home kitchen. So, grab your bread, butter, and a sense of adventure. Let’s build this beauty.
For more delicious meal ideas, check out our recipe for a club sandwich with chips that’s perfect for a crispy, layered lunch feast.
Real-Life Perks of the Classic Club Sandwich with Chips
- Quick prep time—15 minutes tops from fridge to table, which is clutch on hectic days.
- All-in-one meal: protein from turkey and bacon, fresh crunch from lettuce and tomato, plus carbs that keep you full.
- The homemade chips? No greasy takeout guilt here—crispy, golden, and seasoned just right.
- Versatility on point—swap turkey for chicken or veg options without skipping a beat.
- Leftovers store like a champ; you can totally meal prep and avoid the sad desk lunch blues.
Classic Club Sandwich with Chips

A delicious and satisfying classic club sandwich layered with turkey, crispy bacon, fresh lettuce, tomato, and mayonnaise, served with crunchy golden chips on the side.
- Prep Time: 15 minutes
- Cook Time: 15 minutes
- Total Time: 30 minutes
- Yield: 2 sandwiches
Ingredients
6 slices white sandwich bread
4 slices cooked turkey breast
4 slices cooked beef bacon
4 leaves romaine lettuce
4 slices tomato
2 tablespoons mayonnaise
1 tablespoon unsalted butter
2 medium russet potatoes
1 teaspoon olive oil
Salt to taste
Black pepper to taste
Instructions
Preheat the oven to 425°F (220°C) for the chips.
Wash and peel the russet potatoes. Cut them into thin, even strips to make chips.
Place the potato strips in a bowl and toss with olive oil, salt, and black pepper.
Spread the potato strips in a single layer on a baking sheet lined with parchment paper.
Bake the chips in the preheated oven for 12-15 minutes, turning halfway through, until golden brown and crispy.
While the chips bake, lightly toast the bread slices until golden brown.
Spread mayonnaise evenly on one side of each toasted bread slice.
On the first slice of bread, mayonnaise side up, layer 2 slices of turkey breast, 2 leaves of romaine lettuce, and 2 slices of tomato.
Top with a second slice of bread, mayonnaise side down.
Spread mayonnaise on the top of the second slice, then add 2 slices of cooked beef bacon, 2 slices of turkey breast, 2 leaves of romaine lettuce, and 2 slices of tomato.
Place the third slice of bread on top, mayonnaise side down, to complete the sandwich.
Cut the sandwich diagonally into quarters and secure each quarter with a toothpick.
Remove the chips from the oven and season with additional salt if desired.
Serve the club sandwich quarters with the freshly baked chips on the side.
Explore more:
Lunch Recipes
Classic Club Sandwich with Chips: Mastering the Essentials
The Secret to That Golden Crust on Your Chips
Let me spill the beans—nailing that crunch on homemade chips isn’t about tossing ‘em in oil and praying for the best. It’s a dance of temperature and timing. We’re talking 425°F, not a degree less, because that’s where the Maillard reaction kicks in full throttle, crisping those russet strips into golden perfection. I always slice my potatoes razor-thin, like the pros do, no uneven chunky fingers here. Why? Thin strips mean rapid moisture evacuation, giving you that coveted snap as soon as you bite down.
And here’s a curveball—don’t overcrowd your baking sheet. You want those spuds to breathe and roast, not steam in a soggy sauna. Plus, flipping halfway through? Non-negotiable. That’s your crispy jackpot moment.
Why Mayo and Toast Are More Than Just a Tag Team
The mayo isn’t just a flavor booster; it’s the unsung hero that locks moisture and acts as a barrier against soggy bread. Imagine biting into a sandwich where the bread is drenched and collapsing under the layers—it’s a rookie move, a total bummer. I learned this the hard way back in my early kitchen days, when I ignorantly slathered mayo only on the bread’s exterior. Big mistake. Spread it evenly on the toasted bread’s inner surface—this little trick keeps the crunch alive and well, even as the tomato’s juices try to stage a coup.
We’re also layering like pros here: lettuce first, then tomato. Why? Lettuce is the moisture shield between the bread and the juicy tomato slices. It’s sandwich physics, a technique that prevents a soggy meltdown. And hey, the toast itself? Light, golden, not burnt—because charred bread kills the delicate balance of flavors in this classic club.
Fixing the Classic Club Sandwich Fails — No More Soggy, No More Collapse
Here’s a common scenario: you build your masterpiece, but the sandwich falls apart the second you try to eat it. Been there, done that, and it’s a buzzkill. The fix? Toothpicks aren’t just for show—they hold the fortress together, keeping those layers tight and tidy. Don’t skimp on them. Four quarters, four toothpicks. Simple.
Another pro tip: slice diagonally, not straight down. That angle gives your sandwich more structural integrity—and it just looks cooler on the plate. If you find your sandwich soggy, chances are you didn’t toast enough or mayo was slathered unevenly. Remember, toasting is your best friend for structure; mayo is your moisture manager. Skip either, and you’re courting disaster.
Finally, store components separately if not eating immediately. Bread and fillings don’t play nice together overnight. Keep your chips sealed tight or they’ll go limp faster than you can say “club sandwich”—and nobody wants that sad crunch.
Classic Club Sandwich with Chips FAQ
Absolutely! Whole wheat adds a nuttier flavor and extra fiber, but it changes the classic vibe a bit. For me, white bread keeps that nostalgic crunch and softness — the real OG club feel.
Easy fix: soak your potato strips in cold water for at least 30 minutes before baking. This washes off excess starch, making the chips crunchier. Also, spreading them out without overlap on the baking sheet is clutch — no soggy spots allowed.
Yes. The sandwich holds up well cold straight from the fridge, great for packed lunches. But heating it gently on a pan for a couple of minutes revives that toasty goodness and makes the bacon pop.
Definitely. Grilled or roasted chicken breast works like a charm here. Just slice it thin to keep the layers balanced and avoid overpowering the sandwich with too much meat.
Keep sandwich components separate in airtight containers to avoid soggy bread — lettuce and tomato deserve their spotlight, not a mushy sandwich. Chips should stay at room temp in a sealed container to keep crispness, but eat them within a day or they lose their crunch.