
Two hours. That’s it.
I’ve always thought bread baking was an all-day affair—hours of kneading, waiting, and hoping. But this no-knead Dutch oven bread flips the script. No slap-and-fold marathons here, just a simple mix and a patient wait while the dough does its thing.
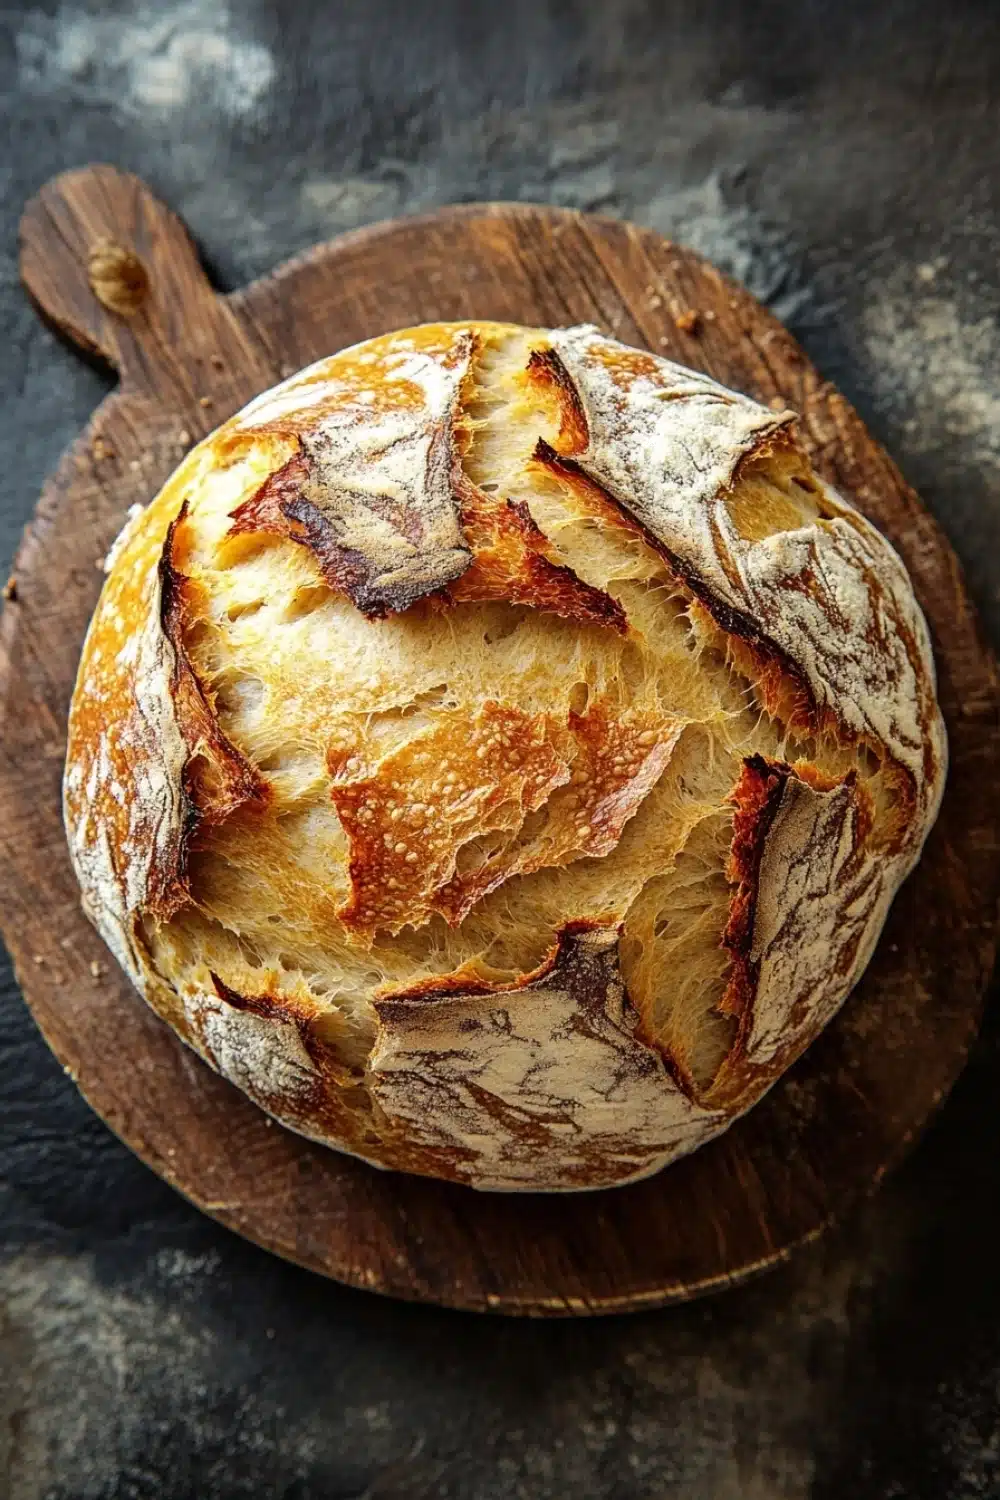
The magic happens in that heavy Dutch oven, which traps steam to create a crackly crust that would make any bakery jealous. I remember the first time I pulled this golden beauty from the oven; the crust cracked with a satisfying snap—music to my carb-loving ears.
Minimal effort, maximum reward—this loaf is a game-changer for busy bakers who want that fresh-from-the-oven vibe without the elbow grease. It’s rustic, cozy, and perfect for any meal, especially when you need bread—fast, foolproof, and fantastic.
If you’re interested in easy bread recipes, check out our guide on How to Make Classic Focaccia Bread: Soft, Crispy, and Herby for a delicious twist beyond no knead bread in a Dutch oven.
Why This No-Knead Dutch Oven Bread Works Wonders in Real Life
- Hands-off magic: Toss ingredients, wait, and boom—bread happens. No elbow grease needed.
- Perfect for busy bees—prep takes 15 minutes, leaving time to Netflix-binge or walk the dog without kitchen guilt.
- That crust? Crunchy enough to snap the silence at your dinner table, while the inside stays pillowy soft—no dry crumbs here.
- The Dutch oven traps steam, creating bakery-level crust without fancy gadgets or secret tricks.
- Leftovers? Freeze slices easily, then toast straight from the freezer. Bread ready whenever hunger strikes.
No-Knead Dutch Oven Bread

A simple and rustic no-knead bread baked in a Dutch oven. This recipe requires minimal effort and yields a crusty, flavorful loaf with a soft interior in just about 2 hours.
- Prep Time: 15 minutes
- Cook Time: 45 minutes
- Total Time: 2 hours
- Yield: 8 slices
Ingredients
3 cups (360 grams) all-purpose flour
1/4 teaspoon instant yeast
1 1/4 teaspoons salt
1 1/2 cups (360 ml) warm water
Instructions
In a large mixing bowl, combine the flour, instant yeast, and salt. Stir to blend evenly.
Add the warm water to the dry ingredients and mix with a wooden spoon or spatula until a shaggy, sticky dough forms.
Cover the bowl tightly with plastic wrap or a clean kitchen towel and let the dough rest at room temperature for 1 hour 30 minutes to 2 hours, until the surface is dotted with bubbles and the dough has doubled in size.
About 30 minutes before baking, place a 5 to 6-quart Dutch oven with its lid in the oven and preheat to 450°F (230°C).
When the dough is ready and the oven is preheated, carefully remove the hot Dutch oven from the oven.
Lightly flour a clean work surface and gently turn the dough out onto it. Shape the dough into a rough ball by folding the edges toward the center.
Place the dough seam side down on a piece of parchment paper.
Using oven mitts, lift the dough with the parchment paper and place it into the hot Dutch oven. Cover with the lid.
Bake covered for 30 minutes.
After 30 minutes, remove the lid and bake for an additional 15 minutes to develop a deep golden crust.
Remove the bread from the Dutch oven and transfer it to a wire rack. Let it cool completely before slicing, about 1 hour.
Explore more:
Breakfast Recipes
Mastering No-Knead Dutch Oven Bread: Tricks, Tweaks, and Troubleshooting
The Art of Ingredient Swaps—Because Sometimes, You Gotta Break the Mold
Look, I get it. Not everyone keeps all-purpose flour and instant yeast on deck at all times. Life happens. But here’s the kicker—this bread’s magic partly lies in its simplicity. Swap the all-purpose for bread flour? Sure, you’ll get a chewier crumb, a bit more chew to the crust, and that bread will flex its gluten muscles a bit more. Whole wheat flour? Go ahead—your loaf will be denser and earthier, but hydration needs a tweak—up your water by 10-15% to avoid a brick masquerading as bread.
Instant yeast is the unsung hero here—if you only have active dry yeast, proof it in warm water first, otherwise, your dough’s gonna act shy and the rise will be sluggish. Salt? Don’t skimp; it’s not just for flavor—it tightens gluten strands, controls yeast, and keeps that loaf from tasting flat as a pancake. And water temperature? Finger-warm, not hot—too hot kills yeast faster than a cold shower ruins a lazy Sunday morning.
The Why Behind the No-Knead Magic—Patience, Bubbles, and That Dutch Oven Dance
Here’s the deal: no-knead doesn’t mean no effort; it means smart effort. The long rest? It’s where the yeast parties hard, breaking down starches into sugars, creating bubbles that puff the dough like a bellowed-up balloon. That shaggy, sticky mess? It’s your bread’s personality—don’t fuss over it.
Preheating the Dutch oven to 450°F is crucial. Why? It mimics a professional steam oven. When you slam that dough inside the scorching cast iron cocoon, moisture is trapped, steam builds, and the crust crisps up like nobody’s business. The lid off for the last 15 minutes? That’s your crust’s time to get golden, crackly, and boast-worthy.
I won’t lie—the timing feels like a sprint for the untrained baker. But if you nail it, that earthy aroma wafting from the oven will have you hooked. Remember: shaping isn’t about perfection but about tension. A tight ball means your bread will rise sky-high instead of sprawling like a couch potato.
When Bread Goes Rogue—Fixing Common No-Knead Mishaps
- Dough too sticky to handle? Don’t drown it in flour. Instead, oil your hands or work surface lightly. This keeps the crumb tender and avoids a dense loaf.
- No bubbles after resting? Yeast might be old or water too cold. Try proofing yeast next time or warming water just right—like baby bath warm.
- Crust too hard or burnt? Oven thermometer might be lying. Dutch ovens run hot—try lowering temperature to 425°F or reduce uncovered baking time.
- Bread dense or heavy? Could be under-risen. Give dough more time to bubble. Remember, patience ain’t just a virtue; it’s a bread must.
In my early baking days, I once dumped a dough ball into a Dutch oven without preheating. Result? A sad, pale loaf that could’ve doubled as a doorstop. Lesson? Respect the heat—it’s the secret sauce nobody talks about.
No-Knead Dutch Oven Bread FAQ
Yes, you can swap instant yeast for active dry yeast, but you’ll want to proof it first in warm water for about 5 minutes to wake it up before mixing with flour.
Nope, but it’s the secret weapon for that crackling crust. A heavy oven-safe pot with a lid traps steam, which is crucial for the crust’s texture. If you don’t have one, try using a roasting pan covered tightly with foil—just expect slightly different results.
This slow rest is a game changer. It lets the yeast work its magic gradually, developing flavor and a great crumb without any elbow grease. It’s basically the lazy cook’s way to artisan bread—no kneading marathon required.
Absolutely! I’ve tossed in rosemary, cracked pepper, or even sun-dried tomatoes. Just fold them into the dough right after mixing the wet and dry ingredients. But be careful—not to overload or it might mess with the dough’s rise.
Wrap your loaf in a clean kitchen towel or paper bag and keep it at room temp for up to two days. For longer life, slice and freeze it. Frozen slices go straight into the toaster for a quick pick-me-up. No freezer burn, just good eats.