
Zero kneading. Zero fuss.
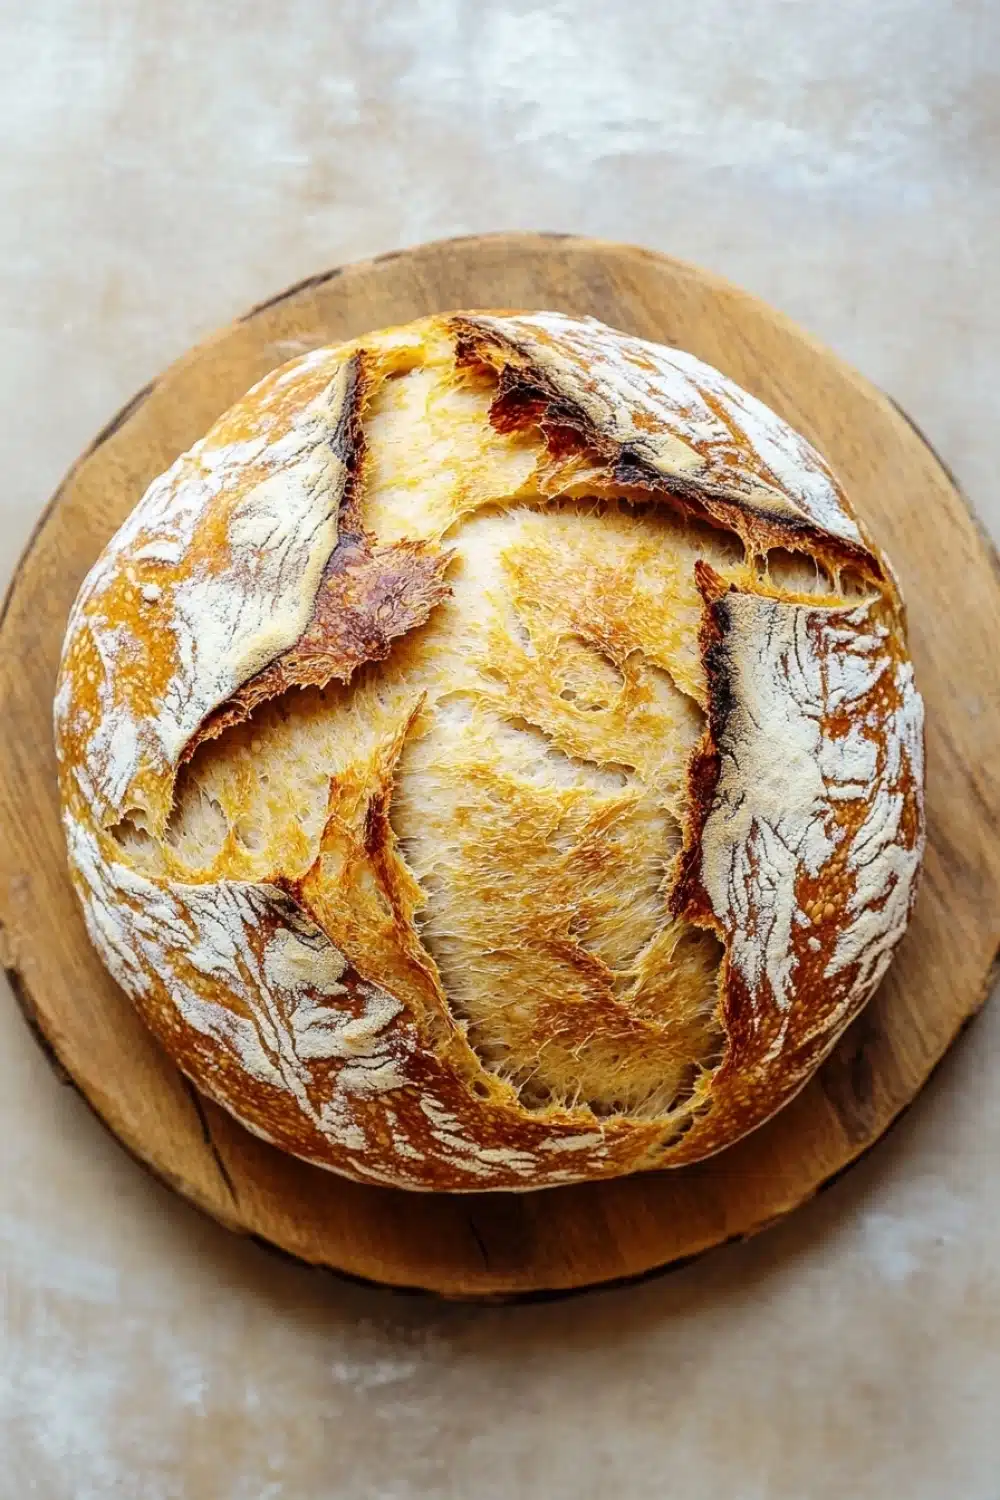
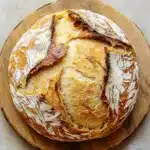
There’s something magical about bread that comes together with minimal elbow grease. This no knead bread recipe has been my go-to when I’m craving fresh, crusty loaves but don’t want to wrestle dough after a long day. The secret weapon? A trusty Dutch oven, throwing down high heat to crisp up that golden crust while keeping the crumb perfectly soft and airy.
About two hours. That’s all it takes from mixing to pulling a steaming loaf from the oven. I remember the first time I tried it—I was skeptical, thinking, “No knead? Seriously?” But that oven-steamed crust and pillowy inside quickly shut me up. It’s the kind of bread that makes you slap your grandma’s old recipe aside and say, “This is it.”
If you’ve ever wanted to bake bread but felt overwhelmed by the kneading and proofing drama, this recipe is your fast track. Grab your Dutch oven, some flour, and warm water. Let’s get this bread—literally—done right, in just two hours.
Discover how to make delicious no knead bread dutch oven 2 hour recipes that are perfect for any occasion.
Why You’ll Love This No Knead Dutch Oven Bread
- Hands-off magic: Toss ingredients, wait, and bam—you’ve got fresh bread without breaking a sweat.
- Crispy crust that snaps with every bite; perfect for dunking into soups or slathering with butter.
- Soft, pillowy inside that’s surprisingly airy—like a bakery loaf, but no fancy gear needed.
- Perfect for rookie bakers and lazy weekend warriors who hate fiddling with dough.
- Minimal ingredients, minimal effort, maximum street cred—your kitchen’s about to smell like a bakery on crack.
No Knead Bread in Dutch Oven
A simple and delicious no knead bread recipe baked in a Dutch oven. This bread has a crispy crust and a soft, airy interior, perfect for beginners and anyone wanting fresh homemade bread with minimal effort.
- Prep Time: 20 minutes
- Cook Time: 40 minutes
- Total Time: 2 hours
- Yield: 8 slices
Ingredients
3 cups (375 grams) all-purpose flour
1/4 teaspoon instant yeast
1 1/4 teaspoons salt
1 1/2 cups (360 ml) warm water (about 110°F / 43°C)
Instructions
In a large mixing bowl, combine the flour, instant yeast, and salt. Stir to evenly distribute the ingredients.
Add the warm water to the dry ingredients and mix with a wooden spoon or spatula until a shaggy, sticky dough forms. Ensure all the flour is hydrated.
Cover the bowl tightly with plastic wrap or a clean kitchen towel. Let the dough rest at room temperature for 1 1/2 hours, or until the surface is dotted with bubbles and the dough has roughly doubled in size.
After the dough has risen, generously flour a clean work surface. Using a spatula or your hands dusted with flour, gently scrape the dough out of the bowl onto the surface.
Fold the dough over on itself once or twice to shape it into a rough ball. Do not knead or overwork the dough.
Place a large piece of parchment paper on the work surface and transfer the dough ball onto it. Cover the dough loosely with a kitchen towel and let it rest for 30 minutes.
About 30 minutes before baking, place a 5- to 6-quart Dutch oven with its lid in the oven and preheat to 450°F (232°C).
Carefully remove the hot Dutch oven from the oven. Using the parchment paper, lift the dough and place it into the Dutch oven.
Cover with the lid and bake for 30 minutes.
After 30 minutes, remove the lid and bake for an additional 10 minutes to brown the crust.
Remove the bread from the Dutch oven and transfer it to a wire rack. Let it cool completely before slicing, about 1 hour.
Explore more:
Breakfast Recipes
Mastering No-Knead Dutch Oven Bread: Tips, Tricks & Fixes
The Art of the Lazy Dough: Why No Kneading Works
Here’s the kicker—no-knead bread isn’t about skipping effort; it’s about playing the long game with time instead of muscle. The secret sauce is patience. When you mix those few ingredients—flour, water, a pinch of yeast, and salt—and then let the dough rest for a good 1.5 hours or more, magic happens. The yeast gets busy, bubbling away and creating pockets of air that give the crumb that coveted softness. Meanwhile, gluten strands develop naturally without any pounding or folding. Think of it like slow-cooked BBQ—low and slow wins every time.
I remember my first attempt: skeptical, I barely stirred the shaggy mess before tossing it into the bowl covered with a tea towel. Two hours later, it looked like a dough beast. The takeaway? Don’t overthink it. The dough’s texture—sticky, slightly loose, and full of bubbles—is your signal that it’s alive and ready for the Dutch oven jump.
Ingredient Switch-Ups That Don’t Kill the Vibe
All-purpose flour is the classic here, but what if you want to experiment without blowing the whole loaf? Swap in bread flour for a chewier texture—higher protein equals stronger gluten chains that hold air better. Whole wheat? Go easy—replace only 25-30% or risk a dense brick masquerading as bread.
Instant yeast is your underground ally—no need to proof, just mix and go. But if you only have active dry yeast, proof it in your warm water first to avoid a flop. And water temperature? Not a guesswork game. Around 110°F (43°C) is the Goldilocks zone—too hot and you kill the yeast, too cold and it’s a slow crawl.
When Your Bread Flops: Quick Fixes for Common Pitfalls
Did your bread turn out dense? Here’s the lowdown: either the dough didn’t ferment long enough, or the yeast was dead on arrival. Double-check your yeast freshness—expired yeast is a party pooper. Also, keep an eye on the dough’s rise. If it hasn’t doubled and bubbled, give it more time—sometimes room temps vary.
Too sticky to handle? Don’t add a ton of flour at once. Dust your hands and surface lightly, and try folding gently. Over-flouring kills that airy crumb. And if your crust isn’t getting crispy, don’t forget that hot Dutch oven preheat—it’s the brick oven magic that crisps the crust fast.
Finally, patience after baking is key. Cool your loaf on a wire rack for at least an hour. Slicing too soon is a rookie mistake that leaves you with a gummy mess instead of those perfect tear-away slices.
No Knead Bread in Dutch Oven: Your FAQ
- Do I really not knead the dough?
- Yep, no kneading here. The magic happens during the long rest as gluten develops on its own—easy street for your hands!
- Can I use bread flour instead of all-purpose?
- Absolutely. Bread flour has more protein, giving a chewier crumb. The rise might be a bit different, but the result? Still banging bread.
- How hot should the water be?
- Warm—think about 110°F (43°C). Too hot and you risk killing the yeast; too cold and the yeast won’t wake up. Tepid water is your dough’s wake-up call.
- Can I bake this without a Dutch oven?
- Yes, but results vary. The Dutch oven traps steam, making that crackling crust. Without it, try using a baking stone and adding a pan of water for steam.
- How long can I keep this bread fresh?
- Store it in a paper bag or bread box for up to 3 days. For longer life, slice and freeze for up to 3 months, then toast or thaw when needed.