
Tuna melts—simple, satisfying, and downright addictive.
There’s a certain magic that happens when creamy tuna salad meets molten cheddar, all embraced by golden, toasted bread. I remember one rainy afternoon when I whipped up this sandwich as a quick fix; the kitchen filled with the smell of butter sizzling and cheese melting, instantly lifting my spirits. It’s comfort food that doesn’t mess around.
What’s great about tuna melts is the balance: a little crunch from the celery and onion, a zing from fresh lemon juice, and that ooey-gooey cheese pull. You don’t need fancy ingredients—just a few pantry staples and a skillet. It’s a lunch game-changer, especially when you want something hearty but fuss-free.
Ready to get your hands a little messy? This is where lunch gets interesting.
For those who love tuna melt sandwiches, check out The Ultimate Tuna Melt with Relish: A Tangy Twist on a Classic for a delicious new take.
Why Tuna Melt Sandwiches Rock Your Lunch Game
- Ready in 20 minutes—because who has time to wait around?
- Creamy tuna mixed with zesty lemon juice adds a punch, not just bland protein.
- Melty cheddar on toasted bread? The classic combo hits all the right notes for comfort food cravings.
- Simple ingredients you’re likely to already have—no scavenger hunt needed.
- Bonus: You can tweak the mix-ins (onion, celery) to match your vibe, making each bite feel homemade and fresh.
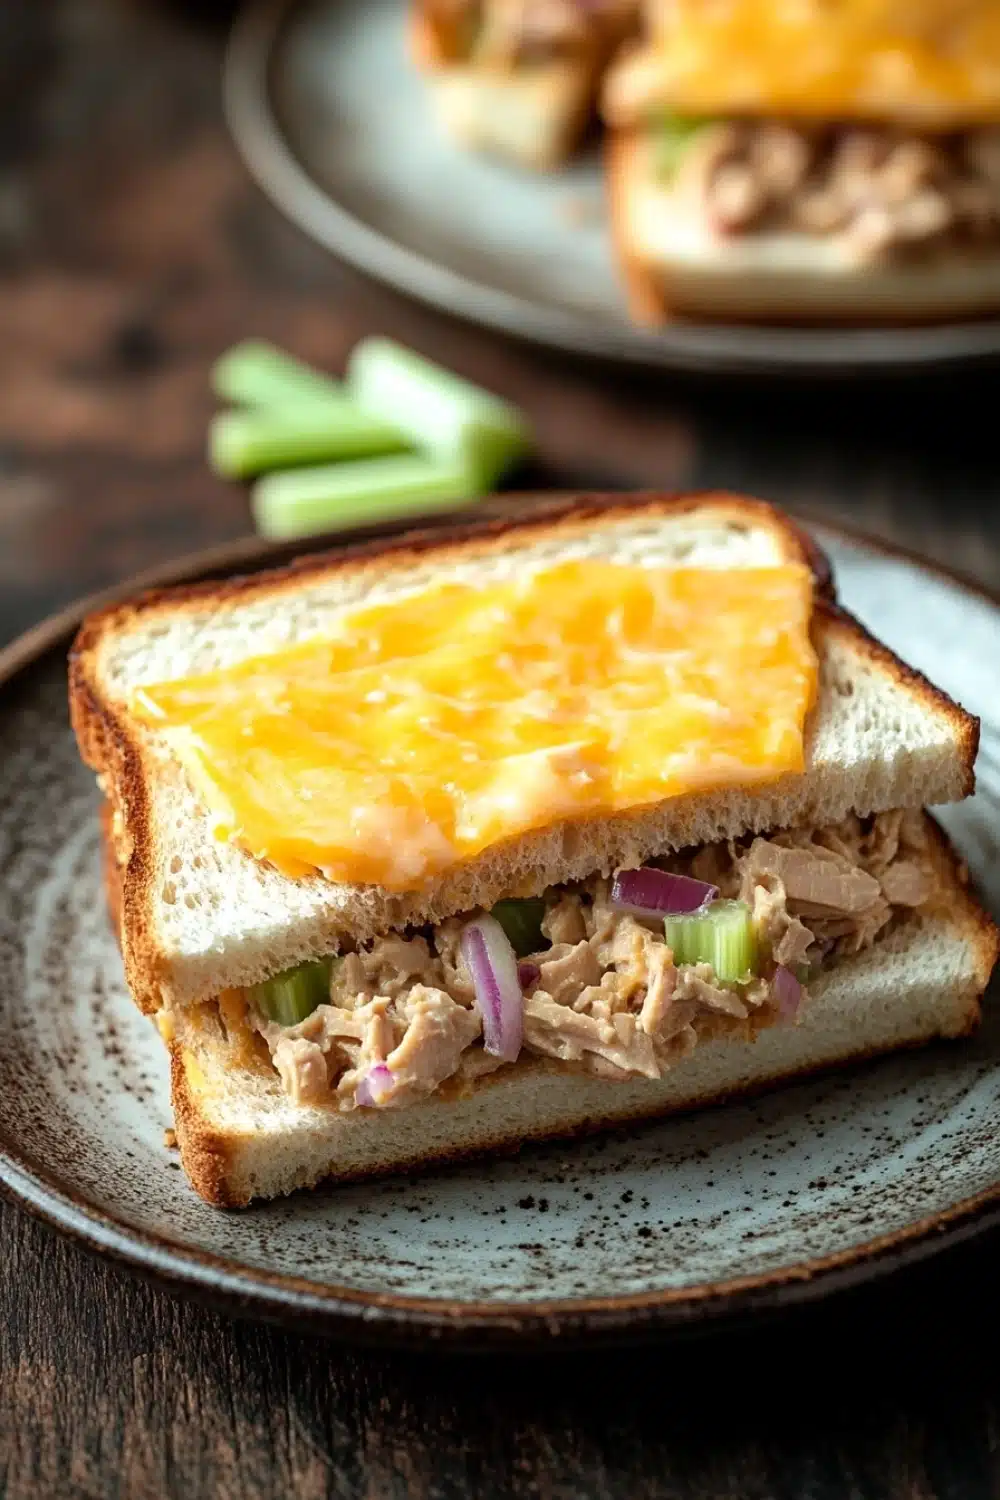
Tuna Melt Sandwiches

Classic Tuna Melt Sandwiches with creamy tuna salad, melted cheddar cheese, and toasted bread, perfect for a quick and satisfying lunch.
- Prep Time: 10 minutes
- Cook Time: 10 minutes
- Total Time: 20 minutes
- Yield: 2 sandwiches
Ingredients
1 (5 ounce) can tuna packed in water, drained
3 tablespoons mayonnaise
1 tablespoon finely chopped red onion
1 tablespoon finely chopped celery
1 teaspoon fresh lemon juice
1/4 teaspoon salt
1/8 teaspoon black pepper
4 slices white sandwich bread
4 slices cheddar cheese
1 tablespoon unsalted butter, softened
Instructions
In a medium bowl, combine the drained tuna, mayonnaise, chopped red onion, chopped celery, lemon juice, salt, and black pepper. Mix until well combined.
Spread the tuna mixture evenly onto two slices of bread.
Place two slices of cheddar cheese on top of the tuna mixture on each sandwich.
Top each sandwich with the remaining bread slices to form two sandwiches.
Heat a large skillet over medium heat.
Spread softened butter evenly on the outside of each sandwich (both top and bottom slices).
Place the sandwiches in the skillet and cook for 4 to 5 minutes on each side, or until the bread is golden brown and the cheese is melted.
Remove the sandwiches from the skillet and let them cool for 1 minute before slicing in half and serving.
Explore more:
Lunch Recipes
Mastering Your Tuna Melt: Tips, Tricks & Fixes
The Secret Sauce: Why Your Tuna Salad Needs a Little Zing
Look, the tuna salad is the real MVP here. Dull, soggy tuna salad kills the whole vibe—it’s like showing up to the party without your shoes on. That splash of fresh lemon juice? Absolute game changer. It cuts through the mayo’s richness, giving your tuna a bright snap that keeps it from being a bland blob. And don’t skip on the finely chopped celery and red onion. They add crunch and a subtle punch, the kind that keeps your taste buds guessing and coming back for more. I once made the mistake of using chunky tuna without draining well, and the sandwich turned into a soggy mess. Lesson learned: drainage and a balance of acid and crunch are your best friends here.
Flip It Like a Pro: Achieving That Perfect Golden Crust
Butter, butter, butter—this ain’t your average toast. Spread softened unsalted butter evenly on the outside of both bread slices. Why? It’s the difference between a sad, limp sandwich and one with a crust that sings. Medium heat is your sweet spot; too hot and you burn the bread before the cheese melts, too low and you end up with a limp, cold sandwich. Patience, grasshopper. Flip after 4-5 minutes—don’t poke around like a sandwich inspector. Let it do its thing. I remember once rushing this and flipping every 2 minutes—end result: uneven melt and no crust to brag about. The sandwich should sizzle softly, not scream in the pan.
When the Tuna Melt Goes South: Quick Fixes to Common Fails
Over-melted cheese? Chill out. Just slice your sandwich and give it a minute to breathe—melts often firm up slightly off the pan. Soggy bread? Next time, squeeze out extra water from the tuna and maybe toast the bread a bit before assembling. If your tuna salad feels flat, add a pinch more salt or a few drops of pickle juice if you’re feeling wild—acid and umami work magic here. And hey, no shame in a quick toast in the oven after pan-frying if your cheese isn’t stretchy enough—sometimes you gotta baby it to perfection.
Tuna Melt Sandwiches FAQ
Can I use canned salmon instead of tuna?
Absolutely! While the flavor shifts a bit, canned salmon works just fine. Just make sure to drain it well and maybe dial back the lemon juice if you prefer a milder tang.
Is mayonnaise necessary in the tuna salad?
Nope. You can swap mayo for Greek yogurt or mashed avocado if you’re watching calories or want a twist—same creamy vibe, different angle.
Can I make these sandwiches ahead of time?
Yes, but with a catch. Assemble them fresh for the crispiest, meltiest results. If you prep early, wrap tightly and refrigerate for no more than 4 hours before grilling to prevent sogginess.
What’s the best bread for a tuna melt?
White sandwich bread is the classic go-to here, providing that golden crunch. But if you’re feeling fancy, sourdough or rye add a nice tangy backbone that holds up well to melty cheese and punchy tuna.
Can I freeze leftover tuna salad?
No. Tuna salad doesn’t freeze well—it tends to get watery and lose its texture. Stick to refrigerating leftovers and eat within 2 days.