
Let’s get this bread.
The kitchen hums with anticipation as I gather my ingredients: warm water, sugar, Red Star Rise yeast—ready to spring into action. There’s a sort of magic that happens when yeast starts bubbling and foaming, like a little life awakening beneath the surface. It’s a primal moment, the heartbeat of baking that never gets old.
Mixing the dough is where the real alchemy begins. Flour dust swirls in the air, sticky hands knead rhythmically, coaxing elasticity and strength into the mass. I’ve been around the block enough to know—this is no place for shortcuts. A well-kneaded dough isn’t just texture; it’s foundation. It promises a crumb so soft it practically melts, a crust with just the right crunch.
Patience is key—letting that dough rise, watching it double, puff up like a living giant, is oddly meditative. When it finally hits the oven, golden and proud, it’s a full-on celebration. And that first slice? Oh, it’s a game-changer. This isn’t just bread. It’s Red Star Rise yeast bread, done right.
If you’re interested in perfecting your baking skills, don’t miss our guide on Mastering Red Star Rise Yeast Bread: Soft Loaf with Golden Crust for the best results.
Why This Red Star Rise Yeast Bread Works Wonders in Real Life
- Soft, fluffy texture that stays fresh for days—no sad, stale slices ruining your sandwich game.
- Simple ingredient list means no scavenger hunts in specialty stores; everything’s probably in your pantry already.
- Hands-on kneading doubles as stress relief (I swear, there’s something zen about working dough).
- Perfect timing—while the dough rises, you can knock out other kitchen chores or sneak in a coffee break.
- Versatile bread base: toast it, sandwich it, or serve alongside your favorite comfort meal without missing a beat.
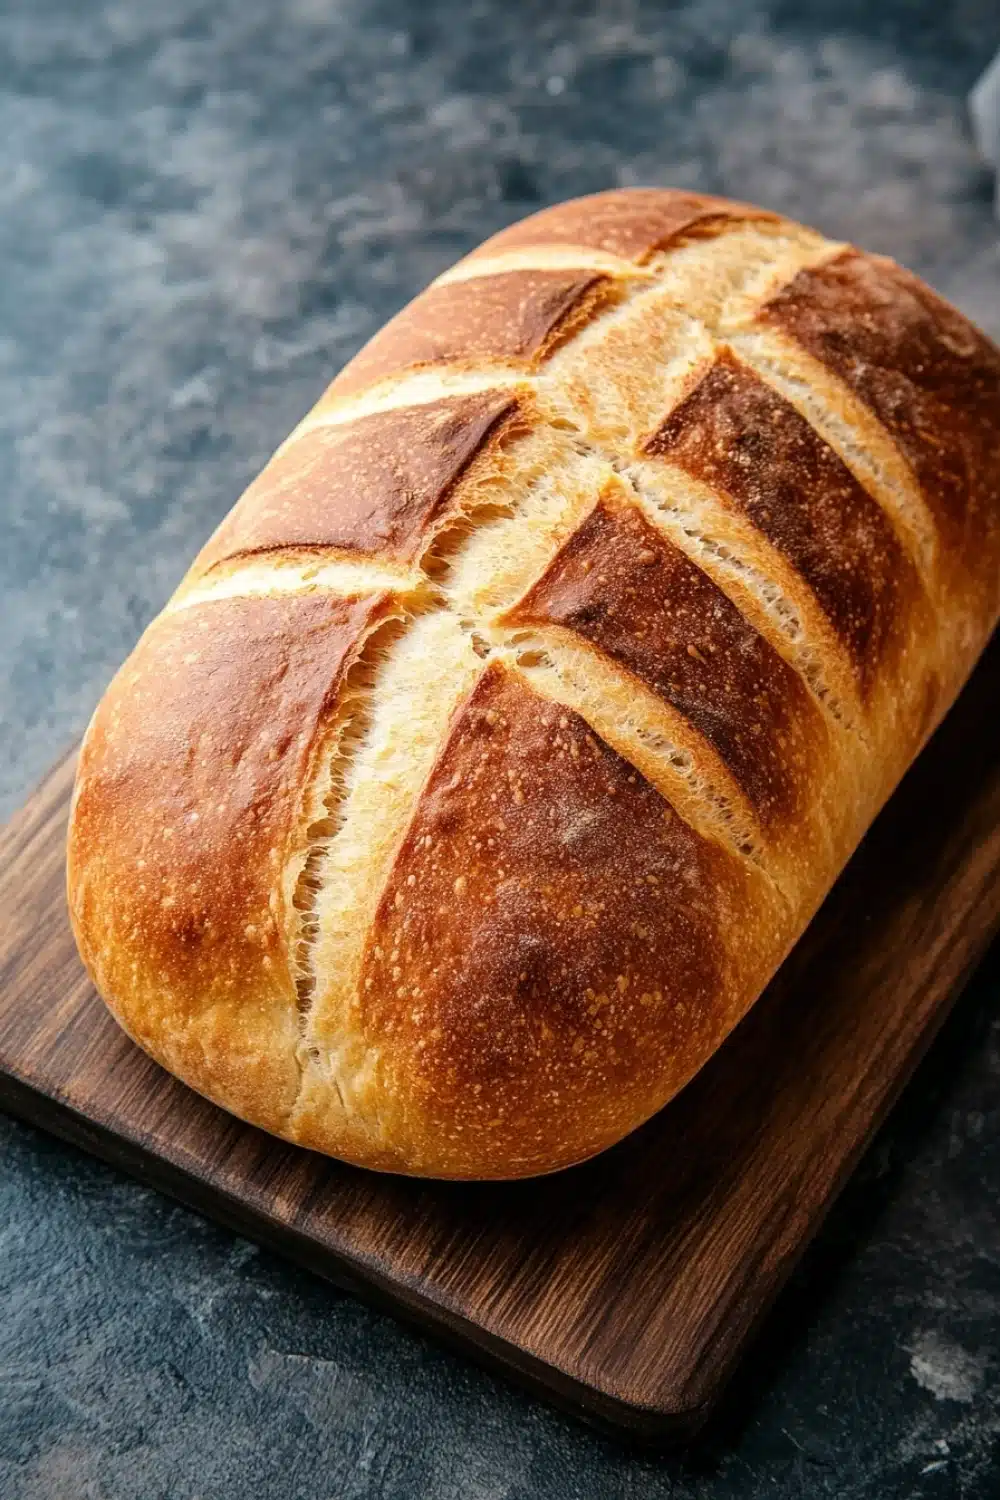
Red Star Rise Yeast Bread
A classic homemade yeast bread recipe using Red Star Rise yeast for a soft, fluffy texture and delicious flavor. Perfect for sandwiches, toast, or as a side for any meal.
- Prep Time: 15 minutes
- Cook Time: 30 minutes
- Total Time: 2 hours 15 minutes
- Yield: 12 slices
Ingredients
1 cup warm water (110°F to 115°F)
2 1/4 teaspoons Red Star Rise Active Dry Yeast (one 7g packet)
2 tablespoons granulated sugar
3 cups all-purpose flour
1 teaspoon salt
2 tablespoons unsalted butter, melted
Instructions
In a large mixing bowl, combine the warm water, Red Star Rise yeast, and sugar. Stir gently and let sit for 5-10 minutes until the mixture is foamy.
Add the salt and melted butter to the yeast mixture and stir to combine.
Gradually add the all-purpose flour, one cup at a time, stirring with a wooden spoon or dough hook attachment until a soft dough forms.
Turn the dough out onto a lightly floured surface and knead for about 8-10 minutes until the dough is smooth and elastic. Add a little flour if the dough is too sticky.
Place the dough in a lightly greased bowl, cover it with a clean kitchen towel or plastic wrap, and let it rise in a warm place for 1 to 1 1/2 hours or until doubled in size.
Punch down the risen dough to release air bubbles and shape it into a loaf.
Place the shaped dough into a greased 9×5-inch loaf pan and cover it again. Let it rise for another 30-45 minutes until it has risen about 1 inch above the pan.
Preheat the oven to 375°F (190°C).
Bake the bread for 25-30 minutes, or until the top is golden brown and the loaf sounds hollow when tapped.
Remove the bread from the oven and let it cool in the pan for 10 minutes.
Transfer the bread to a wire rack to cool completely before slicing.
Explore more:
Breakfast Recipes
Mastering Red Star Rise Yeast Bread: Tips and Tricks
The Magic of Red Star Rise: Why This Yeast Rocks
Not all yeasts play the same game. Red Star Rise is a bit of a showstopper in the bread world—fast-acting and forgiving. I’ve seen bakers, even newbies, get cracking with it and land a soft, pillowy crumb every time. The foamy head it forms in warm water is like a secret handshake telling you it’s alive and ready for action. If you skip this starter step? You’re basically sending your dough into battle without armor.
That warm water temperature—110 to 115°F—is everything. Too hot? You’re nuking your yeast into oblivion. Too cold? It’s a snail’s pace that kills momentum. Think of it as Goldilocks zone for yeasts: just right. It’s no accident the recipe calls for a sugar hit early on; the yeast munches that up and throws a little fermentation party that powers your rise.
Ingredient Swaps—What Works, What’s a No-Go
Let’s talk flour. The recipe’s all about all-purpose flour. But hey, sometimes the pantry gods aren’t on your side. You can nab bread flour instead—higher protein, more gluten structure, meaning a chewier bite and better rise. Want softer? Toss in a bit of cake flour, but don’t go overboard or you’ll end up with a crumb that’s more pillow than structure.
Butter is the fat that smooths everything out here, but if you’re dairy-free or just out, coconut oil is a decent stand-in (solid at room temp, so melt it first). Olive oil? Meh—it changes flavor and texture too much for this style; not worth the gamble.
And sugar? You want that little yeast fuel, but swap in honey or maple syrup if constrained. Just reduce the water slightly since these add moisture.
When Your Dough Acts Up: Fixing Common Failures
Dough too sticky? Chill out. Literally. Sprinkle flour in small increments while kneading, but beware the trap: adding too much flour will slam the brakes on the rise and make your loaf dense and sad.
First rise not happening? Yeast may be dead, water temperature off, or environment too chilly. I once had a batch that wouldn’t budge—ended up cranking the oven to the lowest setting, turning it off, and letting the dough bask inside with the door cracked. Instant baby bread spa.
Loaf sunken post-bake? Over-proofing alert. If your dough doubles too long, the gluten structure weakens and can’t hold air. Next time, keep a close eye—poke test is your friend. If the dough springs back slowly, it’s go time.
Red Star Rise Yeast Bread FAQ
How warm should the water be for activating the yeast?
The water should be between 110°F and 115°F—warm enough to wake the yeast up but never scorching hot or you’ll kill the little buggers instantly. I always double-check with a kitchen thermometer to avoid that rookie mistake.
Do I really need to knead the dough for 8-10 minutes?
Yes. That kneading time develops the gluten structure, giving you that perfect chewy crumb and elastic texture. Shortchanging this step is like telling your bread to take a nap before it’s ready—won’t rise right, and the texture suffers.
Can I substitute margarine for butter?
Technically, yes—but I won’t pretend it’s the same. Butter lends richness and flavor that margarine often lacks. If you’re in a pinch, margarine works, but don’t expect the same mouthfeel or taste.
Will the bread keep well if I freeze it?
Absolutely. Once cooled, wrap it tightly in plastic wrap and toss it in the freezer. It’ll keep up to 3 months. When you’re ready, just thaw it at room temperature. Pro tip: Toasting frozen slices straight from the freezer works wonders, too.
Is this recipe beginner-friendly?
Yes! It’s straightforward and forgiving. If you follow the steps closely, you’ll get a great loaf even if you’re just starting out. Don’t sweat the rising times too much—there’s some wiggle room depending on your kitchen environment.