
Nothing beats homemade vanilla cake.
I remember my first attempt—flour dust everywhere, the kitchen smelling like a candy shop gone rogue. There’s something wildly satisfying about whisking together simple pantry staples and watching them transform into a cloud of fluffy cake. It’s not just baking; it’s a full-on mood shift.
Start by creaming the butter and sugar until they’re light and airy—light as a feather, yet rich as a velvet curtain. The secret? Patience and the right rhythm (beat, beat, beat, then slow it down). Adding eggs one at a time isn’t just some old-school tip—it’s the backbone of texture that keeps your cake from turning into a dense brick.
Mix in the vanilla like it’s magic dust. This isn’t just about flavor; it’s about soul. The scent alone can turn any kitchen into a five-star bakery. Trust me, once that vanilla perfume hits your nose, you know you’re in the sweet spot.
If you’re craving something different, try our Moist Banana Almond Cake Recipe for a Nutty Afternoon Treat instead of your usual vanilla cake scratch.
Real-Life Wins of Baking This Classic Vanilla Cake
- Perfect for those last-minute birthday bashes when you need a crowd-pleaser pronto—no store runs required.
- Every slice is a moist, fluffy hug, making heck of a difference when you’re aiming to impress without the hassle.
- Hands-on baking that turns your kitchen into a cozy hangout spot—kids, friends, or partners get in on the fun and learn a thing or two.
- Freezer-friendly magic: bake now, chill later. It’s a sweet stash for unexpected guests or late-night cravings.
- Mastering this recipe teaches you the ropes—understanding the balance of ingredients, the timing, and the feel—that’s the real cake boss move.
Classic Vanilla Cake from Scratch
This classic vanilla cake from scratch is moist, fluffy, and full of rich vanilla flavor. Perfect for birthdays, celebrations, or any occasion that calls for a delicious homemade cake.
- Prep Time: 20 minutes
- Cook Time: 30 minutes
- Total Time: 50 minutes
- Yield: 12
Ingredients
2 1/2 cups (312g) all-purpose flour, sifted
2 1/2 teaspoons baking powder
1/2 teaspoon salt
1 cup (226g) unsalted butter, softened
1 3/4 cups (350g) granulated sugar
4 large eggs, at room temperature
1 tablespoon pure vanilla extract
1 cup (240ml) whole milk, at room temperature
Instructions
Preheat your oven to 350°F (175°C). Grease and flour two 9-inch round cake pans, then line the bottoms with parchment paper rounds.
In a medium bowl, whisk together the sifted all-purpose flour, baking powder, and salt. Set aside.
In a large mixing bowl, beat the softened unsalted butter with an electric mixer on medium speed until creamy, about 1 minute.
Gradually add the granulated sugar to the butter, beating on medium-high speed until light and fluffy, about 3 to 4 minutes.
Add the eggs one at a time, beating well after each addition to fully incorporate.
Mix in the pure vanilla extract until combined.
With the mixer on low speed, alternately add the dry flour mixture and whole milk to the butter mixture, beginning and ending with the flour mixture. Mix just until combined after each addition to avoid overmixing.
Divide the batter evenly between the prepared cake pans and smooth the tops with a spatula.
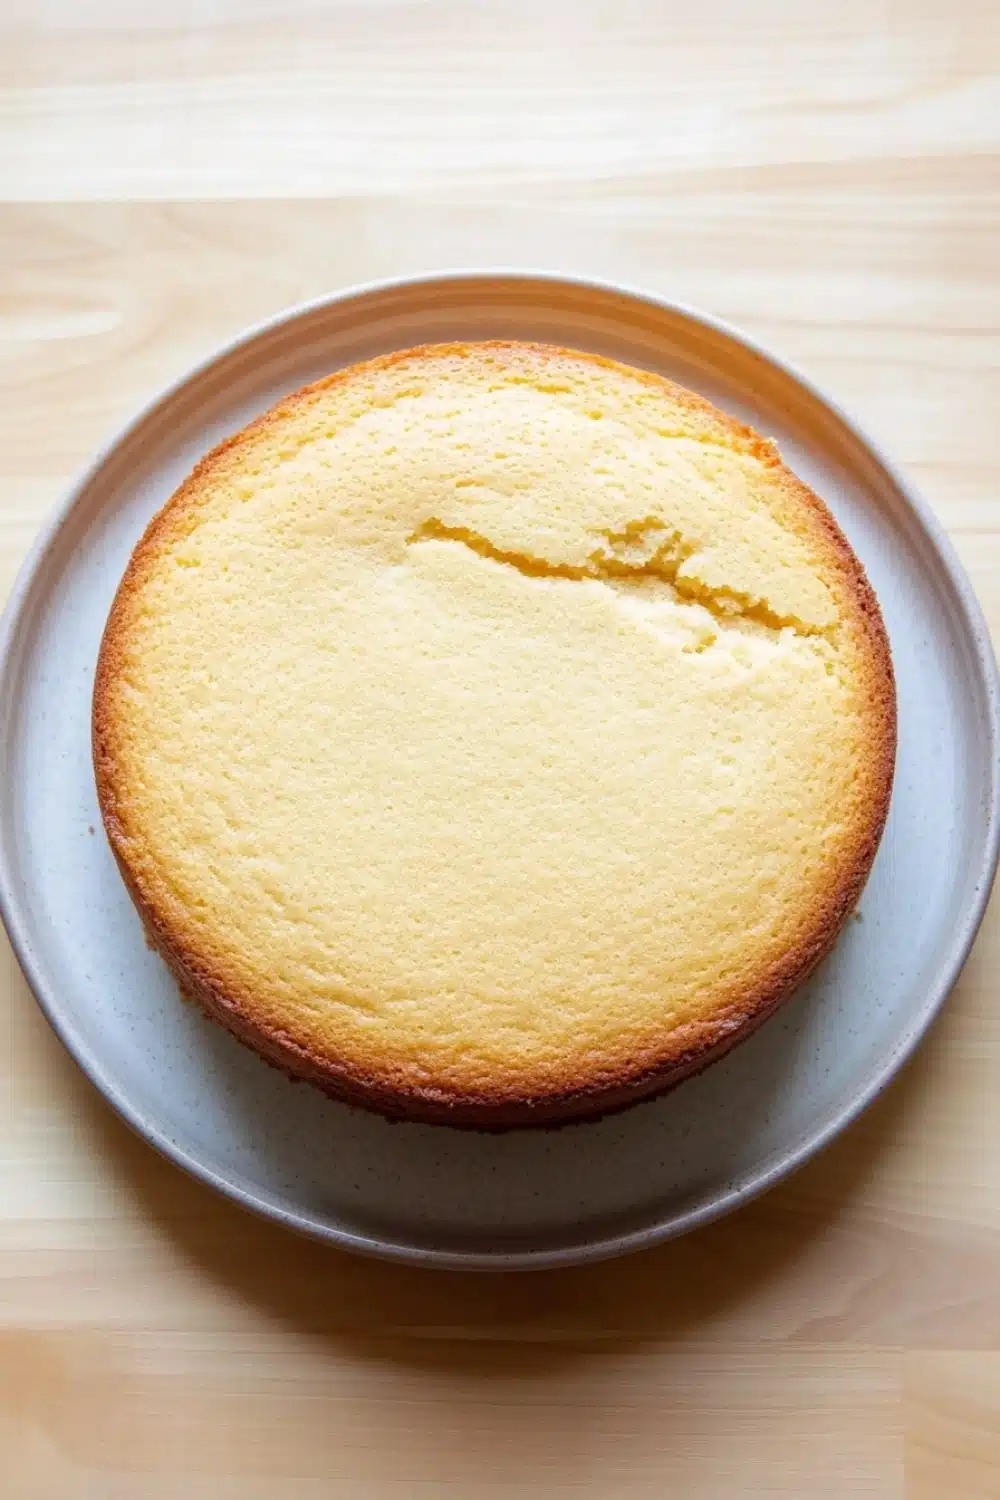
Bake in the preheated oven for 28 to 32 minutes, or until a toothpick inserted into the center of the cakes comes out clean.
Remove the cakes from the oven and allow them to cool in the pans for 10 minutes.
Run a knife around the edges of the pans to loosen the cakes, then invert them onto wire racks to cool completely before frosting.
Explore more:
Breakfast Recipes
Classic Vanilla Cake from Scratch: Insider Tips & Fixes
The Butter and Sugar Tango — Why Creaming Matters
Ever wondered why your vanilla cake sometimes feels dense or flat? The secret often lies in the butter and sugar step. When you beat butter and sugar together, you’re not just mixing ingredients; you’re inviting air into the party—tiny bubbles that puff up your cake like a champ. But here’s the kicker: if your butter’s too cold, it won’t trap those bubbles well. Too soft? You’re just melting butter, and that’s a no-go zone for structure. The sweet spot is soft but still holding shape — think about room temperature butter that yields when poked but isn’t greasy or melty. I learned this the hard way during my early baking days—once skipped the creaming and ended up with a cake that was as flat as a pancake. Lesson learned: take time with this step. Beat medium speed for 3 to 4 minutes until it’s light and fluffy. You’ll see the color lighten—that’s the visual cue you’ve got it right.
Flour Power: Swapping and Mixing Without the Mess
Flour’s the backbone, no doubt. But what if you’re out of all-purpose or want a twist? Here’s the lowdown on swaps: cake flour is your best homie if you want a softer crumb—just use 2 cups plus 2 tablespoons to replace 2 1/2 cups all-purpose. It’s got less protein, which means less gluten formation and a tender bite. If you go whole wheat, remember it’s thirstier—add a splash more milk or reduce flour by a tablespoon or two to keep batter loose. Speaking of batter, overmixing is the silent killer. As soon as you add wet to dry, mix just until the streaks vanish—overmixing = gluten overdrive = rubbery cake. Pro tip: alternate additions (dry then wet, repeat) to avoid batter bombing. This back-and-forth action keeps everything harmonious and airy.
Rescue Mission: When Your Cake Goes Sideways
Sometimes, despite best efforts, your cake may not play nice. Top cracks? Happens when oven temp’s too high or batter’s too dry. Next time, lower the heat by 10-15°F and add a teaspoon of extra milk. Sinking center? Could be underbaked or overbeaten batter. Give it a few more minutes—tent with foil to prevent browning—but don’t overmix your batter next round. Dry, crumbly slices? You might’ve overcooked it or stored it uncovered. Always cool cakes completely on wire racks and airtight wrap ’em up. Lastly, if your cake sticks to the pan like a clingy ex, check your prep game—grease, flour, parchment paper combo is the holy trinity. That little knife run-around the edges after baking? Non-negotiable. These fixes saved my bacon more than once—baking’s part science, part street smarts.
Classic Vanilla Cake FAQ
Can I use salted butter instead?
Yes, you can—but skip adding extra salt in the recipe to keep flavors balanced. Salted butter can throw off the salt levels.
How do I know when the cake is done?
Use a toothpick test. Insert a toothpick in the center—if it comes out clean or with a few moist crumbs, you’re golden. No gooey batter allowed here.
Can I make this cake vegan?
Not without some tweaks. You’d need to swap the butter for plant-based margarine, use a flaxseed or chia egg substitute, and pick a non-dairy milk. The texture might shift a bit, but it’s doable.
What’s the best way to store leftover cake?
After frosting, cover the cake tightly at room temp for up to three days. For longer shelf life, wrap it well in plastic and freeze. Thaw overnight in the fridge before digging in. This keeps it from turning into a dry brick.
Can I double this recipe?
Absolutely! Just double every ingredient and use larger pans or bake in batches. Keep an eye on the baking time—it might take a bit longer if your pans are deeper.