
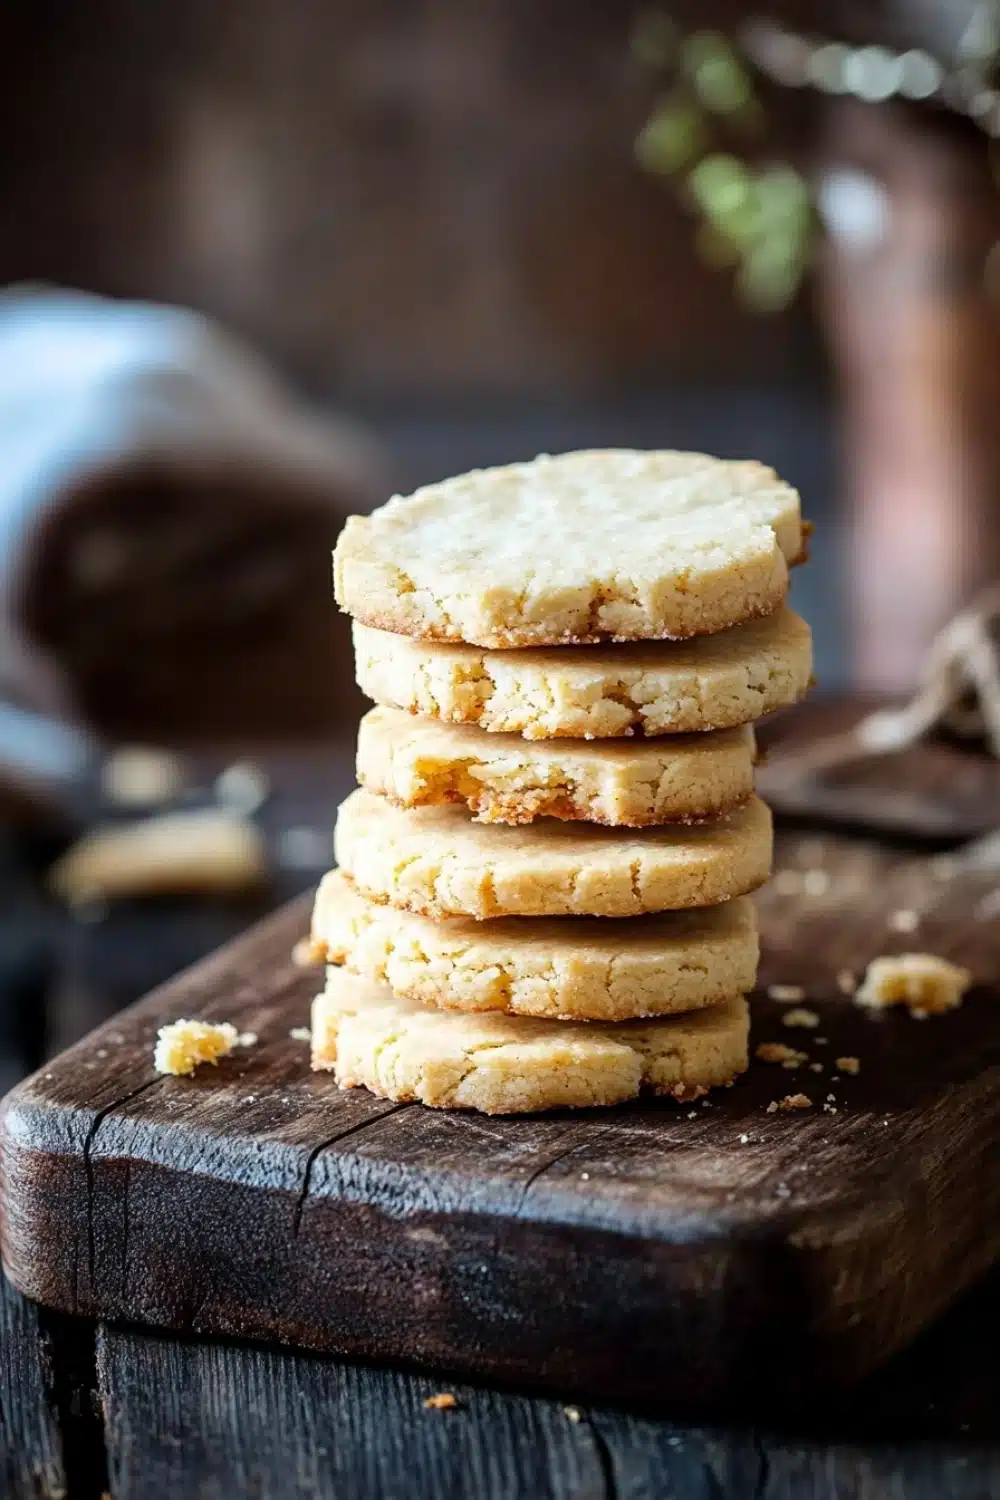
Butter, sugar, and flour—simple as that.
When I first set out to illustrate shortbread cookies, it wasn’t just about replicating their classic crumbly look. It was about capturing that nostalgic snap and melt-in-your-mouth softness that only a true shortbread can deliver. The kitchen was buzzing with warmth, the scent of baked butter swirling around me like a comforting hug. Each cookie shape seemed to tell its own story—round discs, delicate fingers, and charming hearts, all waiting for their moment in the oven.
Sketching these beauties? It’s an exercise in patience and appreciation. The subtle golden edges, the tiny fork pricks—they’re the unsung heroes of shortbread visuals. One wrong stroke, and you lose that tender crumb texture that’s signature to this buttery treat. I remember thinking, “This isn’t just a cookie; it’s a buttery memoir.”
Shortbread cookie illustration isn’t for the faint-hearted, but damn, it’s worth every line drawn.
If you’re craving a delightful treat, check out our guide on How to Make Irresistible Ube Shortbread Cookies in 35 Minutes for a perfect shortbread cookie illustration in your baking adventures.
Real Life Wins with Classic Shortbread Cookies
- Whip up a batch when you need a quick, no-fuss snack that actually feels a little special.
- Perfect for dunking—whether it’s your morning coffee or that late-night cup of cocoa.
- Easy to stash away: freeze extras and pull them out whenever you want a buttery treat without baking anew.
- Great for gifting—no fancy ingredients, just solid, honest cookies that show you care.
- Kids love helping roll and cut shapes—messy, sure, but a solid way to make memories (and eat some dough on the sly).
Classic Shortbread Cookies
These classic shortbread cookies are buttery, tender, and melt-in-your-mouth delicious. Perfectly simple and elegant, they make a delightful treat for any occasion.
- Prep Time: 15 minutes
- Cook Time: 20 minutes
- Total Time: 35 minutes
- Yield: 24 cookies
Ingredients
1 cup unsalted butter, softened
1/2 cup granulated sugar
2 cups all-purpose flour
1/4 teaspoon salt
1 teaspoon vanilla extract
Instructions
Preheat the oven to 325°F (163°C). Line a baking sheet with parchment paper.
In a large bowl, cream the softened butter and granulated sugar together until light and fluffy using an electric mixer.
Add the vanilla extract and mix until combined.
In a separate bowl, whisk together the all-purpose flour and salt.
Gradually add the flour mixture to the butter mixture, mixing on low speed until the dough comes together and is smooth.
Turn the dough out onto a lightly floured surface and gently knead it once or twice to bring it together.
Roll the dough out to about 1/2 inch thickness.
Use a cookie cutter or knife to cut the dough into desired shapes and transfer them to the prepared baking sheet, spacing them about 1 inch apart.
Prick each cookie a few times with a fork to prevent puffing.
Bake in the preheated oven for 18-20 minutes, or until the edges are lightly golden.
Remove from the oven and allow the cookies to cool on the baking sheet for 5 minutes before transferring them to a wire rack to cool completely.
Explore more:
Breakfast Recipes
Mastering Classic Shortbread Cookies: Ingredient Tweaks, Technique Insights, and Fixes
The Butter Swap That Changes Everything
Butter is king in shortbread—no two ways about it. But what if you hit a snag and only have salted butter? Here’s the lowdown: subbing salted butter is totally doable but dial back or skip that 1/4 teaspoon of added salt. I learned this the hard way once when my batch tasted like the sea had invaded my cookie tin. Also, if you want to play mad scientist, try brown butter instead of plain butter. The nutty aroma adds a whole new dimension without messing with the tender crumb you expect. And hey, don’t sleep on European-style butter with higher fat content—it’s like a backstage pass to buttery bliss.
Why Pricking Is Your Secret Weapon
Pricking the dough isn’t just a random step—it’s the unsung hero preventing ballooning, giving you that perfect flat shortbread. Imagine tiny steam vents releasing pressure as the cookies bake. Skip this, and you’re rolling the dice on misshapen, puffed-up cookies. It’s the difference between a crisp edge and a sad, doughy lump. I used to skip this step because it felt fussy, but once I didn’t, my kitchen game changed. Fork or skewer, just make sure those tiny holes are there. Pro tip: poke them just before baking—too early and the dough could dry out.
Fixing the Flop: When Your Shortbread Spreads Too Much
Too much spreading? Here’s your checklist:
- Butter too soft? Use it just softened, not melted. The dough should hold its shape.
- Flour measurement off? Spoon and level the flour instead of scooping—scooping packs that flour, throwing off your ratios.
- Oven temp too low? Low heat means slow setting and a cookie that melts before it bakes.
One time, I rushed and tossed in butter straight from the microwave, expecting magic. Instead, I got cookie pancakes. Lesson learned—patience with butter temperature is clutch. If you catch it early, pop the dough in the fridge for 20 minutes before cutting. It chills the fat, firms the dough, and keeps things tidy during baking.
Classic Shortbread Cookies FAQ
Got a minute? Here are quick answers to your burning questions:
A: Yes, but skip adding extra salt in the recipe. Salted butter can throw off the delicate balance in these buttery bites—best to keep it pure.
A: This cookie dough is a bit fragile by nature, but the trick is not overworking it. When mixing, use a gentle hand, and keep the dough cool. Over-kneading or warm hands can cause extra crumbliness.
A: Absolutely! Adding a teaspoon of lemon zest or a pinch of dried lavender is a game-changer. Toss those right in with the vanilla extract to infuse your cookies with a zesty or floral kick—just don’t go overboard or you’ll mask the buttery goodness.
A: Store cooled shortbreads in an airtight container at room temp for up to a week. To stash them longer, freeze in an airtight container for up to three months. Thaw at room temp, and you’re good to go. Simple as that.
A: Nope, not without some fiddling. The texture depends heavily on all-purpose flour. You’d need a specialized gluten-free blend with xanthan gum to mimic the crumb—otherwise, they fall apart or taste off.