
Time to get rolling.
There’s something about chicken breast roll ups that makes midweek dinners feel less like a chore and more like a mini celebration. The kitchen fills with the earthy aroma of garlic mingling with melted cheeses—a smell that promises comfort and a little indulgence. I remember the first time I nailed the perfect roll: golden crust on the outside, creamy spinach and cheese hiding inside like a tasty surprise.
Flattening the chicken is a bit of a workout, but worth every pound of pressure. It’s all about that thin, even canvas where the filling gets to shine without overwhelming. Then comes the sizzle—the quick sear that locks in juices and builds that crave-worthy crust before the oven finishes the job.
These roll ups aren’t just dinner; they’re a way to turn simple ingredients into a crowd-pleaser. Plus, they make great leftovers—just reheat gently and you’re back in business. Let’s dive in and roll up some magic.
If you’re looking to switch it up from classic chicken breast roll ups, try these Garlic Butter Cheeseburger Rollups: Flavor & Cheese Delight! for a tasty twist.
Why Chicken Breast Roll Ups Work Wonders at Dinner
- Cutting prep time to just 15 minutes means you can whip up a tasty meal even after a long day—no more frantic last-minute cooking.
- The spinach and cheese combo sneaks in some greens and calcium, making this more than just a comfort food hit.
- Searing the rolls before baking locks in juices, so every bite stays moist—say goodbye to dry chicken blues.
- Perfectly portioned for four, which means less food waste and more happy diners at the table.
- Leftovers keep well in the fridge for a quick reheat, making lunch or next-day dinner a total breeze.
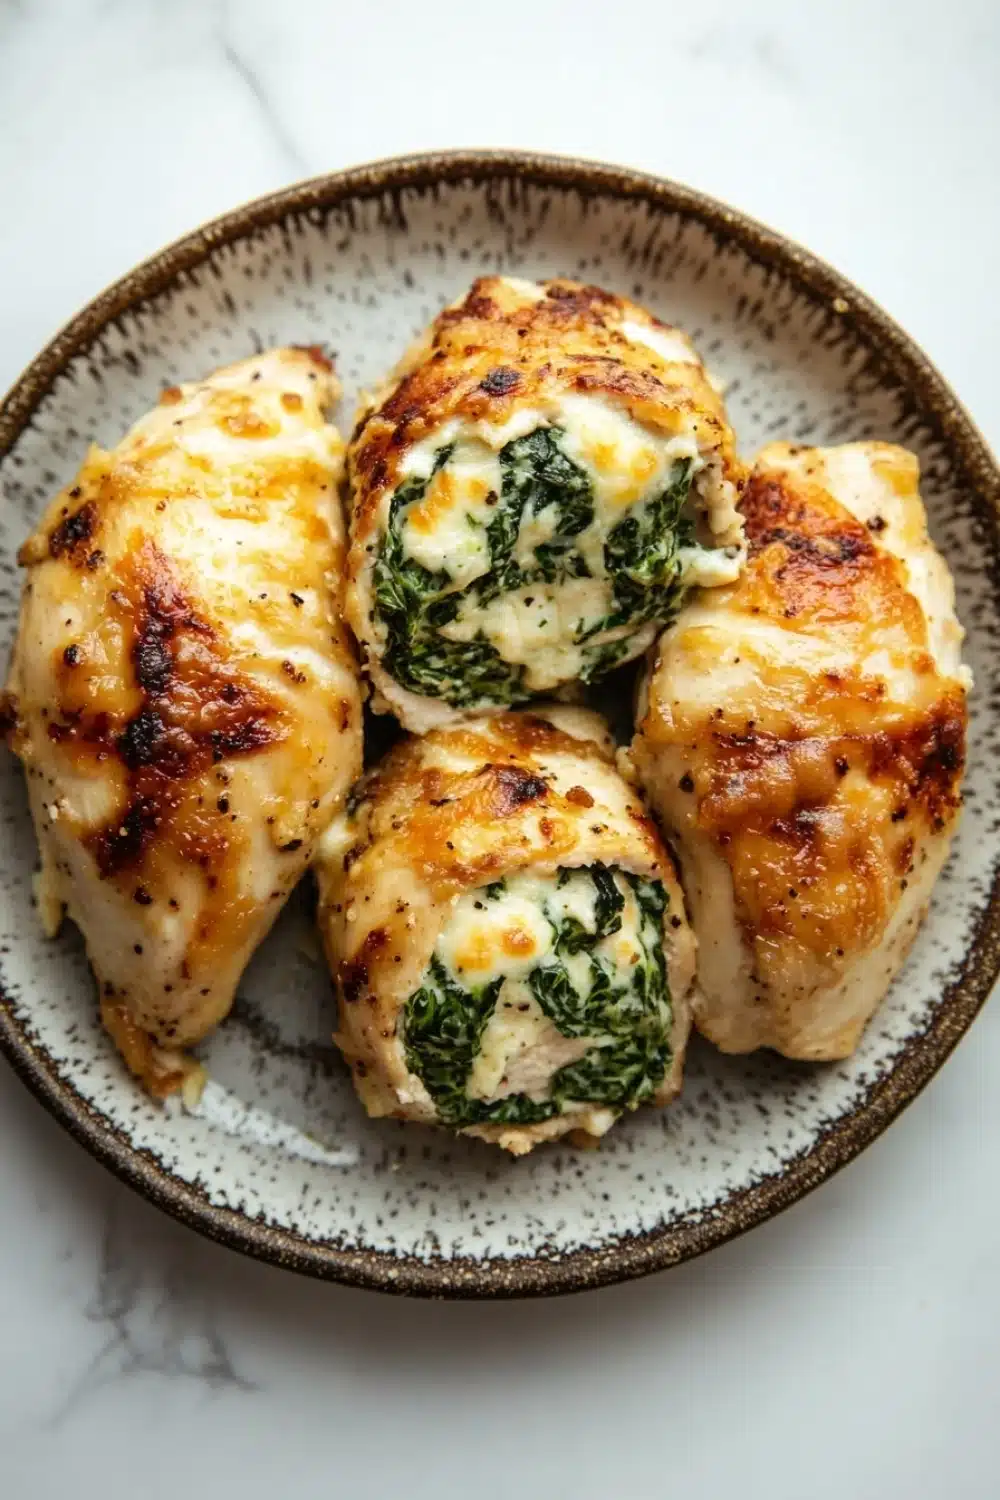
Chicken Breast Roll Ups

Delicious and easy chicken breast roll ups stuffed with spinach, cream cheese, and mozzarella, perfect for a flavorful and impressive dinner.
- Prep Time: 15 minutes
- Cook Time: 25 minutes
- Total Time: 40 minutes
- Yield: 4
Ingredients
4 boneless skinless chicken breasts
1 cup fresh spinach leaves, chopped
4 ounces cream cheese, softened
1/2 cup shredded mozzarella cheese
1/4 cup grated Parmesan cheese
2 cloves garlic, minced
1 teaspoon dried Italian seasoning
1/2 teaspoon salt
1/4 teaspoon black pepper
2 tablespoons olive oil
Toothpicks, for securing roll ups
Instructions
Preheat the oven to 375°F (190°C).
Place each chicken breast between two sheets of plastic wrap and gently pound with a meat mallet or rolling pin until about 1/4 inch thick.
In a medium bowl, combine the chopped spinach, cream cheese, shredded mozzarella, grated Parmesan, minced garlic, dried Italian seasoning, salt, and black pepper. Mix well until fully combined.
Spread an even layer of the cheese and spinach mixture over each flattened chicken breast.
Carefully roll up each chicken breast tightly, starting from one end, and secure with toothpicks to hold the shape.
Heat the olive oil in an oven-safe skillet over medium-high heat.
Add the chicken roll ups and sear on all sides until golden brown, about 2-3 minutes per side.
Transfer the skillet to the preheated oven and bake for 15-20 minutes, or until the chicken is cooked through and reaches an internal temperature of 165°F (74°C).
Remove the toothpicks before serving. Let the roll ups rest for 5 minutes, then slice and serve warm.
Explore more:
Dinner Recipes
Mastering Chicken Breast Roll Ups: Pro Tips and Fixes
The Art of Chicken Flattening—Not Too Thin, Not Too Thick
Ever smashed a chicken breast only to have it fall apart like wet cardboard? Yeah, I’ve been there. The secret isn’t just brute force with the mallet—it’s about even pressure and patience. Lay the breast between plastic wrap or in a zip-top bag (no solo pounding on the counter). Gentle taps, working from the center outwards, create a uniform 1/4-inch thickness. This ensures the roll ups cook evenly and hold their shape without turning into chicken confetti. Too thin? You risk drying out; too thick? The stuffing won’t meld properly, and you’ll get cold pockets of cream cheese. Think Goldilocks, but with poultry.
Swapping Ingredients: Spinach Blues or Dairy Dilemmas?
Can’t stand spinach or lactose gives you grief? No sweat. The filling is a playground. Want to nix spinach? Use kale or arugula—both punchy greens with enough bite to keep things interesting. Cream cheese? Sub in ricotta for a lighter, slightly grainy texture that surprisingly holds up well. Mozzarella’s melty magic can be swapped with provolone or gouda—each brings its own vibe. Parmesan? Freshly grated Pecorino Romano adds a sharper tang. The key is balancing moisture and flavor so the roll ups don’t turn soggy or bland. Pro-tip: If using wetter greens like kale, sauté them first to ditch excess water. Nobody likes a soggy bun in this game.
When Your Roll Ups Go Rogue: The Common Fails and Fixes
Let’s talk about those curveballs in the kitchen. First, seal failure—stuffing oozing out during cooking. The fix? Don’t overstuff. A thin, even layer keeps everything cosy inside. Always secure with sturdy toothpicks or, better yet, kitchen twine if you have it on hand. Another classic: dry chicken. This happens if you skip searing or overbake. The initial skillet sear locks in juices and creates that golden crust, so don’t skip the hot olive oil stage—it’s non-negotiable. If in doubt, use a meat thermometer—165°F is the magic number. Finally, resting post-bake is crucial. Carve into those rolls too soon, and all the juices will sprint out, leaving your dinner parched and sad. Five minutes off the heat lets everything settle and taste just right.
Chicken Breast Roll Ups FAQ
A: Absolutely! You can assemble them and keep them wrapped in the fridge for a few hours before cooking. It’s a clutch move when you’re juggling dinner prep and life’s curveballs.
A: Not strictly. Frozen spinach works—just make sure to thaw and squeeze out all the water first, or else you’ll end up with a soggy mess inside. Nobody wants that.
A: Yes! This recipe is naturally gluten-free since there’s no breading. Just double-check your seasoning and cheese labels to be safe.
A: Yes! They stay tasty for up to three days refrigerated. Heat them slow and easy so the chicken stays juicy and the filling doesn’t dry out. Pro tip: cover with foil if reheating in the oven.
A: Yes, toothpicks keep those rolls tight and prevent the filling from escaping during cooking. If you’re fresh out, kitchen twine works in a pinch.