
Ready to wow your taste buds?
I’ll never forget the first time I tried making chicken breast roll ups—an absolute game changer. The kitchen felt alive with the sizzle of olive oil hitting the pan and the aroma of garlic and Italian seasoning wafting through the air. This isn’t just cooking; it’s a quick trip to flavor town.
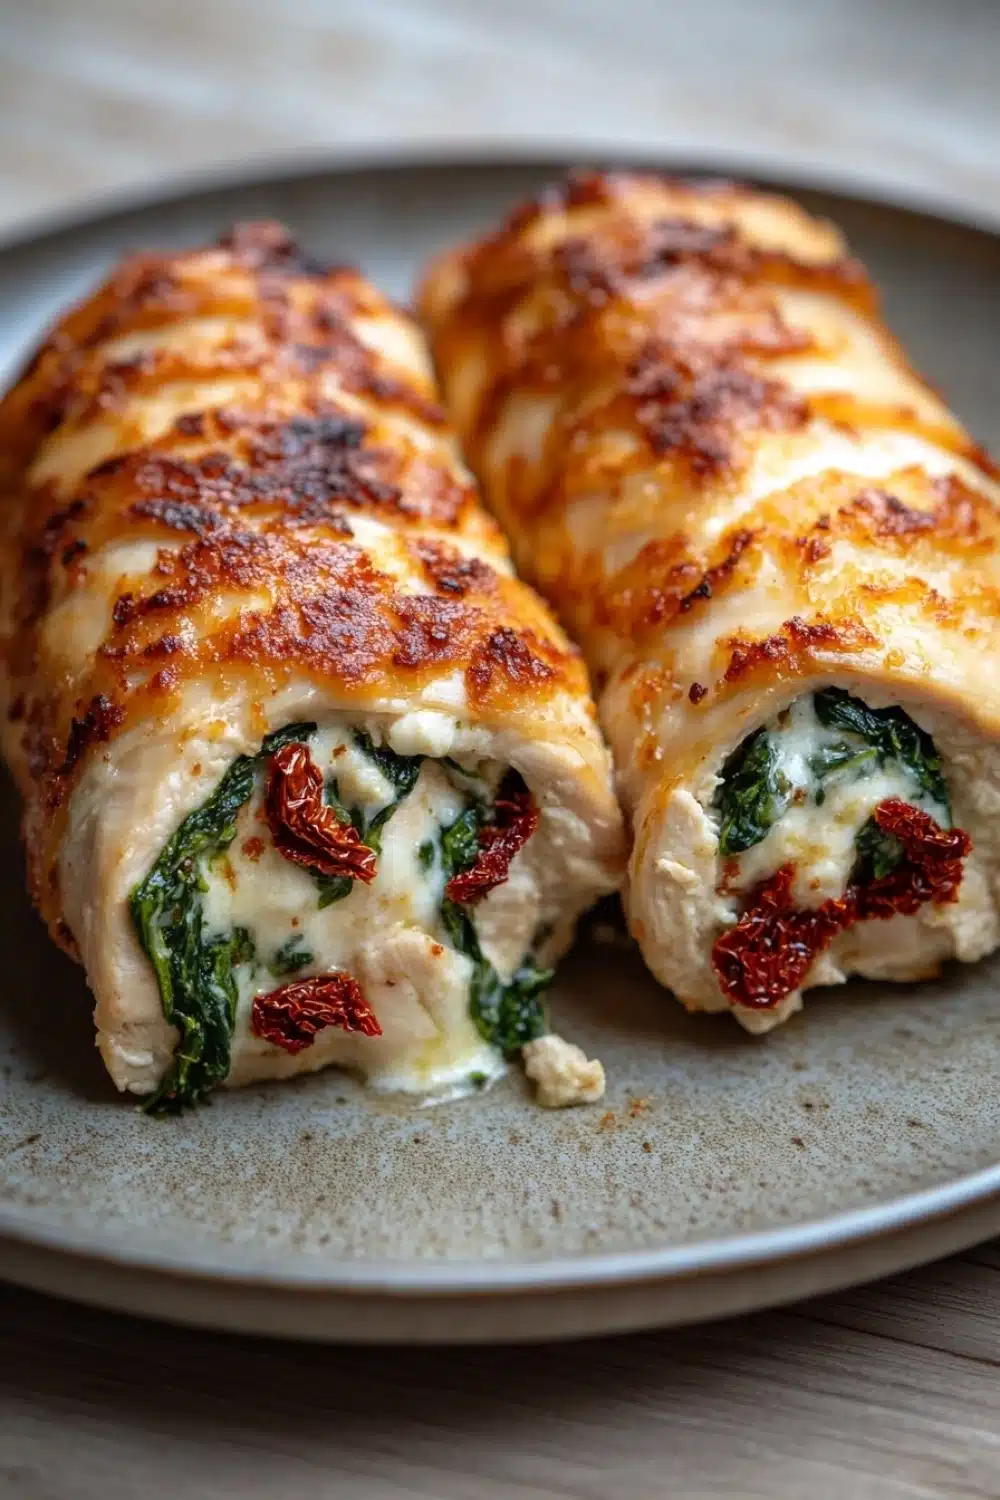
The magic lies in the stuffing—cream cheese, spinach, and sun-dried tomatoes nestled inside tender, pounded chicken breasts. Each bite offers a perfect balance of creamy, tangy, and fresh notes, wrapped up like a little edible treasure. It’s one of those recipes that’s deceptively simple but packs enough punch to impress anyone at the dinner table.
Trust me—once you nail this dish, chicken breast roll ups become your go-to for busy weeknights. It’s a classic crowd-pleaser that’s as easy as it is tasty. So, dust off your meat mallet and let’s get rolling.
For a delicious twist, try our chicken breast roll ups recipe that’s stuffed, seared, and oven-baked to perfection.
Real Life Benefits of Making Chicken Breast Roll Ups
- Quick midweek hero: Ready in just 40 minutes, it’s a solid go-to when the clock’s ticking but you still want something tasty.
- Kid-friendly swap: Sneak in spinach and sun-dried tomatoes disguised in creamy cheese—your picky eaters won’t suspect a thing.
- Meal prep magic: These roll ups hold up well in the fridge and reheat without turning into sad rubbery lumps.
- Impress without stress: Looks fancy on the plate but is dead simple to nail—even if you’re not a kitchen whiz.
- Flavor punch in every bite: Garlic, Italian seasoning, and that tangy sun-dried tomato combo means no boring chicken night here.
Chicken Breast Roll Ups

Delicious and easy chicken breast roll ups stuffed with spinach, cream cheese, and sun-dried tomatoes, perfect for a flavorful and impressive meal.
- Prep Time: 15 minutes
- Cook Time: 25 minutes
- Total Time: 40 minutes
- Yield: 4
Ingredients
4 boneless skinless chicken breasts
4 ounces cream cheese, softened
1 cup fresh spinach, chopped
1/4 cup sun-dried tomatoes, chopped
1/2 cup shredded mozzarella cheese
1 teaspoon garlic powder
1 teaspoon dried Italian seasoning
Salt, to taste
Black pepper, to taste
2 tablespoons olive oil
Instructions
Preheat the oven to 375°F (190°C).
Place each chicken breast between two pieces of plastic wrap and gently pound with a meat mallet or rolling pin until about 1/4 inch thick.
In a medium bowl, mix together the cream cheese, chopped spinach, sun-dried tomatoes, and shredded mozzarella cheese until well combined.
Season both sides of each flattened chicken breast with garlic powder, dried Italian seasoning, salt, and black pepper.
Divide the cream cheese mixture evenly among the chicken breasts, spreading it over one side of each breast.
Carefully roll up each chicken breast tightly, securing with toothpicks if needed.
Heat the olive oil in an oven-safe skillet over medium-high heat.
Add the chicken roll ups seam side down and sear for 2-3 minutes until golden brown.
Turn the roll ups to brown on all sides, about 2 minutes per side.
Transfer the skillet to the preheated oven and bake for 15-20 minutes, or until the chicken is cooked through and juices run clear (internal temperature should reach 165°F or 74°C).
Remove the toothpicks before serving. Let the roll ups rest for 5 minutes, then slice and serve.
Explore more:
Dinner Recipes
Mastering Chicken Breast Roll Ups: From Prep to Plate
The Secret to Rolling Like a Pro—Why Pound Thin?
Listen—this step isn’t just about making the chicken look pretty. Pounding each breast to about a quarter-inch thickness is the golden ticket to a tender roll-up that actually cooks evenly without turning into shoe leather. I once skipped this and ended up with half-raw centers and an overcooked crust. Painful. Flattening also expands your real estate for stuffing—making every bite a balanced flavor bomb. Use plastic wrap to keep your workspace clean and avoid a meat-mallet mess that Grandma would side-eye. Trust me, this little headache saves a world of chewing agony.
Flip, Sear, Bake—The Triple Threat Technique
Here’s the breakdown, no fluff:
- Heat olive oil in an oven-safe skillet. Medium-high, hot but not smoking.
- Place roll ups seam side down. This locks everything tight—like a deal you can’t break.
- Sear for 2-3 minutes until golden brown crust forms.
- Turn every couple minutes to get all sides kissed by that heat.
- Pop the skillet into a 375°F oven for 15-20 minutes. Internal temp? 165°F. No guesswork.
Why this jazz? Searing traps juices, keeps the filling from leaking out like a busted pipe, and creates that crave-worthy browning. Baking finishes the job gently—think of it as a slow dance after a wild intro. Skip the sear and you’ll be left with pale, sad chicken that screams “I skipped the hard part.”
Save Your Roll Ups: When Things Go Sideways
Chicken roll ups can misbehave. Here are quick fixes to rescue your dinner:
Problem: Filling oozes out during cooking.
Fix: Don’t overstuff—less is more. Also, make sure to seal edges tight and use toothpicks like a scaffold to hold your masterpiece together.
Problem: Dry, tough chicken.
Fix: Don’t skip the pounding! Also, sear fast and don’t overbake. If you find dry chicken, next time brine it briefly in salted water for 15 minutes before pounding.
Problem: Burned outside, raw inside.
Fix: Use an oven-safe skillet to move quickly from sear to oven—no lag. If needed, lower heat slightly when searing and trust the oven to finish the job evenly.
We’ve all been there—rolling up hopes and dreams only to have a kitchen disaster. But with these tweaks, you’ll be flexing your roll-up game in no time.
Chicken Breast Roll Ups FAQ
Got a shortcut to prep these roll ups?
Definitely! You can prep the filling the night before and keep it chilled. That way, when you’re ready to cook, it’s a quick assembly line.
Can I swap cream cheese for something else?
Yes, you can use goat cheese or ricotta for a tangy twist, but expect a slightly different texture and flavor profile.
Do I need to use toothpicks?
Yes and no. Toothpicks help keep the roll ups tight during cooking, but if you’re handy with kitchen twine, that works too.
Can I make these roll ups gluten-free?
Absolutely! This recipe is naturally gluten-free, just make sure your spices and sun-dried tomatoes don’t have hidden gluten additives.
Can I freeze leftovers?
Yes, you can freeze these roll ups. Wrap them tightly in foil and place in a freezer bag for up to 2 months. Thaw overnight in the fridge before reheating.