
Here’s the scoop: dessert just got cheeky.
In my kitchen, the air thickens with the scent of cocoa—earthy, rich, and promising something a little out of the ordinary. This isn’t your grandma’s chocolate cake; it’s a mashup of fudgy goodness crowned by a whimsical jelly cat that’s as much fun to make as it is to eat. The first time I tried this recipe, I was taken back by the jelly’s vibrant burst of berry flavor that cut through the dense cake with a playful zing.
Think of it as a two-step dance—the classic chocolate cake lays down a solid, comforting beat while the jelly cat sashays on top, stealing the show with its fruity flair and cute-as-a-button silhouette. The gelatin blooms like a charm, locking in that fresh berry punch, while the cake’s crumb stays moist and tender, a true masterclass in texture contrast.
Ready to get your hands messy and whip up something that’ll have guests talking (and grinning) at your next shindig? Let’s dive in and add some feline finesse to your dessert repertoire.
Discover how to whip up a playful chocolate cake jelly cat for a delightful and sweet treat.
Real Life Perks of Making the Chocolate Cake Jelly Cat
- The combo of chocolate cake and fruity jelly keeps your taste buds guessing — a fun twist that’s anything but basic.
- Perfect party showstopper. Watch jaws drop when you unveil that cute cat-shaped jelly sitting pretty atop a rich chocolate cake.
- Prep and bake within an hour — no marathon kitchen session required, even on busy weeknights.
- Kid-friendly vibes. It’s a sneaky way to get little food critics to enjoy fruit juice without a fuss.
- Leftovers keep well in the fridge for a few days, so no rush to polish it off in one go. Bonus points for easy storage and next-day flavor boost.
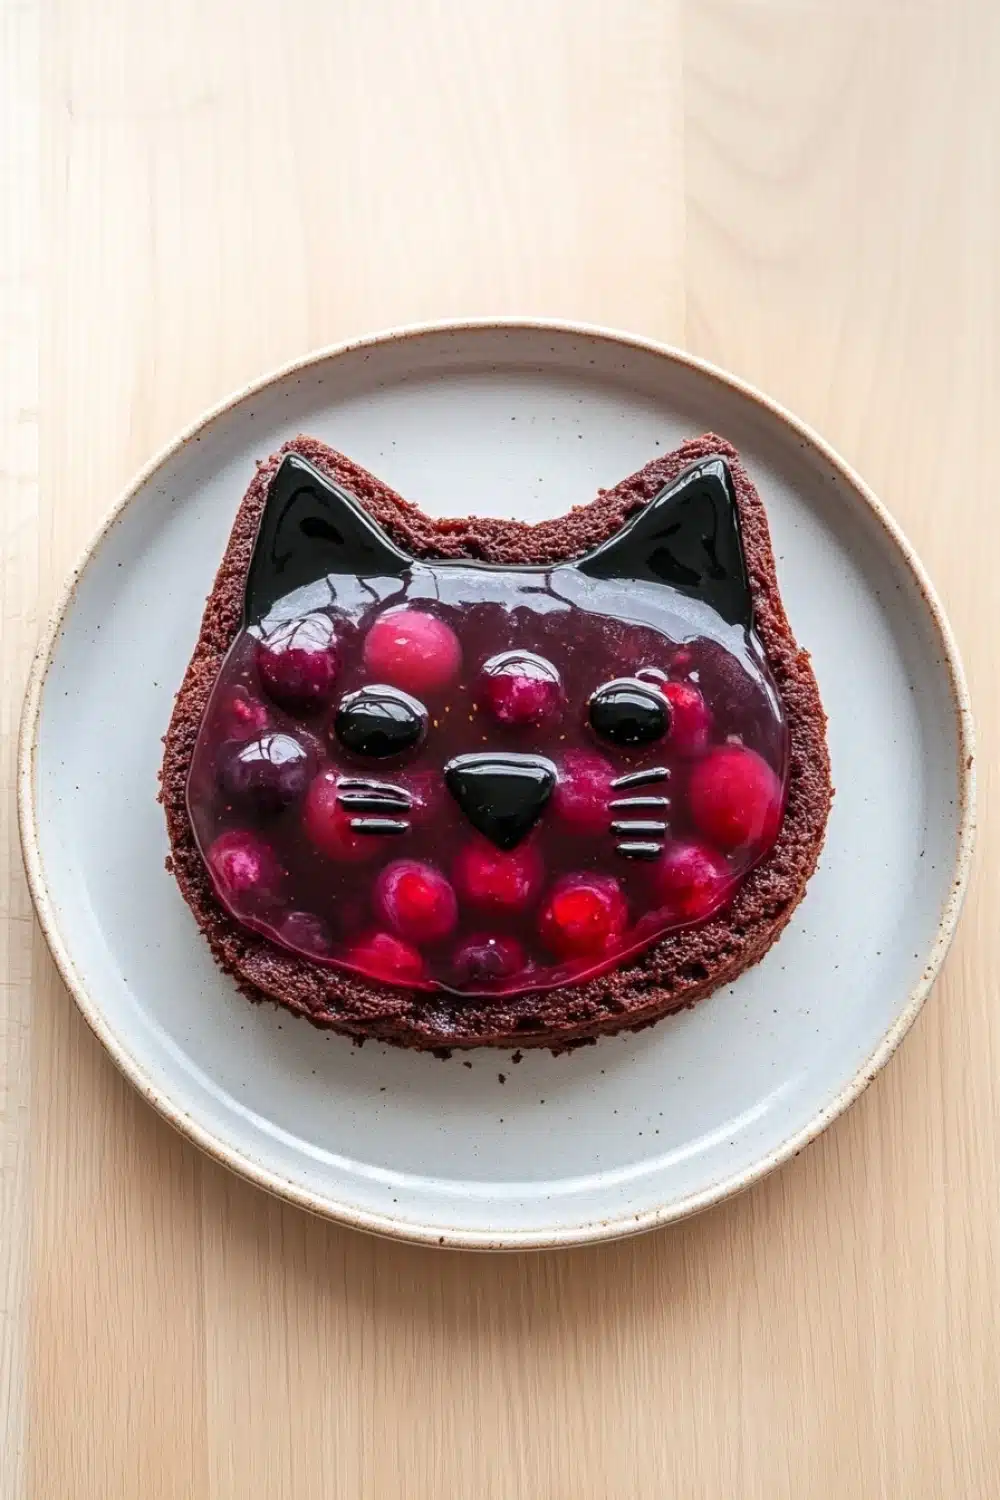
Chocolate Cake Jelly Cat
A whimsical and delicious dessert combining rich chocolate cake with a smooth, fruity jelly shaped like a cute cat. Perfect for parties or a fun treat!
- Prep Time: 30 minutes
- Cook Time: 35 minutes
- Total Time: 1 hour 5 minutes
- Yield: 8
Ingredients
1 cup all-purpose flour
1 cup granulated sugar
1/2 cup unsweetened cocoa powder
1 teaspoon baking powder
1/2 teaspoon baking soda
1/4 teaspoon salt
1/2 cup vegetable oil
1/2 cup whole milk
2 large eggs
1 teaspoon vanilla extract
1/2 cup boiling water
1 packet (7 grams) unflavored gelatin powder
1/2 cup cold water
1 cup mixed berry juice (for jelly)
1/4 cup granulated sugar (for jelly)
1/2 teaspoon lemon juice
Black edible gel icing (for cat face details)
Instructions
Preheat the oven to 350°F (175°C). Grease and flour an 8-inch round cake pan.
In a large mixing bowl, sift together the flour, sugar, cocoa powder, baking powder, baking soda, and salt.
In a separate bowl, whisk together the vegetable oil, milk, eggs, and vanilla extract until combined.
Gradually add the wet ingredients to the dry ingredients, mixing until smooth.
Carefully stir in the boiling water until the batter is thin and well combined.
Pour the batter into the prepared cake pan and bake for 30-35 minutes, or until a toothpick inserted into the center comes out clean.
Remove the cake from the oven and allow it to cool completely in the pan on a wire rack.
While the cake cools, prepare the jelly cat layer: sprinkle the gelatin powder over the cold water in a small bowl and let it bloom for 5 minutes.
In a small saucepan, combine the mixed berry juice, sugar, and lemon juice. Heat over medium heat until the sugar dissolves and the mixture is hot but not boiling.
Remove from heat and stir in the bloomed gelatin until fully dissolved.
Pour the jelly mixture into a cat-shaped silicone mold or a shallow dish lined with a cat-shaped stencil. Refrigerate until set, about 2 hours.
Once the cake and jelly are fully set, carefully unmold the jelly cat and place it on top of the cooled chocolate cake.
Use black edible gel icing to draw the cat’s facial features and details on the jelly cat.
Slice and serve the chocolate cake jelly cat chilled or at room temperature.
Explore more:
Breakfast Recipes
Mastering the Chocolate Cake Jelly Cat: Tricks, Swaps & Saves
The Sweet Switch-Up: Playing with Ingredients Like a Pro
Let’s talk swaps—because nobody’s kitchen is a cookie-cutter zone. Flour? Feel free to roll with cake flour for a softer crumb or even oat flour if you’re going gluten-light. Sugar? Brown sugar sneaks in a hint of molasses that plays well with cocoa’s bitterness, giving your cake that extra oomph. Speaking of cocoa, if you’re grinding your own or have a favorite brand, know this: Dutch-processed cocoa will mellow the tang, while natural cocoa hits you with a punchier, acidic note. The jelly layer? Swap berry juice with pomegranate or cherry for a wild-card flavor twist that’ll make guests do a double-take. And hey—don’t sweat the gelatin powder if you’re vegan; agar-agar is your jam here, though it sets firmer and faster, so timing is key. These tweaks aren’t just for show—they’re your ticket out of the mundane.
Why That Jelly Needs Your Full Attention
Here’s the lowdown:
Gelatin blooming? Non-negotiable. It’s like waking up the jelly’s sleepy bones before it can strut its stuff. Skip this, and you’re in for a lumpy, sad mess. The heat matters too—too hot, and you’ll kill the gelatin’s setting mojo; too cold, and it won’t dissolve properly. I learned this the hard way once, trying to rush it with boiling juice. Trust me, patience pays off here. And the lemon juice? It’s not just for zing—it helps balance sweetness and works with the gelatin to sharpen the jelly’s texture. Pouring the jelly into a cat-shaped mold or stencil is where the magic starts to show. Pro tip? Lightly oil the mold if it’s silicone to make unmolding a breeze. Once set, handle that jelly cat with care—it’s delicate, like a diva at the party.
Fixing the Fumbles: What to Do When Things Go Sideways
The cake came out dense? Don’t panic. Your flour might be measuring too heavy—next time, spoon and level it or sift for airier results. Batter too thick before adding boiling water? Add a splash more milk or water to loosen it up; the boiling water’s job is to thin the batter and bloom the cocoa. Jelly not setting? Run through this checklist: Did you bloom the gelatin? Was your juice too cold or too hot when mixing? Is your jelly chilling long enough? A quick fix: reheat gently, add more gelatin (dissolved first), and chill longer. And that jelly cat refusing to stay on the cake? A dab of thick frosting or a thin layer of jam acts as edible glue—game changer.
Chocolate Cake Jelly Cat: FAQs
Absolutely! If you don’t have a cat-shaped mold, use a shallow dish with a cat stencil or freehand the shape on parchment paper. It’s a bit of a hack, but I’ve done it when in a pinch, and it works like a charm.
The gelatin jelly needs about 2 hours in the fridge to fully set. Don’t rush this step or you’ll end up with a jiggly mess that won’t hold its cute shape. Patience here pays off big time.
Yes! While mixed berry juice gives a nice tartness and color pop, you can swap in pomegranate, cherry, or even grape juice. Just keep the sugar and lemon juice ratios the same to balance flavor and help the gelatin set properly.
Nope—this one’s best chilled or at room temperature. The jelly cat topping loses its shape and texture if the cake’s too warm. Trust me, I’ve learned this the hard way after one too many messy parties.
Short answer: No. Freezing wrecks the jelly’s texture and can cause it to weep or crack. If you want to freeze leftovers, keep the jelly cat separate and thaw the cake on its own before assembling later.