
Crusty bread calls.
There’s something magical about baking your own bread when you plan to layer it thick with grilled chicken — that warm, yeasty aroma wrapping the kitchen like a soft hug. I remember the first time I tried crafting this bread: the dough was sticky, rebellious, but eventually, after kneading and waiting, it transformed into this golden loaf that held my sandwich fillings like a champ.
It’s not just bread; it’s the backbone of your grilled chicken sandwich story. The crumb has to be soft and slightly chewy, with a crust that crisps just right. No soggy bottom nightmares here — just sturdy bread that soaks up sauces without turning into a sad mess.
Baking this bread is a dance with time and patience, but the payoff? Totally worth it. The kitchen feels alive, the smell fills every nook, and suddenly, you’re not just making a sandwich — you’re setting the stage for a serious lunch knockout.
For a delicious twist, check out our grilled chicken sandwich bread recipe that pairs perfectly with your favorite fillings.
Real-Life Wins from Homemade Grilled Chicken Sandwich Bread
- Say goodbye to store-bought flimsies—this bread holds up to juicy grilled chicken without turning into a soggy mess.
- The soft yet slightly chewy crumb means every bite feels substantial but never dense, perfect for serious sandwich lovers.
- Freshly baked crust? That golden snap adds texture contrast that makes weekday lunches feel like a treat.
- Homemade bread lets you skip preservatives and control ingredients—your gut will thank you for the cleaner eats.
- Bonus: making this bread is a chill weekend project that fills your kitchen with mouthwatering smells, setting the vibe for family dinners or solo feast sessions.
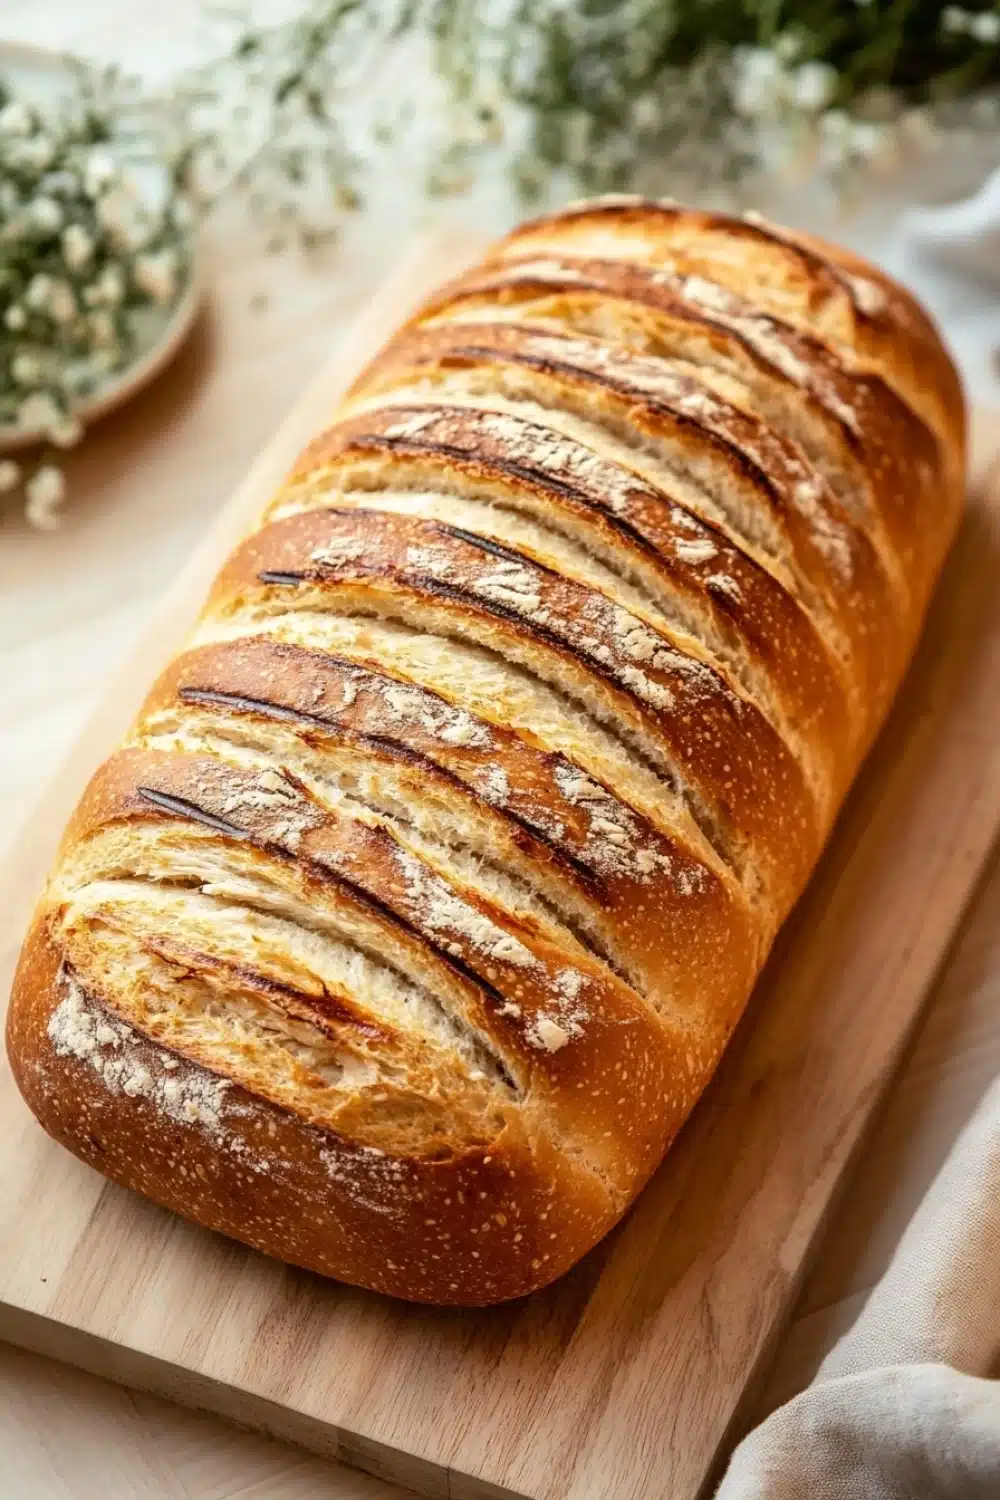
Grilled Chicken Sandwich Bread

Homemade grilled chicken sandwich bread with a soft, slightly chewy crumb and a golden crust, perfect for holding your favorite grilled chicken sandwich fillings.
- Prep Time: 20 minutes
- Cook Time: 25 minutes
- Total Time: 45 minutes
- Yield: 8 slices
Ingredients
3 1/2 cups (420 grams) bread flour
2 teaspoons (7 grams) active dry yeast
1 tablespoon (12 grams) granulated sugar
1 1/4 teaspoons (7 grams) salt
1 cup (240 milliliters) warm water (about 110°F / 43°C)
1/4 cup (60 milliliters) whole milk, warmed
2 tablespoons (30 milliliters) olive oil
1 large egg, room temperature
Instructions
In a small bowl, combine the warm water, warm milk, sugar, and active dry yeast. Stir gently and let sit for 5 to 10 minutes until the mixture is foamy.
In a large mixing bowl, whisk together the bread flour and salt.
Make a well in the center of the dry ingredients and add the yeast mixture, olive oil, and egg.
Mix with a wooden spoon or dough hook attachment until a rough dough forms.
Turn the dough out onto a lightly floured surface and knead for about 8 to 10 minutes until smooth and elastic. Alternatively, knead with a stand mixer fitted with a dough hook for 6 to 7 minutes on medium speed.
Place the dough in a lightly oiled bowl, cover with a clean kitchen towel or plastic wrap, and let it rise in a warm place for about 1 hour or until doubled in size.
Punch down the risen dough and turn it out onto a lightly floured surface.
Shape the dough into a loaf by flattening it into a rectangle approximately 9 by 12 inches, then rolling it tightly from one short edge to the other, pinching the seam to seal.
Place the shaped loaf seam-side down into a greased 9×5-inch loaf pan.
Cover the loaf with a towel or plastic wrap and let it rise for 30 to 40 minutes, or until the dough has risen about 1 inch above the rim of the pan.
Preheat the oven to 375°F (190°C).
Bake the bread for 25 to 30 minutes until the crust is golden brown and the loaf sounds hollow when tapped on the bottom.
Remove the bread from the oven and immediately transfer it to a wire rack to cool completely before slicing.
Explore more:
Lunch Recipes
Mastering Homemade Grilled Chicken Sandwich Bread
The Secret to That Perfectly Soft, Chewy Crumb
Here’s the lowdown: the magic lies in balancing hydration and fat. Use a combo of warm water and whole milk to get that soft but chewy texture—a little trick I picked up from a crusty bread fanatic who swore by milk’s tenderizing powers. Olive oil and an egg sneak in fat and protein, creating a dough that’s pliable and forgiving, not a brick. Too dry? Your crumb will scream ‘sawdust.’ Too wet? You’re in sloppy dough territory. The 3 1/2 cups of bread flour provide enough gluten muscle to hold everything together without turning your sandwich bread into a workout tool. Patience is key—don’t rush the rise. Let the dough double in size, and you’ll feel the difference when you punch it down and shape that loaf.
Why Roll and Seal? The Shaping Hack You Didn’t Know You Needed
Ever wonder why the recipe tells you to flatten the dough then roll it tight before tucking it in the pan? That’s no random step. Rolling creates a tight crumb structure and helps the loaf keep its shape during baking. The pinch-seam seal? Gold. It prevents that dreaded loaf top crack that makes your bread look like it survived a brawl. Also, placing the seam-side down gives a smooth, even bottom crust. This little dance of shaping turns a haphazard blob into a sandwich-ready beauty. Trust me, skipping this step leads to a saggy, uneven loaf, perfect only for sad toast.
Saving a Dough Disaster: Fixes for Common Bread Fails
Dough too sticky? Dust lightly with flour, but beware the over-flour trap—a little goes a long way. If it’s stubborn and won’t rise? Your yeast might be on vacation. Test by proofing yeast first: if it doesn’t foam in warm water with sugar, toss it. Overproofed dough can be salvaged by punching it down hard and reshaping quickly—think of it as dough CPR. Oven acting weird? Use the tap test: knock the bottom of your loaf; a hollow sound means you’re golden. If it’s dull, pop it back in for 5–10 minutes. Last but not least, don’t slice your bread fresh out of the oven unless you want a gummy mess—cooling is non-negotiable. The bread needs time to set its crumb structure. I’ve learned the hard way, slicing hot bread is like slicing wet cement.
Grilled Chicken Sandwich Bread FAQs
Not at all! While it’s designed to hold grilled chicken fillings like a champ, its slightly chewy crumb and golden crust make it a solid choice for any sandwich you fancy.
Yes, you can swap active dry yeast for instant yeast—but toss it right into the dry ingredients without proofing it in warm water. Adjust rise times slightly since instant yeast works faster.
Don’t panic. Add flour in small increments and keep kneading. The dough should be tacky but manageable. Too much flour and you’ll end up with a dense loaf—trust me, I’ve been there.
Classic trick: tap the loaf’s bottom. If it sounds hollow, you nailed it. Also, the crust should be a deep golden brown. Resist slicing until fully cooled, or you’ll get a gummy mess.
Absolutely! Kneading by hand is old school but totally effective. Just commit to 8–10 minutes of elbow grease on a floured surface, and you’ll get a smooth, elastic dough ready to rise.