
Introduction to Libra Cake
As a passionate home cook, I know how hectic life can get, especially for busy moms and professionals. That’s why I’m excited to share my Libra Cake recipe with you! This delightful dessert is not just a treat; it’s a celebration of unique flavors that will impress your loved ones. Whether you’re hosting a gathering or simply want to indulge after a long day, this cake is the perfect solution. With its easy preparation and scrumptious taste, the Libra Cake will quickly become a favorite in your home. Let’s dive into this culinary adventure together!
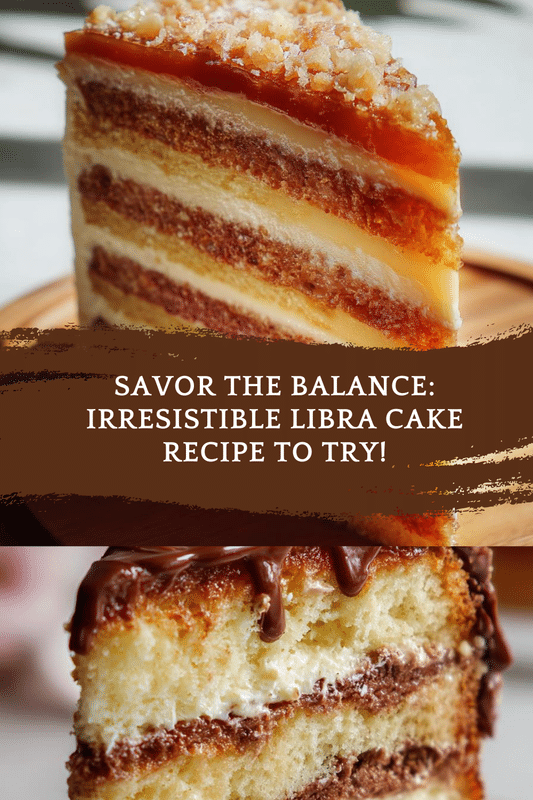
PrintLibra Cake: Discover the Unique Flavors You’ll Love!
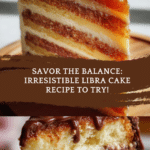
Libra Cake is a delightful dessert that combines unique flavors to create a memorable treat, perfect for celebrating the Libra zodiac sign.
- Prep Time: 15 minutes
- Cook Time: 35 minutes
- Total Time: 50 minutes
- Yield: 8 servings
- Category: Dessert
- Method: Baking
- Cuisine: American
- Diet: Vegetarian
Ingredients
- 2 cups all-purpose flour
- 1 cup sugar
- 1/2 cup unsalted butter, softened
- 1 cup milk
- 3 eggs
- 1 tablespoon baking powder
- 1 teaspoon vanilla extract
- 1/2 teaspoon salt
- 1/2 cup chopped nuts (optional)
- 1/2 cup chocolate chips (optional)
Instructions
- Preheat the oven to 350°F (175°C).
- In a large bowl, cream together the butter and sugar until light and fluffy.
- Add the eggs one at a time, beating well after each addition.
- Stir in the vanilla extract.
- In another bowl, combine the flour, baking powder, and salt.
- Gradually add the dry ingredients to the wet mixture, alternating with the milk.
- If desired, fold in the chopped nuts and chocolate chips.
- Pour the batter into a greased cake pan.
- Bake for 30-35 minutes or until a toothpick inserted into the center comes out clean.
- Let the cake cool before serving.
Notes
- For a richer flavor, consider adding cocoa powder for a chocolate version.
- Decorate with frosting or fresh fruits for a beautiful presentation.
- This cake can be stored in an airtight container for up to 3 days.
Why You’ll Love This Libra Cake
This Libra Cake is a dream come true for busy cooks like us! It’s quick to whip up, taking just about 50 minutes from start to finish. The flavors are a delightful blend that will have your family asking for seconds. Plus, it’s versatile enough to suit any occasion, whether it’s a birthday, a cozy family dinner, or just a sweet treat to brighten your day. You’ll love how easy it is to make!
Ingredients for Libra Cake
Gathering the right ingredients is the first step to creating your delicious Libra Cake. Here’s what you’ll need:
- All-purpose flour: This is the backbone of your cake, providing structure and texture.
- Sugar: Sweetness is key! It not only sweetens but also helps with the cake’s moisture.
- Unsalted butter: Softened butter adds richness and flavor, making your cake tender.
- Milk: This ingredient keeps the cake moist and helps blend everything together.
- Eggs: They act as a binding agent, giving the cake its structure and a lovely rise.
- Baking powder: This leavening agent ensures your cake rises beautifully, creating a light texture.
- Vanilla extract: A splash of vanilla adds warmth and depth to the flavor profile.
- Salt: Just a pinch enhances all the flavors, balancing the sweetness.
- Chopped nuts (optional): Add some crunch and nutty flavor; walnuts or pecans work great!
- Chocolate chips (optional): For a sweet surprise, fold in some chocolate chips for extra indulgence.
For exact measurements, check the bottom of the article where you can find everything listed for easy printing. Happy baking!
How to Make Libra Cake
Now that we have our ingredients ready, let’s dive into the fun part—making the Libra Cake! Follow these simple steps, and you’ll have a delightful dessert in no time.
Step 1: Preheat the Oven
First things first, preheat your oven to 350°F (175°C). Preheating is crucial because it ensures your cake bakes evenly. A hot oven helps the cake rise properly, giving it that fluffy texture we all love.
Step 2: Cream Butter and Sugar
In a large bowl, cream together the softened butter and sugar until it’s light and fluffy. This process is essential for incorporating air into the mixture, which helps your cake achieve that perfect rise. It’s like giving your cake a little boost of happiness!
Step 3: Add Eggs and Vanilla
Next, add the eggs one at a time, beating well after each addition. Eggs are the magic ingredient that binds everything together and adds moisture. Don’t forget to stir in the vanilla extract; it brings a warm, inviting flavor that makes your Libra Cake irresistible.
Step 4: Combine Dry Ingredients
In another bowl, mix together the flour, baking powder, and salt. Combining these dry ingredients separately is important to ensure even distribution of the baking powder. This way, your cake will rise beautifully without any surprises!
Step 5: Mix Wet and Dry Ingredients
Now, it’s time to combine the wet and dry mixtures. Gradually add the dry ingredients to the wet mixture, alternating with the milk. This helps keep the batter smooth and prevents overmixing, which can lead to a dense cake. We want light and fluffy, remember?
Step 6: Fold in Optional Ingredients
If you’re feeling adventurous, fold in the chopped nuts and chocolate chips at this stage. These optional ingredients add delightful texture and flavor to your Libra Cake. Imagine the crunch of nuts or the melty goodness of chocolate with every bite!
Step 7: Pour and Bake
Pour the batter into a greased cake pan, spreading it evenly. Bake in your preheated oven for 30-35 minutes. Keep an eye on it! You’ll know it’s done when a toothpick inserted into the center comes out clean. The aroma will be heavenly!
Step 8: Cool and Serve
Once baked, let the cake cool in the pan for about 10 minutes before transferring it to a wire rack. This cooling process is vital; it allows the cake to set properly. When you’re ready to serve, consider decorating it with frosting or fresh fruits for a beautiful presentation. Enjoy your delicious Libra Cake!
Tips for Success
- Always measure your ingredients accurately for the best results.
- Use room temperature eggs and butter for easier mixing.
- Don’t overmix the batter; stop as soon as everything is combined.
- Check your cake a few minutes before the suggested baking time.
- Let the cake cool completely before frosting to prevent melting.
Equipment Needed
- Mixing bowls: A set of various sizes is handy; you can also use any large bowl you have.
- Electric mixer: This makes creaming butter and sugar easier; a whisk works too if you’re up for a workout!
- Measuring cups and spoons: Essential for accuracy; you can use a kitchen scale as an alternative.
- Spatula: Great for folding in ingredients; a wooden spoon can do the trick as well.
- Cake pan: A round or square pan works; just make sure it’s greased well!
Variations of Libra Cake
- Chocolate Libra Cake: Add cocoa powder to the batter for a rich chocolate flavor that chocolate lovers will adore.
- Gluten-Free Option: Substitute all-purpose flour with a gluten-free blend to make this cake suitable for those with gluten sensitivities.
- Fruit-Infused: Incorporate fresh berries or diced apples into the batter for a fruity twist that adds moisture and flavor.
- Spiced Libra Cake: Add a teaspoon of cinnamon or nutmeg for a warm, spiced flavor that’s perfect for fall.
- Vegan Version: Replace eggs with flaxseed meal and use plant-based milk and butter for a delicious vegan alternative.
Serving Suggestions for Libra Cake
- Pair your Libra Cake with a scoop of vanilla ice cream for a delightful contrast.
- Serve with a dollop of whipped cream and fresh berries for a colorful presentation.
- A cup of coffee or herbal tea complements the cake beautifully.
- For a festive touch, dust with powdered sugar before serving.
FAQs about Libra Cake
What makes Libra Cake special?
Libra Cake stands out due to its unique blend of flavors and textures. It’s a delightful dessert that celebrates the Libra zodiac sign, making it perfect for themed parties or special occasions. The optional ingredients like nuts and chocolate chips add an extra layer of deliciousness!
Can I make Libra Cake ahead of time?
Absolutely! You can bake the Libra Cake a day in advance. Just store it in an airtight container to keep it fresh. This way, you can save time on the day of your gathering and focus on enjoying the moment with your loved ones.
How do I store leftover Libra Cake?
To keep your Libra Cake fresh, store it in an airtight container at room temperature for up to three days. If you want to keep it longer, you can freeze individual slices. Just wrap them tightly in plastic wrap and place them in a freezer-safe bag.
Can I customize the flavors in Libra Cake?
Definitely! The beauty of Libra Cake is its versatility. You can add spices, fruits, or even swap out the nuts for your favorites. Feel free to experiment with flavors that resonate with you and your family!
Is Libra Cake suitable for special diets?
Yes! You can easily adapt the Libra Cake recipe to fit various dietary needs. For a gluten-free version, use a gluten-free flour blend. If you’re looking for a vegan option, substitute eggs with flaxseed meal and use plant-based milk and butter. Enjoy baking!
Final Thoughts
Making Libra Cake is more than just baking; it’s about creating memories and sharing joy with those you love. The delightful blend of flavors and textures makes each bite a celebration, perfect for any occasion. I cherish the moments spent in the kitchen, watching my family’s faces light up as they savor this cake. Whether it’s a special gathering or a simple weeknight treat, this recipe brings warmth and happiness to our home. I hope you enjoy making your own Libra Cake and experience the joy it brings to your table!