
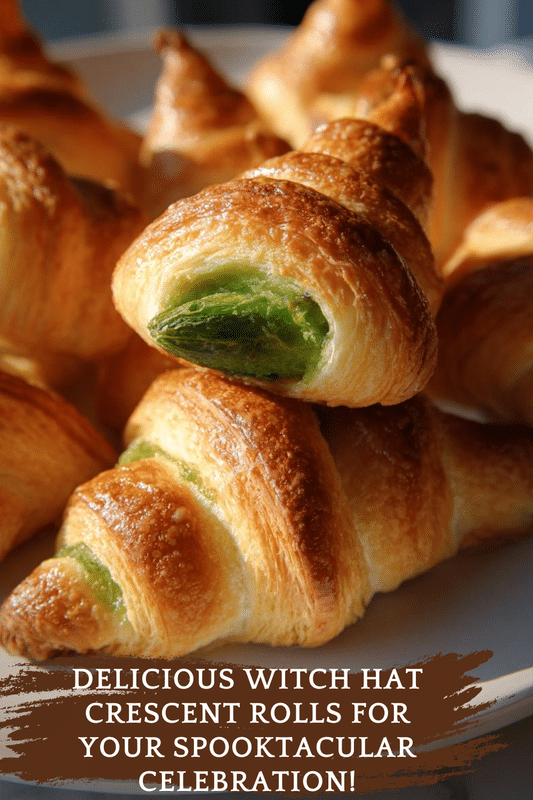
Introduction to Witch Hat Crescent Rolls
As the leaves turn and the air gets crisp, I find myself craving festive treats that bring a smile to my family’s faces. That’s where these delightful Witch Hat Crescent Rolls come in! They’re not just a quick solution for a busy day; they’re a fun way to celebrate Halloween with your loved ones. With flaky crescent rolls, rich chocolate, and colorful candy corn, these treats are as easy to make as they are to enjoy. Trust me, your kids will love helping out, and you’ll love how quickly they disappear!
PrintWitch Hat Crescent Rolls: Delightful Halloween Treats!
Witch Hat Crescent Rolls are a fun and festive Halloween treat that combines flaky crescent rolls with chocolate and candy to create adorable witch hats.
- Prep Time: 15 minutes
- Cook Time: 12 minutes
- Total Time: 27 minutes
- Yield: 12 servings
- Category: Dessert
- Method: Baking
- Cuisine: American
- Diet: Vegetarian
Ingredients
- 1 can of crescent roll dough
- 1 cup of chocolate chips
- 1 cup of candy corn
- 1/2 cup of icing (for decoration)
Instructions
- Preheat the oven to 375°F (190°C).
- Unroll the crescent roll dough and separate it into triangles.
- Roll each triangle from the wide end to the point to form a cone shape.
- Place the rolled cones on a baking sheet lined with parchment paper.
- Bake for 10-12 minutes or until golden brown.
- Once cooled, dip the top of each cone in melted chocolate.
- Attach a piece of candy corn to the top of each cone using icing to create the witch hat.
- Decorate with additional icing as desired.
Notes
- For a more intense chocolate flavor, use dark chocolate chips.
- These can be made ahead of time and stored in an airtight container.
- Feel free to get creative with decorations!
Why You’ll Love This Witch Hat Crescent Rolls
These Witch Hat Crescent Rolls are a game-changer for busy moms like us! They come together in just 27 minutes, making them perfect for last-minute Halloween gatherings. The combination of flaky dough and sweet chocolate is simply irresistible. Plus, they’re a hit with kids and adults alike, ensuring smiles all around. You’ll love how easy they are to make, and the joy they bring to your festive celebrations!
Ingredients for Witch Hat Crescent Rolls
Gathering the right ingredients is the first step to creating these magical Witch Hat Crescent Rolls. Here’s what you’ll need:
- Crescent roll dough: The star of the show! This flaky dough forms the base of our witch hats.
- Chocolate chips: Melted chocolate adds a rich, sweet touch that makes these treats irresistible.
- Candy corn: These colorful candies not only add a festive flair but also serve as the perfect hat tip!
- Icing: Use this for decoration and to attach the candy corn. You can make your own or buy it pre-made.
Feel free to get creative! You can swap chocolate chips for dark chocolate for a richer flavor. If you’re looking for a healthier option, consider using mini chocolate chips or even a drizzle of caramel. The exact quantities for each ingredient are listed at the bottom of the article for your convenience, ready for printing!
How to Make Witch Hat Crescent Rolls
Making Witch Hat Crescent Rolls is a delightful adventure! Follow these simple steps, and you’ll have a spooky treat ready in no time. Let’s get started!
Step 1: Preheat the Oven
First things first, preheat your oven to 375°F (190°C). Preheating is crucial because it ensures even baking. You want those witch hats to puff up perfectly and turn golden brown. So, don’t skip this step!
Step 2: Prepare the Crescent Roll Dough
Next, grab your can of crescent roll dough. Unroll it carefully and separate it into triangles. Each triangle will become a witch hat. Be gentle; the dough can be a bit sticky, but that’s part of the fun!
Step 3: Shape the Witch Hats
Now, it’s time to shape those triangles into witch hats! Starting from the wide end, roll each triangle towards the point. This will create a cone shape. Make sure to pinch the seams to keep them closed. Your hats are taking form!
Step 4: Bake the Witch Hats
Place your rolled cones on a baking sheet lined with parchment paper. Bake them for 10-12 minutes, or until they’re golden brown. Keep an eye on them; you want that perfect color! The aroma will fill your kitchen, making it hard to wait.
Step 5: Decorate with Chocolate
Once your witch hats have cooled, it’s time for the fun part! Melt some chocolate chips in a microwave-safe bowl. Dip the top of each cone into the melted chocolate. This adds a delicious finish and makes them look extra spooky!
Step 6: Add the Candy Corn
Now, let’s complete the look! Use icing to attach a piece of candy corn to the top of each chocolate-dipped cone. This is the perfect finishing touch that transforms your crescent rolls into adorable witch hats!
Step 7: Final Touches
Feel free to get creative with your decorations! Use additional icing to add swirls or spooky designs. You can even sprinkle some edible glitter for a magical effect. The more festive, the better!
Tips for Success
- Make sure your crescent roll dough is cold for easier handling.
- Use a microwave to melt chocolate in short bursts to avoid burning.
- Let the witch hats cool completely before decorating to prevent melting.
- Experiment with different candies for unique hat designs.
- Have fun with your kids during the decorating process; it’s all about creativity!
Equipment Needed
- Baking sheet: A standard baking sheet works perfectly. If you don’t have one, a large oven-safe dish will do.
- Parchment paper: This helps prevent sticking. If you’re out, lightly greasing the baking sheet is a good alternative.
- Microwave-safe bowl: For melting chocolate. Any heat-safe bowl will work!
Variations of Witch Hat Crescent Rolls
- Dark Chocolate Delight: Swap regular chocolate chips for dark chocolate chips for a richer flavor that pairs beautifully with the sweetness of candy corn.
- Nutty Twist: Add crushed nuts, like almonds or pecans, to the melted chocolate for a delightful crunch on top of your witch hats.
- Gluten-Free Option: Use gluten-free crescent roll dough to make these treats accessible for those with dietary restrictions.
- Fruit-Filled Hats: Instead of chocolate, fill the cones with fruit preserves or pie filling for a fruity twist on the classic recipe.
- Vegan Version: Use vegan crescent roll dough and dairy-free chocolate chips to create a plant-based version of these festive treats.
Serving Suggestions for Witch Hat Crescent Rolls
- Spooky Punch: Pair these treats with a fun Halloween-themed punch for a festive drink option.
- Fruit Platter: Serve alongside a colorful fruit platter to balance the sweetness of the rolls.
- Decorative Plate: Present your witch hats on a spooky-themed platter for an eye-catching display.
- Ice Cream: Offer a scoop of vanilla ice cream on the side for a delightful contrast.
FAQs about Witch Hat Crescent Rolls
Can I make Witch Hat Crescent Rolls ahead of time?
Absolutely! You can prepare the witch hats and store them in an airtight container. Just wait to add the chocolate and candy corn until you’re ready to serve. This makes them a perfect make-ahead treat for your Halloween gatherings!
What can I use instead of candy corn?
If candy corn isn’t your thing, feel free to get creative! You can use chocolate-covered pretzels, gummy candies, or even mini marshmallows. The key is to find something that adds that whimsical touch to your witch hats!
How do I store leftover Witch Hat Crescent Rolls?
Store any leftovers in an airtight container at room temperature. They’re best enjoyed within a couple of days, but I doubt they’ll last that long with how delicious they are!
Can I freeze Witch Hat Crescent Rolls?
Yes, you can freeze the unbaked crescent rolls! Just shape them and place them on a baking sheet to freeze. Once frozen, transfer them to a freezer bag. When you’re ready to bake, just pop them in the oven straight from the freezer, adding a few extra minutes to the baking time.
What’s the best way to melt chocolate for decorating?
The microwave is my go-to for melting chocolate! Just heat it in short bursts, stirring in between, until smooth. This prevents burning and ensures a silky finish for your witch hats!
Final Thoughts
Creating these Witch Hat Crescent Rolls is more than just baking; it’s about making memories with your family. The joy on your kids’ faces as they help shape the hats and decorate them is priceless. Plus, the delightful combination of flaky dough and sweet chocolate is sure to bring smiles all around. Whether you’re hosting a Halloween party or just looking for a fun treat, these rolls are a perfect choice. So, roll up your sleeves, gather your loved ones, and let the magic of Halloween fill your kitchen with laughter and deliciousness!