
Introduction to Baked Pumpkin Seeds
As a busy mom, I know how challenging it can be to find a quick and healthy snack that everyone loves. That’s where baked pumpkin seeds come in! These little gems are not only crunchy and delicious, but they also pack a nutritious punch. Whether you’re looking for a snack to satisfy those afternoon cravings or something to impress your friends at a gathering, baked pumpkin seeds are the perfect solution. Plus, they’re super easy to make at home, allowing you to enjoy a guilt-free treat without the fuss. Let’s dive into this delightful recipe!
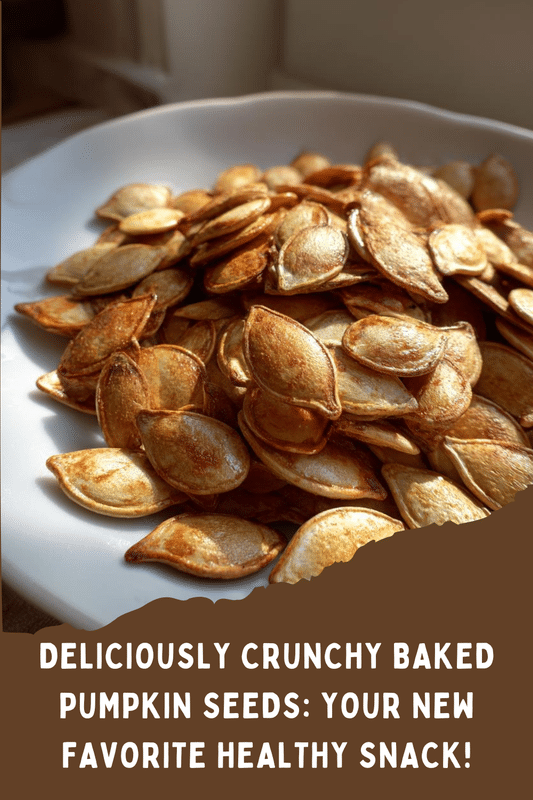
PrintBaked pumpkin seeds: Discover the ultimate crunchy snack!
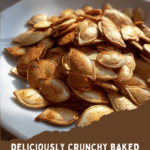
Baked pumpkin seeds are a delicious and crunchy snack that can be easily made at home. They are nutritious and perfect for satisfying your cravings.
- Prep Time: 10 minutes
- Cook Time: 25 minutes
- Total Time: 35 minutes
- Yield: 1 cup
- Category: Snack
- Method: Baking
- Cuisine: American
- Diet: Vegan
Ingredients
- 1 cup pumpkin seeds
- 1 tablespoon olive oil
- 1 teaspoon salt
- 1 teaspoon garlic powder
- 1 teaspoon paprika
Instructions
- Preheat your oven to 300°F (150°C).
- Rinse the pumpkin seeds under cold water and remove any pulp.
- Pat the seeds dry with a paper towel.
- In a bowl, mix the pumpkin seeds with olive oil, salt, garlic powder, and paprika.
- Spread the seasoned seeds in a single layer on a baking sheet.
- Bake for 20-25 minutes, stirring occasionally, until golden brown and crunchy.
- Let them cool before serving.
Notes
- Store baked pumpkin seeds in an airtight container for up to a week.
- Feel free to experiment with different seasonings like cayenne pepper or cinnamon for a sweet version.
Why You’ll Love This Baked Pumpkin Seeds
What’s not to love about baked pumpkin seeds? They’re incredibly easy to whip up, taking just 35 minutes from start to finish. The best part? You can customize the flavors to suit your taste buds! Whether you prefer a savory kick or a sweet twist, these crunchy snacks are perfect for busy days or cozy nights in. Plus, they’re a guilt-free way to satisfy your cravings while sneaking in some nutrition!
Ingredients for Baked Pumpkin Seeds
Gathering the right ingredients is the first step to creating your crunchy masterpiece. Here’s what you’ll need:
- Pumpkin seeds: The star of the show! These seeds are packed with protein and healthy fats, making them a nutritious snack.
- Olive oil: This adds a lovely richness and helps the seasonings stick. You can substitute with coconut oil for a different flavor.
- Salt: A pinch of salt enhances the natural flavor of the seeds. Feel free to adjust to your taste!
- Garlic powder: This brings a savory depth to the mix. If you’re a garlic lover, you might want to add a bit more!
- Paprika: This adds a smoky, slightly sweet flavor. You can experiment with smoked paprika for an extra kick.
For those adventurous souls, consider adding cayenne pepper for heat or cinnamon for a sweet twist. The beauty of baked pumpkin seeds is that you can tailor them to your liking! If you’re curious about exact measurements, they’re listed at the bottom of the article for easy printing.
How to Make Baked Pumpkin Seeds
Now that you have your ingredients ready, let’s get cooking! Making baked pumpkin seeds is a straightforward process that anyone can master. Follow these simple steps, and you’ll have a crunchy snack in no time!
Step 1: Preheat the Oven
First things first, preheat your oven to 300°F (150°C). Preheating is crucial because it ensures that your baked pumpkin seeds cook evenly. A hot oven helps them crisp up beautifully, giving you that satisfying crunch!
Step 2: Rinse the Pumpkin Seeds
Next, rinse the pumpkin seeds under cold water. This step is essential to remove any leftover pulp from the pumpkin. Just place the seeds in a colander and give them a good rinse. You want them clean and ready for seasoning!
Step 3: Dry the Seeds
After rinsing, pat the seeds dry with a paper towel. This step is vital for achieving that perfect crunch. If the seeds are wet, they’ll steam instead of bake, and we definitely want crispy baked pumpkin seeds!
Step 4: Season the Seeds
Now it’s time to add flavor! In a bowl, mix the dried seeds with olive oil, salt, garlic powder, and paprika. Toss them well to ensure every seed is coated. This is where you can get creative! Feel free to add your favorite spices for a personal touch.
Step 5: Spread on Baking Sheet
Spread the seasoned seeds in a single layer on a baking sheet. Make sure they’re not overcrowded; this allows for even baking. If they’re piled on top of each other, some may end up soggy instead of crunchy!
Step 6: Bake the Seeds
Pop the baking sheet in the oven and bake for 20-25 minutes. Stir the seeds occasionally to ensure they brown evenly. Keep an eye on them, as oven temperatures can vary. You’ll know they’re done when they’re golden brown and smell amazing!
Step 7: Cool and Serve
Once baked, let the seeds cool on the baking sheet. This cooling time allows them to crisp up even more. Once they’re cool, you can enjoy your delicious baked pumpkin seeds as a snack or use them as a topping for salads or soups!
Tips for Success
- Make sure to rinse the seeds thoroughly to remove all pulp for better flavor.
- Don’t skip the drying step; it’s key for achieving that irresistible crunch.
- Experiment with different spices to find your favorite flavor combination.
- Store any leftovers in an airtight container to keep them fresh.
- Check on the seeds while baking to prevent burning; every oven is different!
Equipment Needed
- Baking sheet: A standard baking sheet works perfectly. If you don’t have one, a shallow dish will do.
- Colander: Great for rinsing seeds. A fine mesh strainer can also work.
- Mixing bowl: Any bowl will suffice for mixing your ingredients.
- Paper towels: Essential for drying the seeds. A clean kitchen towel can be a substitute.
Variations of Baked Pumpkin Seeds
- Spicy Kick: Add cayenne pepper or chili powder for a fiery twist that will wake up your taste buds!
- Sweet Cinnamon: Mix in a sprinkle of cinnamon and a touch of sugar for a delightful sweet version that’s perfect for snacking.
- Herb Infusion: Try adding dried herbs like rosemary or thyme for a fragrant, savory flavor that elevates your seeds.
- Cheesy Delight: Sprinkle nutritional yeast or grated Parmesan cheese after baking for a cheesy, umami flavor.
- Maple Glaze: Drizzle a bit of maple syrup before baking for a sweet and sticky treat that’s hard to resist!
Serving Suggestions for Baked Pumpkin Seeds
- Pair baked pumpkin seeds with a refreshing yogurt dip for a delightful contrast.
- Serve them alongside a crisp salad for added crunch and nutrition.
- Enjoy with a glass of iced tea or sparkling water for a light snack.
- Use as a topping for soups or chili to enhance flavor and texture.
- Present in a decorative bowl for a fun party snack that impresses guests!
FAQs about Baked Pumpkin Seeds
As you embark on your journey to make baked pumpkin seeds, you might have a few questions. Here are some common queries I’ve encountered, along with helpful answers!
Can I use raw pumpkin seeds for baking?
Absolutely! Raw pumpkin seeds are perfect for baking. Just make sure to rinse and dry them well before seasoning. This ensures they get that delightful crunch!
How do I store baked pumpkin seeds?
To keep your baked pumpkin seeds fresh, store them in an airtight container. They’ll stay crunchy for up to a week. Just be sure to keep them in a cool, dry place!
Can I make baked pumpkin seeds in advance?
Yes, you can! Baked pumpkin seeds make a great make-ahead snack. Just prepare them, let them cool, and store them in an airtight container. They’re perfect for busy days!
What are some creative ways to use baked pumpkin seeds?
Besides snacking, you can sprinkle baked pumpkin seeds on salads, soups, or even oatmeal for added texture and nutrition. They’re versatile and delicious!
Can I customize the seasonings for baked pumpkin seeds?
Definitely! The beauty of baked pumpkin seeds lies in their versatility. Feel free to experiment with different spices and flavors to find your perfect combination!
Final Thoughts
Making baked pumpkin seeds is more than just a cooking task; it’s a delightful experience that brings joy to your kitchen. The aroma of spices wafting through the air as they bake is simply irresistible. Plus, knowing you’ve created a healthy, crunchy snack that your family will love is incredibly rewarding. Whether you’re enjoying them during a cozy movie night or packing them for a busy day, these baked pumpkin seeds are sure to become a staple in your home. So, roll up your sleeves and let the crunching begin—your taste buds will thank you!