
Introduction to Apple Brownies
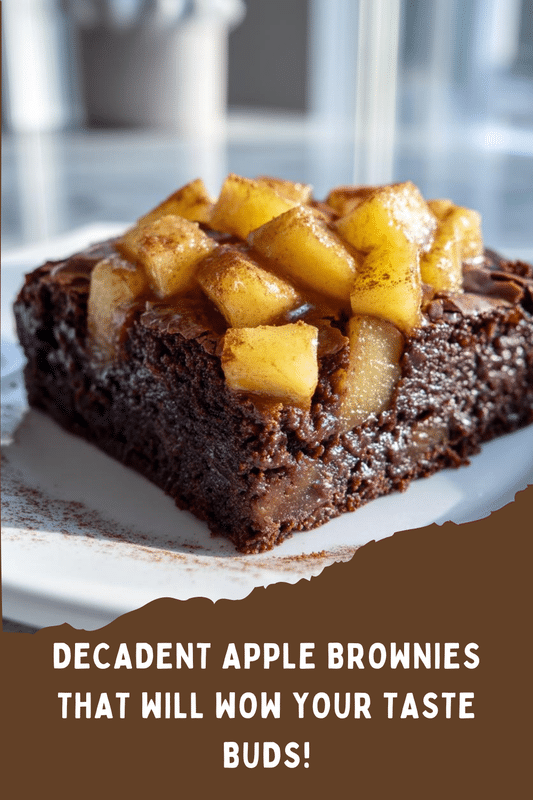
As a busy mom, I know how precious time can be, especially when it comes to whipping up something delicious. That’s why I’m excited to share my favorite recipe for Apple Brownies! These delightful treats combine the sweetness of fresh apples with rich chocolate flavor, making them a perfect dessert for any occasion. Whether you’re looking to impress your family or need a quick solution for a last-minute gathering, these brownies are sure to please. Trust me, once you try them, you’ll wonder how you ever lived without this easy recipe in your life!
PrintApple Brownies: Discover the Easiest Recipe Today!
Delicious and easy-to-make apple brownies that combine the sweetness of apples with rich chocolate flavor.
- Prep Time: 15 minutes
- Cook Time: 30 minutes
- Total Time: 45 minutes
- Yield: 12 servings
- Category: Dessert
- Method: Baking
- Cuisine: American
- Diet: Vegetarian
Ingredients
- 1 cup all-purpose flour
- 1/2 cup unsweetened cocoa powder
- 1/2 teaspoon baking powder
- 1/4 teaspoon salt
- 1/2 cup unsalted butter, melted
- 1 cup granulated sugar
- 2 large eggs
- 1 teaspoon vanilla extract
- 1 cup diced apples
- 1/2 cup chopped walnuts (optional)
Instructions
- Preheat the oven to 350°F (175°C) and grease a baking pan.
- In a bowl, mix together the flour, cocoa powder, baking powder, and salt.
- In another bowl, combine the melted butter and sugar, then add the eggs and vanilla extract.
- Gradually add the dry ingredients to the wet mixture until well combined.
- Fold in the diced apples and walnuts if using.
- Pour the batter into the prepared baking pan and spread evenly.
- Bake for 25-30 minutes or until a toothpick inserted in the center comes out clean.
- Let cool before cutting into squares and serving.
Notes
- For a richer flavor, use dark chocolate cocoa powder.
- Store leftovers in an airtight container for up to 3 days.
- These brownies can be served warm with ice cream for a delicious dessert.
Why You’ll Love This Apple Brownies
These Apple Brownies are a game-changer for busy days! They come together in just 45 minutes, making them a quick and satisfying treat. The combination of tender apples and rich chocolate creates a flavor explosion that will have everyone asking for seconds. Plus, they’re versatile enough to serve at family gatherings or cozy nights in. You’ll love how easy they are to make, and your loved ones will adore the taste!
Ingredients for Apple Brownies
Gathering the right ingredients is the first step to creating these scrumptious Apple Brownies. Here’s what you’ll need:
- All-purpose flour: This is the base of your brownies, giving them structure and a soft texture.
- Unsweetened cocoa powder: It adds that rich chocolate flavor we all crave, balancing the sweetness of the apples.
- Baking powder: A little leavening agent to help your brownies rise and become fluffy.
- Salt: Just a pinch enhances the flavors and brings out the sweetness.
- Unsalted butter: Melted butter adds moisture and richness, making your brownies decadent.
- Granulated sugar: This sweetener is essential for that delightful sweetness in every bite.
- Large eggs: They bind everything together and contribute to the brownies’ fudgy texture.
- Vanilla extract: A splash of vanilla elevates the flavor profile, making it even more irresistible.
- Diced apples: Fresh apples bring natural sweetness and a lovely texture to the brownies.
- Chopped walnuts (optional): For those who enjoy a bit of crunch, walnuts add a delightful contrast to the soft brownies.
For exact measurements, check the bottom of the article where you can find everything listed for easy printing. Happy baking!
How to Make Apple Brownies
Step 1: Preheat and Prepare
First things first, preheat your oven to 350°F (175°C). This step is crucial for achieving that perfect brownie texture. While the oven warms up, grab a baking pan and grease it well. You can use butter or cooking spray to ensure your brownies don’t stick. Trust me, there’s nothing worse than losing half your delicious creation to the pan!
Step 2: Mix Dry Ingredients
In a large mixing bowl, combine the all-purpose flour, unsweetened cocoa powder, baking powder, and salt. Whisk them together until they’re well blended. This step is important because it ensures that the leavening agent is evenly distributed. A good mix will help your Apple Brownies rise beautifully, giving them that delightful texture we all love!
Step 3: Combine Wet Ingredients
In another bowl, mix the melted unsalted butter and granulated sugar until they’re smooth and creamy. Then, add the large eggs and vanilla extract, whisking until everything is well combined. This mixture should be glossy and inviting. The melted butter adds richness, while the eggs help bind everything together, creating a luscious brownie batter.
Step 4: Combine Mixtures
Now, it’s time to bring the two mixtures together! Gradually add the dry ingredients to the wet mixture, stirring gently. You want to mix until just combined—overmixing can lead to tough brownies. The batter should be thick and fudgy, with no visible flour left. This is where the magic begins, as the flavors start to meld together beautifully!
Step 5: Fold in Apples and Walnuts
Next, fold in the diced apples and optional chopped walnuts. Use a spatula to gently incorporate them into the batter. This step adds a lovely texture and flavor contrast to your brownies. The apples will soften while baking, creating pockets of sweetness, while the walnuts provide a delightful crunch. It’s a match made in dessert heaven!
Step 6: Bake the Brownies
Pour the batter into your prepared baking pan, spreading it evenly. Pop it into the preheated oven and bake for 25-30 minutes. Keep an eye on them! You’ll know they’re done when a toothpick inserted in the center comes out clean. Once baked, let them cool in the pan for a bit before cutting them into squares. Enjoy the heavenly aroma wafting through your kitchen!
Tips for Success
- Use fresh apples for the best flavor and texture.
- Don’t overmix the batter; it should be thick and fudgy.
- For a richer taste, opt for dark chocolate cocoa powder.
- Let the brownies cool completely before cutting for cleaner squares.
- Experiment with different nuts or add chocolate chips for extra indulgence!
Equipment Needed
- Baking pan: A 9×9-inch square pan works best, but any similar size will do.
- Mixing bowls: Use two medium-sized bowls for mixing wet and dry ingredients.
- Whisk: A whisk is great for blending, but a fork can work in a pinch.
- Spatula: A rubber spatula helps fold in ingredients smoothly.
- Measuring cups and spoons: Essential for accurate ingredient measurements.
Variations
- Gluten-free: Substitute all-purpose flour with a gluten-free blend for a delicious alternative.
- Vegan: Replace eggs with flaxseed meal mixed with water and use a plant-based butter substitute.
- Spiced version: Add a teaspoon of cinnamon or nutmeg for a warm, cozy flavor.
- Chocolate chip addition: Stir in a cup of chocolate chips for an extra chocolatey treat.
- Fruit variations: Swap apples for pears or even mashed bananas for a different fruity twist.
Serving Suggestions
- Serve warm with a scoop of vanilla ice cream for a delightful contrast.
- Pair with a drizzle of caramel sauce for an extra touch of sweetness.
- Enjoy with a cup of coffee or tea for a cozy afternoon treat.
- Dust with powdered sugar for a beautiful presentation.
- Top with whipped cream and a sprinkle of cinnamon for added flair.
FAQs about Apple Brownies
Can I use other fruits in this recipe?
Absolutely! While apples are the star of this recipe, you can easily swap them for pears or even mashed bananas. Each fruit brings its own unique flavor and texture, making your Apple Brownies a delightful surprise every time!
How do I store leftover Apple Brownies?
To keep your brownies fresh, store them in an airtight container at room temperature for up to three days. If you want to keep them longer, you can freeze them for up to three months. Just make sure to wrap them well!
Can I make these brownies ahead of time?
Yes! These Apple Brownies are perfect for making ahead. Bake them a day or two in advance, and they’ll still taste delicious. Just remember to let them cool completely before storing.
What can I serve with Apple Brownies?
These brownies pair wonderfully with a scoop of vanilla ice cream or a drizzle of caramel sauce. You can also enjoy them with a warm cup of coffee or tea for a cozy treat!
Are Apple Brownies suitable for a gluten-free diet?
Yes! You can easily make these brownies gluten-free by substituting all-purpose flour with a gluten-free flour blend. Just be sure to check the other ingredients for any hidden gluten!
Final Thoughts
Making Apple Brownies is more than just baking; it’s about creating sweet memories in the kitchen. The delightful aroma that fills your home as they bake is simply irresistible. Each bite offers a perfect blend of chocolatey goodness and tender apple pieces, making them a treat everyone will love. Whether you’re sharing them with family or enjoying a quiet moment with a cup of tea, these brownies bring joy to any occasion. So, roll up your sleeves and dive into this easy recipe. I promise, you’ll be savoring every delicious moment!