
Introduction to Cinnamon Rolls
There’s something magical about the aroma of freshly baked cinnamon rolls wafting through the house. It’s like a warm hug on a chilly morning! As a busy mom, I know how precious those moments can be. These cinnamon rolls are not just a treat; they’re a quick solution for a hectic day or a delightful way to impress your loved ones. Whether you’re serving them for breakfast or as a sweet dessert, they’re sure to bring smiles all around. Trust me, once you try this recipe, you’ll want to make them again and again!
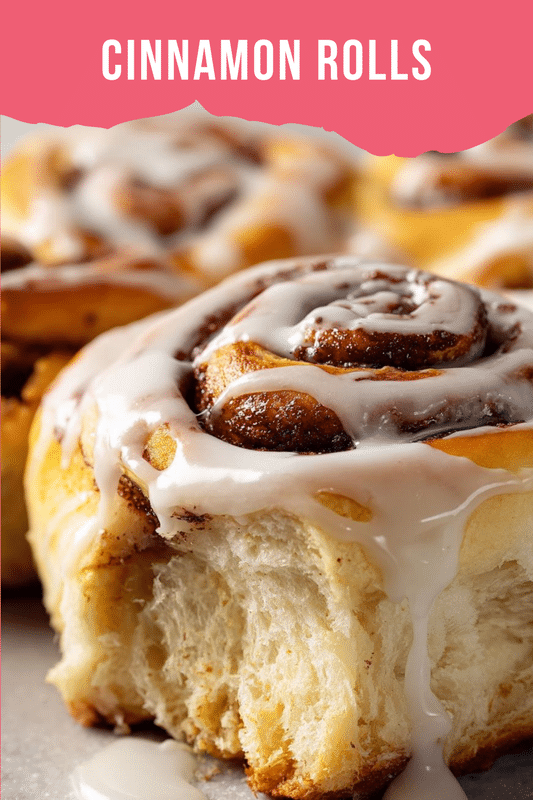
PrintCinnamon rolls that will wow your taste buds today!

Delicious and fluffy cinnamon rolls that are perfect for breakfast or dessert.
- Prep Time: 20 minutes
- Cook Time: 30 minutes
- Total Time: 1 hour 50 minutes
- Yield: 12 rolls
- Category: Dessert
- Method: Baking
- Cuisine: American
- Diet: Vegetarian
Ingredients
- 4 cups all-purpose flour
- 1 cup milk
- 1/2 cup sugar
- 1/2 cup butter, softened
- 2 eggs
- 1 packet active dry yeast
- 1 teaspoon salt
- 1 tablespoon ground cinnamon
- 1/2 cup brown sugar
- 1 cup powdered sugar (for icing)
- 2 tablespoons cream cheese (for icing)
- 1 tablespoon vanilla extract (for icing)
Instructions
- In a bowl, combine warm milk and yeast; let it sit for 5 minutes.
- Add sugar, butter, eggs, and salt to the yeast mixture and mix well.
- Gradually add flour until a dough forms.
- Knead the dough for about 5-10 minutes until smooth.
- Let the dough rise in a warm place for 1 hour or until doubled in size.
- Roll out the dough into a rectangle and spread softened butter over it.
- Sprinkle brown sugar and cinnamon evenly on top.
- Roll the dough tightly and cut into 12 equal pieces.
- Place the rolls in a greased baking dish and let them rise for another 30 minutes.
- Bake in a preheated oven at 350°F (175°C) for 25-30 minutes.
- For icing, mix powdered sugar, cream cheese, and vanilla until smooth and drizzle over warm rolls.
Notes
- For a richer flavor, use whole milk instead of skim milk.
- Make sure the yeast is fresh for the best rise.
- These rolls can be made ahead and frozen before baking.
Why You’ll Love This Cinnamon Rolls
These cinnamon rolls are a game-changer for busy mornings or cozy weekends. They’re incredibly easy to make, even for novice bakers. The fluffy texture and sweet, spiced flavor will have your family begging for more. Plus, the delightful aroma fills your home, creating a warm atmosphere. With just a little time and love, you can whip up a batch that feels like a hug in every bite!
Ingredients for Cinnamon Rolls
Gathering the right ingredients is the first step to creating these delightful cinnamon rolls. Here’s what you’ll need:
- All-purpose flour: The backbone of your dough, giving it structure and fluffiness.
- Milk: Adds moisture and richness. Whole milk works wonders for a creamier texture.
- Sugar: Sweetens the dough and helps with browning during baking.
- Butter: Softened butter adds flavor and tenderness to the rolls.
- Eggs: They enrich the dough, contributing to its soft texture.
- Active dry yeast: This little powerhouse makes your rolls rise and become fluffy.
- Salt: Enhances flavor and balances the sweetness.
- Ground cinnamon: The star of the show! It brings that warm, comforting flavor we all love.
- Brown sugar: Adds a deeper sweetness and a hint of caramel flavor.
- Powdered sugar: Essential for the icing, giving it that sweet, smooth finish.
- Cream cheese: A delicious addition to the icing, making it rich and creamy.
- Vanilla extract: A splash of vanilla elevates the flavor of the icing.
For those looking to switch things up, consider using whole wheat flour for a healthier twist or adding nuts for a delightful crunch. You can find the exact measurements for these ingredients at the bottom of the article, ready for printing!
How to Make Cinnamon Rolls
Now that you have your ingredients ready, let’s dive into the delightful process of making these cinnamon rolls. Follow these simple steps, and you’ll be rewarded with a batch of fluffy, sweet goodness!
Step 1: Prepare the Yeast Mixture
Start by warming your milk until it’s just lukewarm. Too hot, and you’ll kill the yeast! Sprinkle the active dry yeast over the warm milk and let it sit for about 5 minutes. This little waiting game allows the yeast to activate, getting ready to work its magic.
Step 2: Mix the Ingredients
Once your yeast is bubbly and frothy, it’s time to add the sugar, softened butter, eggs, and salt. Mix everything together until well combined. The butter should melt into the warm mixture, creating a lovely, rich base for your dough.
Step 3: Form the Dough
Now, gradually add the all-purpose flour, one cup at a time, until a soft dough forms. Don’t be afraid to get your hands in there! Knead the dough for about 5-10 minutes until it’s smooth and elastic. This is where the magic happens, turning your mixture into a beautiful dough.
Step 4: Let the Dough Rise
Place your kneaded dough in a greased bowl, cover it with a clean kitchen towel, and let it rise in a warm spot. You want it to double in size, which usually takes about an hour. This is the perfect time to sip your coffee and dream about those warm cinnamon rolls!
Step 5: Roll Out the Dough
Once your dough has risen, punch it down gently to release the air. Roll it out on a floured surface into a rectangle. Spread softened butter generously over the surface. This buttery layer is what makes each bite so delicious!
Step 6: Add Cinnamon and Sugar
Now comes the fun part! Sprinkle the brown sugar and ground cinnamon evenly over the buttered dough. The sweet aroma will start to fill your kitchen, and you’ll be tempted to dive right in!
Step 7: Shape the Rolls
Starting from one end, roll the dough tightly into a log. Once rolled, cut it into 12 equal pieces. I like to use a sharp knife or dental floss for a clean cut. Each piece will become a fluffy roll, ready to rise again!
Step 8: Second Rise
Place the cut rolls in a greased baking dish, leaving a little space between each one. Cover them again with a towel and let them rise for another 30 minutes. This second rise is crucial for that fluffy texture we all love.
Step 9: Bake the Rolls
Preheat your oven to 350°F (175°C). Once the rolls have risen, pop them in the oven and bake for 25-30 minutes. You’ll know they’re ready when they’re golden brown and your kitchen smells heavenly!
Step 10: Prepare the Icing
While the rolls are baking, mix the powdered sugar, cream cheese, and vanilla extract in a bowl until smooth. Once the rolls are out of the oven, drizzle this creamy icing over them while they’re still warm. It’s the perfect finishing touch!
Tips for Success
- Always check your yeast’s expiration date for the best rise.
- Use room temperature ingredients for a smoother dough.
- Don’t rush the rising time; it’s key for fluffy rolls.
- For extra flavor, try adding a pinch of nutmeg to the cinnamon mixture.
- Let the rolls cool slightly before icing for a perfect drizzle.
Equipment Needed
- Mixing bowl: A large bowl for combining ingredients. A sturdy pot works too!
- Rolling pin: Essential for rolling out the dough. A wine bottle can be a fun substitute!
- Baking dish: A 9×13 inch dish is perfect. Any oven-safe dish will do.
- Measuring cups and spoons: For accurate ingredient measurements. A kitchen scale is a great alternative.
- Kitchen towel: To cover the dough while it rises. A clean cloth or plastic wrap works as well.
Variations
- Nutty Delight: Add chopped walnuts or pecans to the cinnamon and sugar mixture for a delightful crunch.
- Fruit-Filled: Incorporate fresh or dried fruits like raisins, cranberries, or apples for a fruity twist.
- Gluten-Free: Substitute all-purpose flour with a gluten-free blend to accommodate dietary needs.
- Maple Icing: Swap the vanilla icing for a maple glaze by using maple syrup instead of vanilla extract.
- Chocolate Swirl: Mix cocoa powder into the brown sugar for a chocolatey version that’s sure to please!
Serving Suggestions
- Pair your cinnamon rolls with a hot cup of coffee or a refreshing glass of orange juice for a delightful breakfast.
- Serve them warm on a beautiful platter, drizzled with icing for an eye-catching presentation.
- For a cozy brunch, add fresh fruit or yogurt on the side.
FAQs about Cinnamon Rolls
Can I make cinnamon rolls ahead of time?
Absolutely! You can prepare the rolls and place them in the baking dish, then cover and refrigerate them overnight. In the morning, let them rise for about 30 minutes before baking. This way, you can enjoy fresh cinnamon rolls without the morning rush!
What can I do if my cinnamon rolls don’t rise?
If your rolls don’t rise, it might be due to inactive yeast. Always check the expiration date on your yeast packet. If it’s fresh, ensure your milk wasn’t too hot when activating the yeast. A warm, draft-free environment is also essential for rising.
How should I store leftover cinnamon rolls?
Store any leftover cinnamon rolls in an airtight container at room temperature for up to 2 days. For longer storage, you can freeze them. Just wrap each roll tightly in plastic wrap and place them in a freezer bag. They’ll be ready to enjoy later!
Can I use a different type of icing?
Of course! While the cream cheese icing is delicious, you can experiment with different flavors. A simple glaze made from powdered sugar and milk or a maple syrup drizzle can add a unique twist to your cinnamon rolls.
What’s the best way to reheat cinnamon rolls?
The best way to reheat cinnamon rolls is in the microwave for about 10-15 seconds. If you prefer a crispy exterior, pop them in the oven at 350°F (175°C) for a few minutes. Either way, they’ll taste just as delightful as when they were fresh!
Final Thoughts
Making these cinnamon rolls is more than just baking; it’s about creating memories. The joy of pulling a warm, fluffy roll from the oven and drizzling it with creamy icing is a moment worth savoring. Whether you’re sharing them with family at breakfast or enjoying one with your afternoon coffee, each bite is a reminder of love and comfort. So, roll up your sleeves and dive into this delightful adventure. Trust me, the smiles and happy sighs that follow will make every minute spent in the kitchen worthwhile!