
Introduction to Cheesy Corn Poppers
As a busy mom, I know how precious time can be, especially when it comes to meal prep. That’s why I absolutely adore these Cheesy Corn Poppers! They’re not just a snack; they’re a delightful treat that can turn any ordinary day into a mini celebration. Imagine the joy on your loved ones’ faces when they bite into these golden, cheesy morsels. Perfect for parties or a quick appetizer, these poppers are a simple solution that brings smiles and satisfaction. Trust me, once you try them, they’ll become a staple in your kitchen!
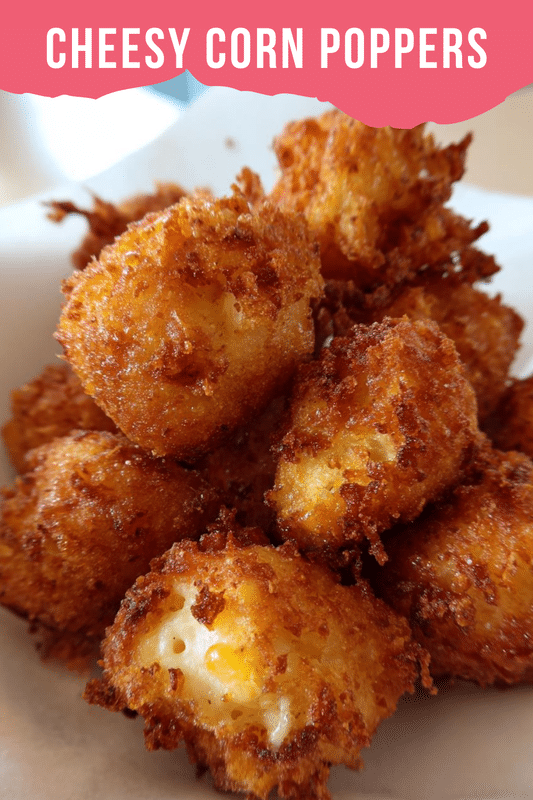
PrintCheesy Corn Poppers: A Delightful Snack Recipe!

Cheesy Corn Poppers are a delightful snack made with sweet corn and cheese, perfect for parties or as a quick appetizer.
- Prep Time: 15 minutes
- Cook Time: 10 minutes
- Total Time: 25 minutes
- Yield: 4 servings
- Category: Snack
- Method: Frying
- Cuisine: American
- Diet: Vegetarian
Ingredients
- 1 cup sweet corn
- 1 cup shredded cheese (cheddar or mozzarella)
- 1/2 cup all-purpose flour
- 1/4 cup cornmeal
- 1/2 teaspoon baking powder
- 1/2 teaspoon salt
- 1/4 teaspoon black pepper
- 1/4 cup milk
- 1 egg
- Oil for frying
Instructions
- In a mixing bowl, combine sweet corn, shredded cheese, flour, cornmeal, baking powder, salt, and black pepper.
- In another bowl, whisk together milk and egg.
- Pour the milk mixture into the corn mixture and stir until well combined.
- Heat oil in a frying pan over medium heat.
- Drop spoonfuls of the mixture into the hot oil and fry until golden brown on both sides.
- Remove from oil and drain on paper towels.
- Serve warm with your favorite dipping sauce.
Notes
- For a spicier version, add chopped jalapeños to the mixture.
- These can be baked instead of fried for a healthier option.
- Store leftovers in an airtight container in the refrigerator for up to 2 days.
Why You’ll Love This Cheesy Corn Poppers
These Cheesy Corn Poppers are a game-changer for busy days! They come together in just 25 minutes, making them a quick and satisfying snack. The combination of sweet corn and gooey cheese creates a flavor explosion that’s hard to resist. Plus, they’re versatile enough to please even the pickiest eaters. Whether you’re hosting a gathering or just need a tasty treat, these poppers are sure to impress!
Ingredients for Cheesy Corn Poppers
Gathering the right ingredients is the first step to creating these delightful Cheesy Corn Poppers. Here’s what you’ll need:
- Sweet Corn: The star of the show! Fresh or frozen corn adds a natural sweetness and texture.
- Shredded Cheese: Cheddar or mozzarella works wonders here. Choose your favorite for that melty goodness.
- All-Purpose Flour: This helps bind everything together, giving the poppers a nice structure.
- Cornmeal: Adds a delightful crunch and enhances the corn flavor.
- Baking Powder: A little lift to make your poppers light and airy.
- Salt: Essential for bringing out the flavors in your ingredients.
- Black Pepper: A dash of spice to elevate the taste.
- Milk: This moistens the mixture, ensuring a creamy texture.
- Egg: Acts as a binder, helping everything stick together beautifully.
- Oil for Frying: Choose a neutral oil like vegetable or canola for frying to golden perfection.
For those who like a kick, consider adding chopped jalapeños for a spicy twist! If you’re looking for a healthier option, these poppers can also be baked instead of fried. You can find the exact quantities for each ingredient at the bottom of the article, ready for printing!
How to Make Cheesy Corn Poppers
Now that you have all your ingredients ready, let’s dive into the fun part—making these Cheesy Corn Poppers! Follow these simple steps, and you’ll have a delicious snack in no time.
Step 1: Prepare the Mixture
In a mixing bowl, combine the sweet corn, shredded cheese, all-purpose flour, cornmeal, baking powder, salt, and black pepper. Stir everything together until it’s well mixed. The aroma of sweet corn and cheese will already start to make your mouth water!
Step 2: Mix Wet Ingredients
In another bowl, whisk together the milk and egg until they’re fully combined. This mixture will add moisture and help bind everything together. It’s like a little hug for your poppers!
Step 3: Combine Mixtures
Pour the milk mixture into the corn mixture. Stir gently until everything is well combined. You want a thick batter that holds together but isn’t too dry. If it feels too thick, a splash more milk can help!
Step 4: Heat the Oil
Heat oil in a frying pan over medium heat. You want it hot enough that a drop of batter sizzles when it hits the oil. This is crucial for achieving that golden, crispy exterior. Patience is key here—don’t rush it!
Step 5: Fry the Poppers
Drop spoonfuls of the mixture into the hot oil. Fry them until they’re golden brown on both sides, about 3-4 minutes per side. Keep an eye on them; they can go from perfect to overdone in a flash!
Step 6: Drain and Serve
Once they’re golden, remove the poppers from the oil and drain them on paper towels. This helps soak up any excess oil. Serve them warm with your favorite dipping sauce, and watch them disappear!
Tips for Success
- Make sure your oil is hot enough before frying; this ensures a crispy texture.
- Don’t overcrowd the pan; fry in batches for even cooking.
- Experiment with different cheeses for unique flavors.
- For a healthier option, bake the poppers at 400°F for 15-20 minutes.
- Serve with a variety of dipping sauces to please everyone!
Equipment Needed
- Mixing Bowls: Use any size you have on hand; a large bowl works best for mixing.
- Whisk: A fork can also do the job if you don’t have a whisk.
- Frying Pan: A deep skillet is ideal, but a regular pan works too.
- Slotted Spoon: Perfect for removing the poppers from the oil; a regular spoon can work in a pinch.
- Paper Towels: Essential for draining excess oil; a clean kitchen cloth can substitute.
Variations of Cheesy Corn Poppers
- Spicy Jalapeño Poppers: Add chopped jalapeños to the mixture for a fiery kick that spice lovers will adore.
- Herbed Delight: Mix in fresh herbs like cilantro or chives for a burst of freshness and flavor.
- Cheesy Veggie Poppers: Incorporate finely chopped bell peppers or spinach for added nutrition and color.
- Gluten-Free Option: Substitute all-purpose flour with a gluten-free blend to accommodate dietary needs.
- Cheese Lovers: Experiment with different cheeses like pepper jack or feta for unique flavor profiles.
Serving Suggestions for Cheesy Corn Poppers
- Fresh Salad: Pair with a crisp green salad for a refreshing contrast.
- Dipping Sauces: Serve with ranch, salsa, or a zesty aioli for extra flavor.
- Drinks: Complement with iced tea or a light beer for a casual vibe.
- Presentation: Arrange on a colorful platter for an eye-catching display.
FAQs about Cheesy Corn Poppers
Can I bake Cheesy Corn Poppers instead of frying them?
Absolutely! For a healthier twist, you can bake them at 400°F for about 15-20 minutes. Just make sure to spray them lightly with oil for that golden finish!
What dipping sauces pair well with Cheesy Corn Poppers?
These poppers are delicious with a variety of dipping sauces! Try ranch, salsa, or a spicy aioli to elevate the flavor. Your guests will love the options!
How do I store leftovers?
Store any leftovers in an airtight container in the refrigerator for up to 2 days. Reheat them in the oven for a few minutes to regain their crispiness!
Can I use frozen corn for this recipe?
Yes, frozen corn works perfectly! Just thaw and drain it before mixing. It’s a great time-saver and still delivers that sweet corn flavor.
What can I add to make these poppers more flavorful?
Feel free to get creative! Adding chopped jalapeños, fresh herbs, or even different types of cheese can enhance the flavor and make them your own.
Final Thoughts
Making Cheesy Corn Poppers is more than just cooking; it’s about creating joyful moments in the kitchen. The delightful aroma that fills your home as they fry is simply irresistible. Watching your family and friends savor each bite brings a warmth to my heart that’s hard to describe. These poppers are not only quick and easy but also a canvas for your creativity. Whether you stick to the classic recipe or add your own twist, they’re sure to become a beloved snack. So, roll up your sleeves and enjoy the delicious journey of making these cheesy delights!