
Bright, zesty, and downright fun.
There’s something about cake pops that pulls me back to my childhood — those tiny bites on sticks that pack a punch of flavor and whimsy. But when you toss lemon into the mix, suddenly, it’s not just dessert; it’s a little celebration in your mouth. I remember the first time I tried crafting lemon cake pops: the batter, tangy and fresh, dancing on my taste buds before being dipped in smooth white chocolate and crowned with a riot of sprinkles. That contrast between tart and sweet? Chef’s kiss.
Designing these little orbs isn’t just baking; it’s playing dress-up with your food. Whether it’s a casual brunch or a flash party moment, these lemon cake pops bring the house down. The trick? Getting the white chocolate coating flawless—no drips or weird lumps—and then hitting it just right with those sprinkles before the glaze sets. It’s all about timing and a steady hand, or as I call it, keeping your cool in the kitchen chaos.
Ready to get your hands sticky and your kitchen smelling like citrus heaven? Let’s dive in and make something truly show-stopping.
If you enjoy creative baking, check out our Classic Banana Cake Recipe: Moist, Flavorful & Easy to Bake for a delicious treat to try next.
Real Life Benefits of Making Lemon Cake Pops
- Perfect party pleasers — these cake pops are easy to hold and eat, making them a no-mess option for any gathering.
- The tangy lemon zing cuts through the sweetness, keeping your taste buds from going into sugar overload mode.
- They freeze like a charm, so you can prep ahead and pull them out when the craving hits or guests arrive unexpectedly.
- Kids love sticking their hands into the sprinkles — it’s a mini sensory party that doubles as dessert decoration.
- Because they’re bite-sized, you can enjoy a quick sweet hit without the guilt of a full slice of cake staring back at you.
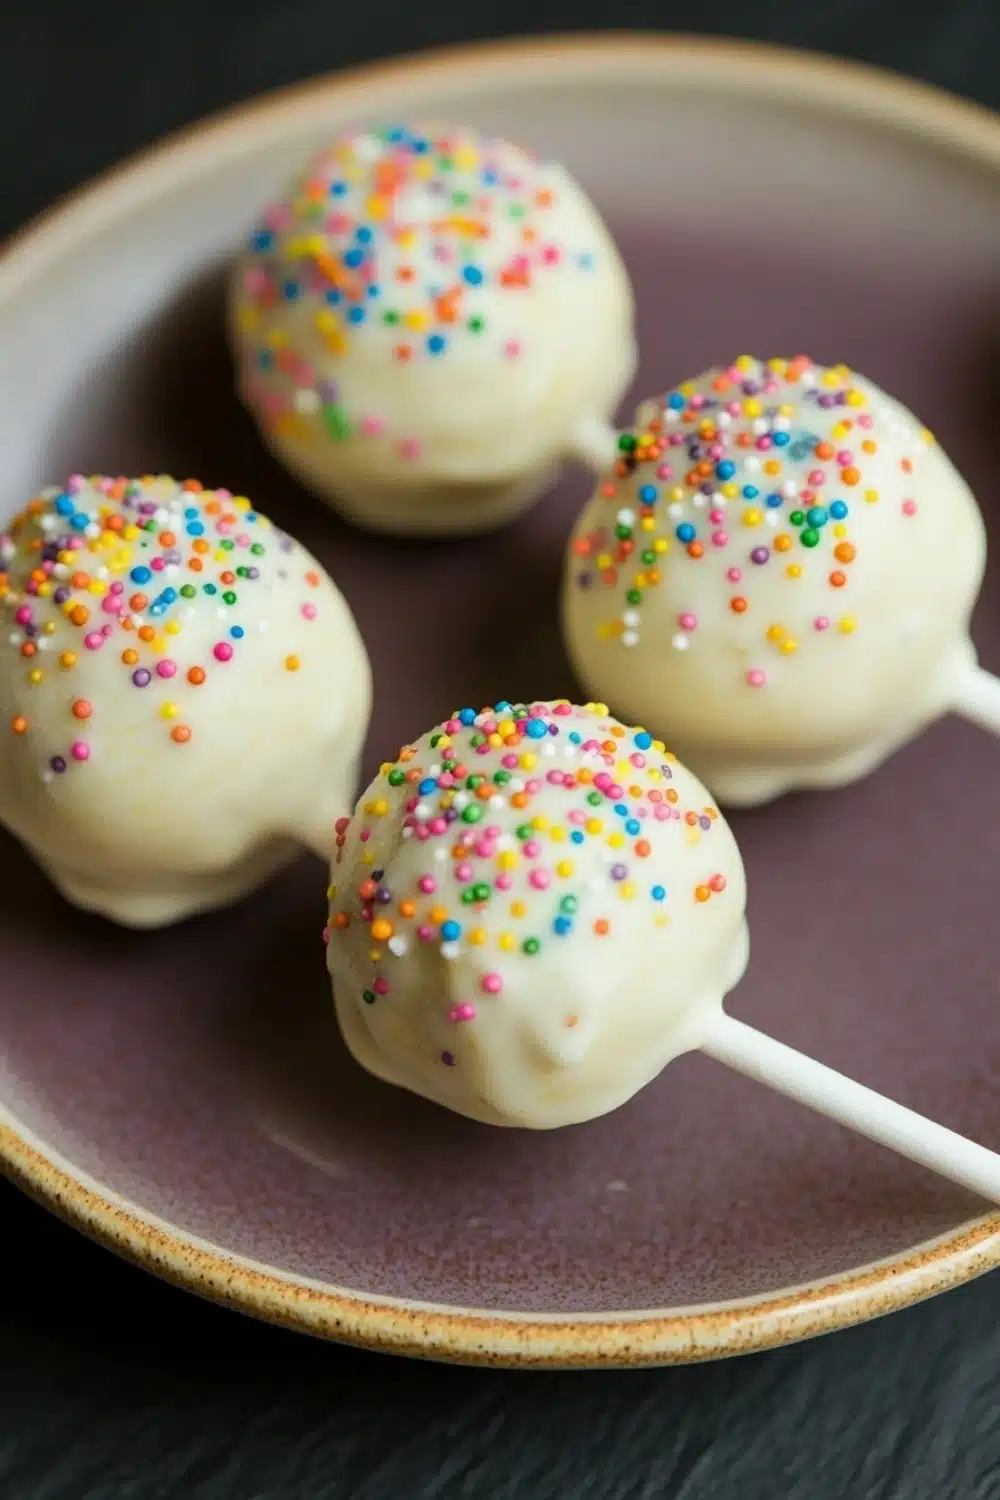
Lemon Cake Pops

Delightful lemon cake pops with a tangy lemon flavor, coated in a smooth white chocolate glaze and decorated with colorful sprinkles. Perfect for parties or a sweet treat!
- Prep Time: 30 minutes
- Cook Time: 25 minutes
- Total Time: 55 minutes
- Yield: 24 cake pops
Ingredients
1 cup all-purpose flour
1/2 teaspoon baking powder
1/4 teaspoon baking soda
1/4 teaspoon salt
1/2 cup granulated sugar
1/4 cup unsalted butter, softened
2 large eggs
1/4 cup sour cream
2 tablespoons fresh lemon juice
1 tablespoon lemon zest
1 teaspoon vanilla extract
8 ounces white chocolate, chopped
24 white lollipop sticks
1/2 cup rainbow sprinkles
Instructions
Preheat the oven to 350°F (175°C). Line an 8×8-inch baking pan with parchment paper.
In a medium bowl, whisk together the flour, baking powder, baking soda, and salt. Set aside.
In a large bowl, cream the softened butter and granulated sugar together until light and fluffy, about 3 minutes.
Add the eggs one at a time, beating well after each addition.
Mix in the sour cream, fresh lemon juice, lemon zest, and vanilla extract until combined.
Gradually add the dry ingredients to the wet ingredients, mixing until just combined. Do not overmix.
Pour the batter into the prepared baking pan and spread evenly.
Bake for 22-25 minutes or until a toothpick inserted into the center comes out clean.
Allow the cake to cool completely in the pan on a wire rack.
Once cooled, crumble the cake into a large bowl until fine crumbs form.
Melt 4 ounces of white chocolate in a microwave-safe bowl in 30-second intervals, stirring between each, until smooth.
Add about 3 tablespoons of melted white chocolate to the cake crumbs and mix until the mixture holds together when pressed.
Roll the mixture into 24 equal-sized balls and place them on a parchment-lined baking sheet.
Insert a lollipop stick into each cake ball, about halfway through.
Freeze the cake pops for 15 minutes to firm up.
Melt the remaining 4 ounces of white chocolate in the microwave as before until smooth.
Dip each cake pop into the melted white chocolate, allowing the excess to drip off.
Immediately sprinkle the coated cake pops with rainbow sprinkles before the chocolate sets.
Place the cake pops upright in a styrofoam block or a cake pop stand to dry completely, about 30 minutes.
Once set, serve or store as desired.
Explore more:
Breakfast Recipes
Mastering Lemon Cake Pops: Insider Tips & Tricks
The Cake Crumb Consistency—Why It’s Your Make-or-Break Moment
Here’s the real kicker: getting your cake crumbs just right isn’t about pulverizing your cake into dust. No sir. You want fine crumbs that still have a subtle texture, like the sandy bottom of a lemon beach, not a powdery mess that turns your pops into concrete balls. I’ve seen folks toss a whole cake into the food processor and end up with a dough so dense it might crumble a tooth instead of a bite. Instead, crumble by hand or lightly pulse in a processor—aim for a texture that holds together when you squeeze it but still feels soft. If it’s too dry, it’ll crack; too wet, and you’re in a sticky situation that’s hard to shape.
Swapping Ingredients: When Life Gives You No Lemons…
So, you’re out of fresh lemons? Don’t sweat it. Lemon zest and juice are the backbone of that zesty punch, but a good stand-in can save your day. Use 1 tablespoon of bottled lemon juice and a teaspoon of lemon extract to mimic that brightness, but be sparing—too much can tip your batter into bitter territory. Sour cream lends moisture and tang; if you’re dairy-averse or just out, Greek yogurt is your next-best pal. Butter can be swapped with equal parts of neutral oil—like grapeseed—to keep your cake moist without overpowering flavors. Just remember: these swaps shift the chemistry a bit, so keep an eye on batter texture, adjusting flour or liquid if it feels off-kilter.
Fixing the Dreaded Chocolate Coating Fails: Cracks, Clumps, and More
Nothing kills the vibe like a cracked or clumpy white chocolate shell. Here’s the lowdown—white chocolate is a diva. Microwave melting in 30-second bursts with stirring in between is your best bet to keep it smooth. Overheating causes it to seize—grainy, dry, and useless. If that happens, pop in a tablespoon of vegetable oil and stir like mad; this often brings it back to life. When dipping your cake pops, tap off the excess glaze gently but swiftly—too much chocolate means drips and lumps. Plunge your pops straight and steady, then let gravity do its thing while you hold them upright. I swear by using a styrofoam block for drying—no wobble, no warpage. Pro tip: avoid the fridge for drying if you can; rapid cooling can cause cracking as the chocolate contracts.
Lemon Cake Pops FAQs
Q1: Can I make these cake pops ahead of time?
Absolutely! You can prepare them a day or two in advance. Just keep them chilled in an airtight container and bring to room temp before serving.
Q2: Do I have to use white chocolate?
Nope! You can swap white chocolate for any candy melts or even regular chocolate if you’re feeling adventurous. Just pick something that melts smoothly for that perfect dip.
Q3: What’s the secret to getting the cake pops to hold together?
It’s all about the right moisture balance. That little bit of melted chocolate mixed into the crumbs works wonders to bind everything without making the texture gummy. Don’t skip chilling them before dipping — it keeps the shape rock solid.
Q4: Can I freeze these for longer storage?
Yes, you can freeze cake pops wrapped tightly in plastic wrap and stored in an airtight container for up to a month. When ready, thaw overnight in the fridge and bring to room temperature before serving.
Q5: Any tips for neat and clean dipping?
Use a tall glass for melting the chocolate and tap off excess by gently tapping the stick on the rim. Rotate the pop slowly to avoid drips pooling below. If your chocolate thickens, heat it back up briefly to keep it fluid.