
Introduction to Fun & Easy Graveyard Brownies for Halloween
As the leaves turn and the air gets crisp, I can’t help but get excited about Halloween! This time of year brings a delightful mix of spooky fun and sweet treats. That’s why I’m thrilled to share my recipe for Fun & Easy Graveyard Brownies for Halloween. These brownies are not just a quick solution for a busy day; they’re a way to impress your loved ones with minimal effort. With rich chocolate flavor and playful decorations, they’re sure to be a hit at any gathering. Let’s dive into this deliciously spooky adventure!
PrintFun & Easy Graveyard Brownies for Halloween Awaits You!

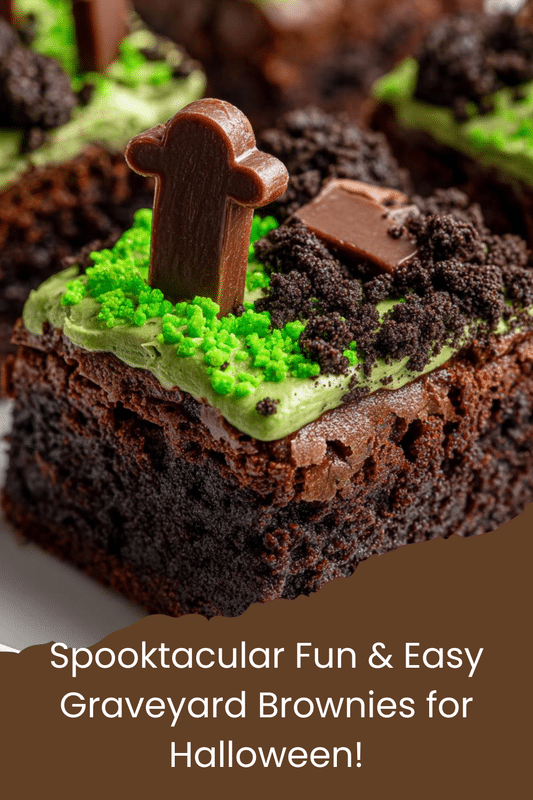
These Fun & Easy Graveyard Brownies are a delightful Halloween treat that combines rich chocolate brownies with spooky decorations, perfect for parties and gatherings.
- Prep Time: 15 minutes
- Cook Time: 30 minutes
- Total Time: 45 minutes
- Yield: 12 servings
- Category: Dessert
- Method: Baking
- Cuisine: American
- Diet: Vegetarian
Ingredients
- 1 box of brownie mix
- Ingredients required for brownie mix (usually eggs, oil, and water)
- Chocolate frosting
- Oreo cookies
- Green candy melts
- Gummy worms
- Edible eyes
Instructions
- Preheat the oven and prepare the brownie mix according to package instructions.
- Pour the brownie batter into a greased baking pan and bake as directed.
- Once baked, let the brownies cool completely.
- Spread a layer of chocolate frosting over the cooled brownies.
- Crush Oreo cookies and sprinkle them over the frosting to create a ‘dirt’ effect.
- Melt green candy melts and drizzle them over the brownies.
- Decorate with gummy worms and edible eyes to create a spooky graveyard scene.
- Cut into squares and serve for Halloween festivities.
Notes
- For a more intense chocolate flavor, consider adding chocolate chips to the brownie mix.
- Feel free to customize decorations based on your Halloween theme.
- Store leftovers in an airtight container for up to 3 days.
Why You’ll Love This Fun & Easy Graveyard Brownies for Halloween
These Fun & Easy Graveyard Brownies for Halloween are a lifesaver for busy moms like me! They come together in just 45 minutes, making them perfect for last-minute parties or school events. The rich chocolate flavor is irresistible, and the spooky decorations add a fun twist that kids adore. Plus, you can customize them to fit your Halloween theme, ensuring everyone leaves with a smile and a sweet treat!
Ingredients for Fun & Easy Graveyard Brownies for Halloween
Gathering the right ingredients is half the fun! Here’s what you’ll need to whip up these delightful brownies:
- Brownie mix: The star of the show! A box mix saves time and ensures a rich, fudgy base.
- Eggs, oil, and water: These are the usual suspects needed to bring your brownie mix to life. Check the box for specifics!
- Chocolate frosting: A smooth layer of chocolate goodness that adds sweetness and helps hold the decorations.
- Oreo cookies: Crushed to create a ‘dirt’ effect, they add a delightful crunch and a hint of creaminess.
- Green candy melts: Melted and drizzled on top, they give a spooky, vibrant touch to your graveyard scene.
- Gummy worms: These creepy crawlers are a must for that authentic graveyard feel. Kids love them!
- Edible eyes: These little guys add a fun, whimsical touch, making your brownies come alive!
Feel free to get creative! You can swap out the gummy worms for other candies or use different colors of candy melts to match your Halloween theme. For exact quantities, check the bottom of the article where you can find everything you need for printing. Happy baking!
How to Make Fun & Easy Graveyard Brownies for Halloween
Step 1: Preheat and Prepare
First things first, let’s get that oven preheating to 350°F (or whatever your brownie mix suggests). While it warms up, grab your brownie mix and follow the package instructions. Usually, you’ll need to mix in some eggs, oil, and water. I love the smell of chocolate wafting through the kitchen! It’s like a warm hug on a chilly day. Make sure everything is well combined for that fudgy texture we all crave.
Step 2: Bake the Brownies
Now, pour that luscious brownie batter into a greased baking pan. I like to use a 9×13 inch pan for the perfect thickness. Spread it evenly, and then pop it into the oven. Bake according to the package directions, usually around 30 minutes. The aroma will fill your home, making it hard to resist sneaking a taste! Just remember, a toothpick should come out with a few moist crumbs when they’re done.
Step 3: Cool the Brownies
Once your brownies are baked to perfection, it’s crucial to let them cool completely. I know, waiting is tough! But trust me, frosting warm brownies is a recipe for a gooey mess. Let them sit for about 30 minutes, and use this time to plan your spooky decorations. The anticipation makes it even more fun!
Step 4: Frost the Brownies
After your brownies have cooled, it’s time to spread a generous layer of chocolate frosting on top. Use a spatula to create a smooth, even layer. This frosting is like the icing on the cake—literally! It not only adds sweetness but also acts as the glue for our graveyard decorations. Don’t be shy; make it thick and luscious!
Step 5: Create the ‘Dirt’ Effect
Next, grab those Oreo cookies and crush them into fine crumbs. You can use a food processor or just place them in a zip-top bag and smash away! Sprinkle the crushed Oreos over the frosting to create a ‘dirt’ effect. It’s like a little graveyard landscape right on your brownies! The contrast of the dark crumbs against the chocolate frosting is simply delightful.
Step 6: Add Spooky Decorations
Now for the fun part! Melt your green candy melts according to the package instructions. Once melted, drizzle them over the brownies in a spooky pattern. Then, it’s time to add the gummy worms and edible eyes. Place the worms wriggling out of the ‘dirt’ and scatter the eyes around for a playful touch. Your graveyard scene is coming to life, and it’s looking deliciously creepy!
Step 7: Cut and Serve
Finally, it’s time to cut your brownies into squares. I like to use a sharp knife for clean edges. Serve them up on a festive platter, and watch the smiles appear! These Fun & Easy Graveyard Brownies for Halloween are sure to be a hit at any gathering. Enjoy the spooky season with a sweet treat!
Tips for Success
- Always let brownies cool completely before frosting to avoid a gooey mess.
- Use a sharp knife to cut brownies for clean, neat squares.
- Experiment with different candies for unique decorations.
- Store leftovers in an airtight container to keep them fresh.
- For extra chocolate flavor, add chocolate chips to the brownie mix!
Equipment Needed
- Baking pan: A 9×13 inch pan works best, but an 8×8 inch pan is fine for thicker brownies.
- Mixing bowl: Any large bowl will do for mixing your brownie batter.
- Spatula: A rubber spatula is perfect for spreading frosting evenly.
- Food processor or zip-top bag: Use either to crush Oreo cookies easily.
- Microwave-safe bowl: For melting the green candy melts.
Variations
- Gluten-Free Option: Use a gluten-free brownie mix to make these brownies suitable for those with gluten sensitivities.
- Nutty Twist: Add chopped nuts like walnuts or pecans to the brownie batter for an extra crunch.
- Vegan Version: Substitute eggs with applesauce or flaxseed meal and use a vegan brownie mix.
- Minty Flavor: Incorporate mint extract into the brownie batter for a refreshing twist.
- Colorful Candy Melts: Use different colors of candy melts to match your Halloween theme or to create a rainbow effect!
Serving Suggestions
- Pair with Milk: A glass of cold milk complements the rich chocolate flavor perfectly.
- Halloween-Themed Plates: Serve on spooky plates or platters to enhance the festive vibe.
- Garnish with Sprinkles: Add Halloween-themed sprinkles for an extra pop of color.
- Serve with Ice Cream: A scoop of vanilla ice cream on the side makes it a decadent treat!
FAQs about Fun & Easy Graveyard Brownies for Halloween
Can I make these brownies ahead of time?
Absolutely! You can bake the brownies a day in advance. Just store them in an airtight container after they cool completely. Frost and decorate them on the day you plan to serve for the best presentation.
What if I don’t have green candy melts?
No worries! You can use any color of candy melts you have on hand. White chocolate or even melted chocolate can work as a substitute. Just drizzle it on for that spooky effect!
How do I store leftover brownies?
Store any leftover Fun & Easy Graveyard Brownies for Halloween in an airtight container at room temperature. They’ll stay fresh for up to three days. If you want to keep them longer, consider freezing them!
Can I customize the decorations?
<pDefinitely! Feel free to get creative with your decorations. Use different candies, sprinkles, or even edible glitter to match your Halloween theme. The more fun, the better!
Are these brownies suitable for kids?
<pYes! These brownies are kid-friendly and perfect for Halloween parties. Just keep an eye on the gummy worms and edible eyes, as some little ones might be sensitive to certain ingredients. Enjoy the spooky fun!
Final Thoughts
Creating these Fun & Easy Graveyard Brownies for Halloween is more than just baking; it’s about making memories with your loved ones. The joy on your kids’ faces as they help decorate is priceless. Plus, the delightful aroma of chocolate fills your home, wrapping everyone in a warm embrace. These brownies are a perfect blend of spooky and sweet, making them a highlight of any Halloween gathering. So, roll up your sleeves, gather your ingredients, and let the fun begin! I promise, these brownies will be a treat everyone will remember long after the ghosts and goblins have gone.