
Introduction to Gingerbread Crinkle Cookies
As the holiday season approaches, I find myself craving the warm, spicy aroma of freshly baked cookies wafting through my home. That’s where these delightful Gingerbread Crinkle Cookies come in! They’re not just any cookies; they’re a quick solution for busy days filled with holiday hustle. With their crinkled tops and rich flavors, they’re sure to impress your loved ones. Plus, they’re easy to whip up, making them perfect for those moments when you need a sweet treat without the fuss. Trust me, these cookies will become a cherished part of your holiday traditions!
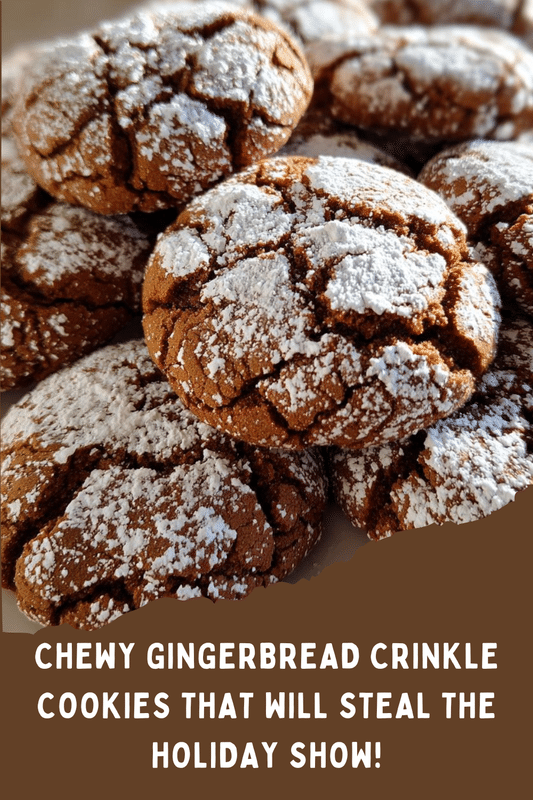
PrintGingerbread Crinkle Cookies: Discover the Perfect Recipe!

Deliciously spiced gingerbread cookies with a crinkled appearance, perfect for the holiday season.
- Prep Time: 30 minutes
- Cook Time: 12 minutes
- Total Time: 42 minutes
- Yield: 24 cookies
- Category: Dessert
- Method: Baking
- Cuisine: American
- Diet: Vegetarian
Ingredients
- 2 1/4 cups all-purpose flour
- 1 teaspoon baking soda
- 1 tablespoon ground ginger
- 1 tablespoon ground cinnamon
- 1/2 teaspoon ground cloves
- 1/2 teaspoon salt
- 3/4 cup unsalted butter, softened
- 1 cup brown sugar, packed
- 1/2 cup molasses
- 1 large egg
- 1 teaspoon vanilla extract
- 1/2 cup powdered sugar for rolling
Instructions
- Preheat your oven to 350°F (175°C).
- In a bowl, whisk together flour, baking soda, ginger, cinnamon, cloves, and salt.
- In another bowl, cream together the butter and brown sugar until light and fluffy.
- Add molasses, egg, and vanilla extract to the butter mixture and mix well.
- Gradually add the dry ingredients to the wet ingredients, mixing until just combined.
- Chill the dough in the refrigerator for at least 30 minutes.
- Once chilled, scoop out dough and roll into balls, then roll in powdered sugar.
- Place on a baking sheet lined with parchment paper, spacing them about 2 inches apart.
- Bake for 10-12 minutes or until the edges are set and the tops are crinkled.
- Allow to cool on the baking sheet for a few minutes before transferring to a wire rack to cool completely.
Notes
- For a spicier cookie, increase the amount of ginger and cinnamon.
- Store cookies in an airtight container for up to a week.
- These cookies can be frozen for up to 3 months.
Why You’ll Love This Gingerbread Crinkle Cookies
These Gingerbread Crinkle Cookies are a delightful blend of ease and flavor. They come together quickly, making them perfect for busy moms like us. The rich spices create a cozy taste that warms the heart, while the crinkled tops add a charming touch. Plus, they’re a hit with both kids and adults, ensuring smiles all around. You’ll love how they fill your home with holiday cheer!
Ingredients for Gingerbread Crinkle Cookies
Gathering the right ingredients is the first step to creating these delightful Gingerbread Crinkle Cookies. Here’s what you’ll need:
- All-purpose flour: This is the base of your cookies, providing structure and a soft texture.
- Baking soda: A leavening agent that helps the cookies rise and achieve that perfect crinkle.
- Ground ginger: The star spice that gives these cookies their signature warmth and flavor.
- Ground cinnamon: Adds a sweet, aromatic touch that complements the ginger beautifully.
- Ground cloves: A little goes a long way, adding depth and a hint of earthiness.
- Salt: Enhances the flavors and balances the sweetness of the cookies.
- Unsalted butter: Softened butter creates a rich, creamy texture and helps the cookies spread.
- Brown sugar: Packed with moisture, it gives the cookies a chewy texture and a hint of caramel flavor.
- Molasses: This is what makes gingerbread cookies truly special, adding a deep, rich sweetness.
- Egg: Acts as a binder, helping to hold everything together while adding moisture.
- Vanilla extract: A splash of vanilla rounds out the flavors, making the cookies even more irresistible.
- Powdered sugar: For rolling the cookies, it gives them that classic snowy finish.
For those looking to switch things up, consider adding a pinch of nutmeg for extra warmth or using whole wheat flour for a healthier twist. You can find all the exact measurements at the bottom of the article, ready for printing!
How to Make Gingerbread Crinkle Cookies
Now that you have your ingredients ready, let’s dive into the fun part: making these delightful Gingerbread Crinkle Cookies. Follow these simple steps, and you’ll have a batch of cookies that will fill your home with holiday cheer!
Step 1: Preheat the Oven
First things first, preheat your oven to 350°F (175°C). Preheating is crucial because it ensures that your cookies bake evenly. A hot oven helps them rise and develop that lovely crinkled top we all adore.
Step 2: Prepare the Dry Ingredients
In a large bowl, whisk together the all-purpose flour, baking soda, ground ginger, ground cinnamon, ground cloves, and salt. This step is essential for blending the spices evenly. A well-mixed dry ingredient blend means every cookie will be packed with flavor!
Step 3: Cream the Butter and Sugar
In another bowl, cream together the softened unsalted butter and brown sugar until the mixture is light and fluffy. This process incorporates air into the batter, giving your cookies a tender texture. It’s like giving your cookies a little spa treatment!
Step 4: Combine Wet Ingredients
Next, add the molasses, egg, and vanilla extract to the butter-sugar mixture. Mix well until everything is combined. The molasses adds that rich, deep flavor that makes gingerbread cookies so special. It’s the secret ingredient that brings everything together!
Step 5: Mix Dry and Wet Ingredients
Gradually add the dry ingredients to the wet mixture. Stir gently until just combined. Be careful not to overmix; we want our cookies to be soft and chewy, not tough. Think of it as a gentle hug for your dough!
Step 6: Chill the Dough
Now, it’s time to chill the dough in the refrigerator for at least 30 minutes. Chilling helps the flavors meld and makes the dough easier to handle. Plus, it prevents the cookies from spreading too much while baking. Patience is key here!
Step 7: Shape the Cookies
Once the dough is chilled, scoop out portions and roll them into balls. Then, roll each ball in powdered sugar until they’re generously coated. This snowy finish is what gives these cookies their signature crinkle and festive look!
Step 8: Bake the Cookies
Place the cookie balls on a baking sheet lined with parchment paper, spacing them about 2 inches apart. Bake for 10-12 minutes, or until the edges are set and the tops are crinkled. Keep an eye on them; you want them to be soft in the center!
Step 9: Cool and Enjoy
After baking, let the cookies cool on the baking sheet for a few minutes before transferring them to a wire rack. This cooling time allows them to firm up a bit. Store any leftovers in an airtight container for up to a week, if they last that long!
Tips for Success
- Measure your ingredients accurately for the best results.
- Don’t skip the chilling step; it’s crucial for texture.
- Use fresh spices for maximum flavor impact.
- Experiment with rolling in colored sugar for a festive twist.
- Keep an eye on baking time; every oven is different!
Equipment Needed
- Mixing bowls: Use any size you have; a large bowl is ideal for mixing.
- Whisk: A hand whisk works great, but an electric mixer can save time.
- Baking sheet: A standard cookie sheet or any flat baking tray will do.
- Parchment paper: If you don’t have it, greasing the baking sheet works too.
- Wire rack: A cooling rack is best, but a plate can work in a pinch.
Variations
- Chocolate Chip Gingerbread Crinkle Cookies: Add semi-sweet chocolate chips for a delightful twist on the classic flavor.
- Gluten-Free Option: Substitute all-purpose flour with a gluten-free blend to accommodate dietary needs.
- Vegan Version: Replace the egg with a flaxseed egg and use vegan butter for a plant-based treat.
- Spicy Kick: Increase the ground ginger and cinnamon for a bolder flavor that packs a punch.
- Nutty Addition: Fold in chopped walnuts or pecans for added texture and flavor.
Serving Suggestions
- Pair with Hot Cocoa: These cookies are perfect alongside a warm cup of hot cocoa or spiced tea.
- Festive Platter: Arrange them on a decorative platter with holiday-themed decorations for a charming presentation.
- Gift Idea: Package them in a cute tin or box for a thoughtful homemade gift.
FAQs about Gingerbread Crinkle Cookies
Can I make Gingerbread Crinkle Cookies ahead of time?
Absolutely! You can prepare the dough in advance and chill it in the refrigerator for up to 3 days. Just roll and bake when you’re ready to enjoy these delightful gingerbread cookies.
How do I store Gingerbread Crinkle Cookies?
Store your cookies in an airtight container at room temperature for up to a week. If you want to keep them longer, they freeze beautifully for up to 3 months!
Can I use different spices in my Gingerbread Crinkle Cookies?
Yes! Feel free to experiment with spices like nutmeg or allspice for a unique flavor twist. Just remember, the classic ginger and cinnamon combo is what makes these cookies so special!
Why are my cookies not crinkling?
If your cookies aren’t crinkling, it might be due to not chilling the dough long enough or overmixing the batter. Make sure to follow the steps closely for that perfect crinkle!
Can I add frosting to my Gingerbread Crinkle Cookies?
While these cookies are delicious on their own, a light glaze or cream cheese frosting can add an extra layer of sweetness. Just drizzle it on top after they’ve cooled!
Final Thoughts
Making these Gingerbread Crinkle Cookies is more than just baking; it’s about creating memories. The delightful aroma fills your home, wrapping you in warmth and nostalgia. Each crinkled cookie is a little piece of joy, perfect for sharing with family and friends. Whether you’re enjoying them with a cup of tea or gifting them to loved ones, these cookies bring smiles all around. I hope this recipe becomes a cherished part of your holiday traditions, just as it has in mine. Happy baking, and may your kitchen be filled with love and laughter!