
Cookie houses aren’t just for kids.
Last winter, I dove headfirst into crafting a chocolate chip cookie house that looked more like an architectural marvel than a holiday snack. The kitchen was buzzing—flour dust swirling in the air, the faint hum of the oven, and that irresistible scent of melting chocolate wafting through every corner. It’s a project that demands patience, but also rewards with sheer fun and a pinch of nostalgia.
The trick? Nailing the royal icing’s consistency—it’s the mortar holding this sweet fortress together. Too runny, and you’re in for a sticky mess; too stiff, and you can’t pipe the fine details. There’s a rhythm to it, blending beating egg whites with powdered sugar until you hit that sweet spot. Crafting each cookie panel and then assembling them is like building a gingerbread house’s rebellious cousin—chunkier, gooier, and packed with melty chocolate chips.
Get ready to roll up your sleeves. This isn’t your average bake-and-eat cookie—it’s a full-on edible construction adventure, a showstopper centerpiece that’s as fun to make as it is to crumble.
If you love creating delightful treats, you’ll enjoy our guide to Whip Up a Playful Chocolate Cake Jelly Cat for Sweet Fun after making your chocolate chip cookie house.
Why Build a Chocolate Chip Cookie House? Real-Life Perks
- Fun for the whole crew—kids and adults alike get stuck in, no experience needed. It’s hands-on, messy, and keeps everyone buzzing.
- Perfect icebreaker at parties—watch people bond over royal icing mishaps and cookie panel debates. It’s social glue in sugar form.
- Double-duty snack—once admired, the house gets demolished and devoured. No waste, just sweet satisfaction.
- Customizable canvas—go wild with decorations or keep it old school. The cookie house reflects your vibe, from sleek minimalist to grandma’s living room chaos.
- Teaches patience and precision—this isn’t a slapdash job. Royal icing needs its moment to dry, so you learn to chill and savor the process (and the crumbs) along the way.
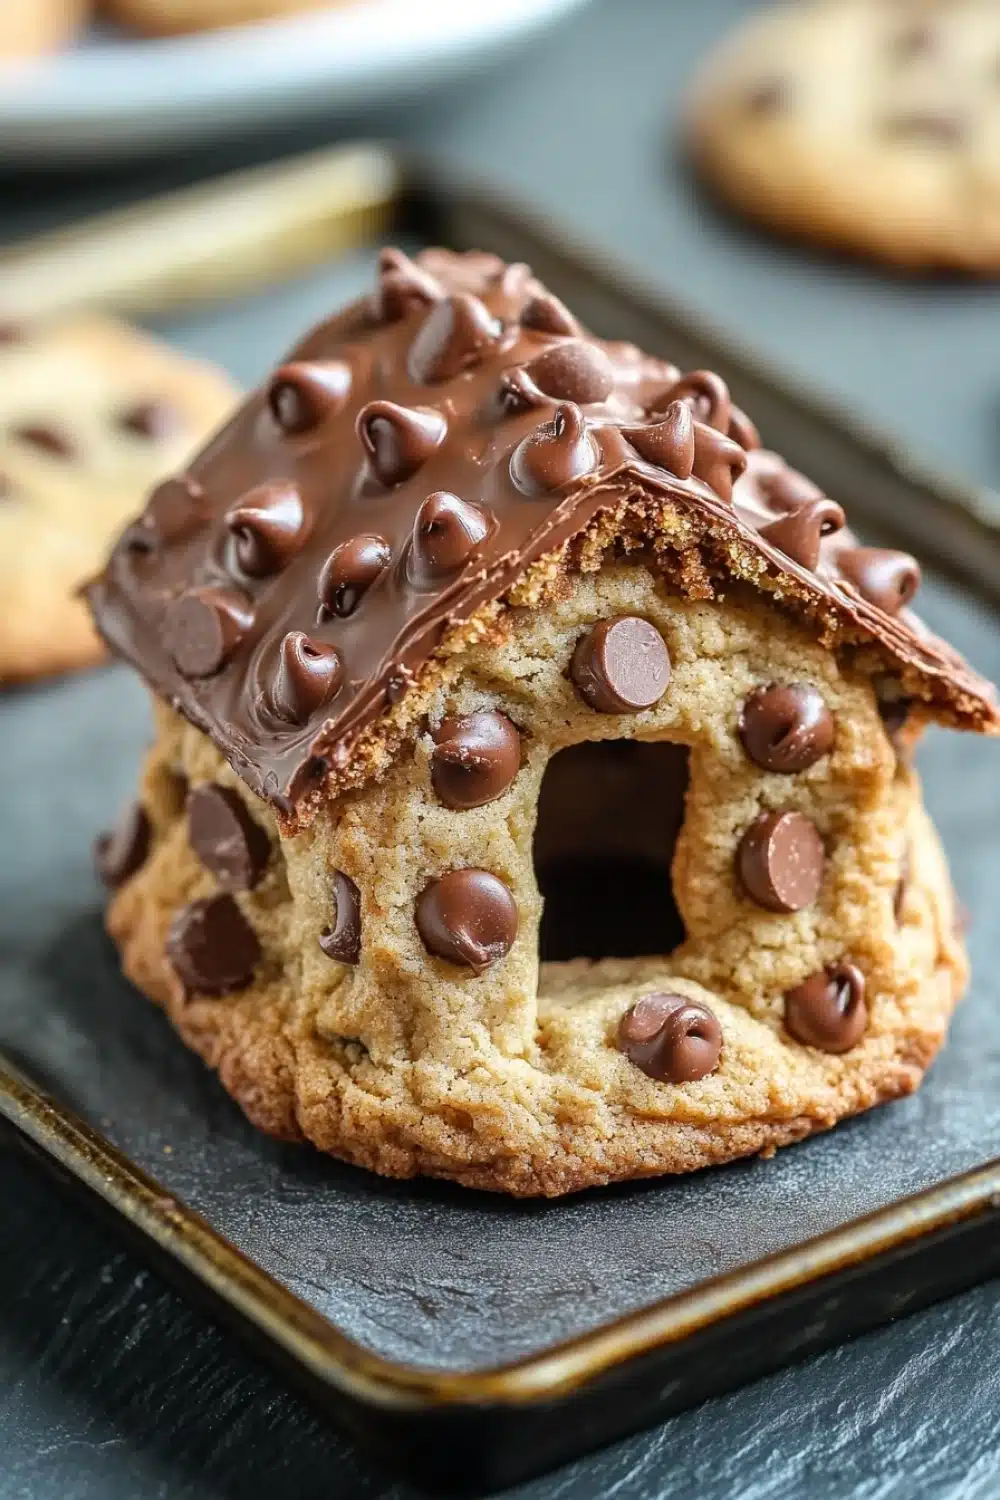
Chocolate Chip Cookie House

Create a delightful and edible chocolate chip cookie house perfect for festive occasions or fun baking projects. This recipe includes homemade chocolate chip cookies shaped into house panels and a simple royal icing to assemble and decorate your cookie house.
- Prep Time: 45 minutes
- Cook Time: 15 minutes
- Total Time: 1 hour
- Yield: 1 cookie house (serves 6-8)
Ingredients
2 1/4 cups all-purpose flour
1/2 teaspoon baking soda
1/2 teaspoon salt
3/4 cup unsalted butter, melted and cooled
1 cup packed brown sugar
1/2 cup granulated sugar
1 tablespoon vanilla extract
1 large egg
1 large egg yolk
1 1/2 cups semisweet chocolate chips
3 large egg whites
1/4 teaspoon cream of tartar
2 1/2 cups powdered sugar
Instructions
Preheat the oven to 350°F (175°C). Line two baking sheets with parchment paper.
In a medium bowl, whisk together the flour, baking soda, and salt. Set aside.
In a large bowl, combine the melted butter, brown sugar, and granulated sugar. Mix until smooth.
Add the vanilla extract, egg, and egg yolk to the butter and sugar mixture. Beat until light and creamy.
Gradually add the dry ingredients to the wet ingredients, mixing until just combined.
Fold in the chocolate chips evenly throughout the dough.
Divide the dough in half. Roll out one half between two sheets of parchment paper to about 1/4 inch thickness.
Using a printed template or freehand, cut out the shapes for the cookie house panels: two rectangles for the walls, two rectangles for the roof, and two triangles for the roof ends.
Transfer the cutouts on the parchment paper to the baking sheets.
Repeat rolling and cutting with the remaining dough for backup pieces or additional decorations.
Bake the cookies for 12 to 15 minutes or until the edges are golden brown. Allow cookies to cool completely on the baking sheets.
While cookies cool, prepare the royal icing by beating the egg whites and cream of tartar in a large bowl until frothy.
Gradually add the powdered sugar, beating on low speed until combined, then on high speed until stiff peaks form and the icing is smooth and thick.
Transfer the royal icing to a piping bag fitted with a small round tip or a resealable plastic bag with the corner snipped.
Assemble the cookie house by piping royal icing along the edges of the wall pieces and pressing them together. Hold until set, then attach the roof pieces similarly.
Use remaining royal icing to pipe decorative details such as window frames, door outlines, and roof shingles.
Allow the assembled house to dry and set completely for at least 4 hours before moving or displaying.
Explore more:
Breakfast Recipes
Mastering Your Chocolate Chip Cookie House
The Art of Ingredient Swaps: When to Break the Mold
Brown sugar or granulated? Melted butter or cold cubes? These choices aren’t just kitchen chatter—they shape the entire vibe of your cookie house. Melted butter speeds things up and yields a chewier bite, perfect when you want that soft yet sturdy texture to hold the house together. But if you’re after a classic snap, swap melted butter for cold, cubed butter and briefly chill the dough. It’s a quick trick that flips the texture from plush to crisp, ideal for those structural edges that need to stand tall and proud.
Don’t have semisweet chips? No sweat. Dark chocolate chunks add a bold twist, while white chocolate chips bring a sweet creaminess that contrasts beautifully with the brown sugar’s molasses punch. I’ve even tossed in chopped nuts for extra crunch and surprise—just be mindful that extra add-ins may affect how well the panels stick with royal icing.
The Royal Icing Rundown—Glue, Decor, and All That Jazz
Royal icing is the unsung hero here. Think of it as edible superglue—but it demands respect. Beat those egg whites until frothy, then fold in cream of tartar; this combo stabilizes the mix, giving you that perfect pipe-ready glue. Powdered sugar isn’t just for sweetness; it’s the body that turns your icing from runny chaos into a thick, hold-your-shape marvel. I’ve learned the hard way: too thin, and your house collapses like a rookie castle. Too thick, and you’re basically frosting rocks.
Assembly is a test of patience and steady hands. Pipe a generous bead along the edges, then hold those walls in place—don’t rush this step. The magic of royal icing takes time to set into a rock-solid bond, so let gravity do its thing. Finally, decoration isn’t just for show—it adds weight and balance, so pile on those piped shingles and window frames to help your house keep its charm and shape.
When the Cookie House Goes Sideways: Troubleshooting Common Flops
Cracking panels? Blame the dough thickness. Too thin, and they snap like twigs; too thick, and they’re heavy, wobbling like a bad Jenga tower. Aim for that Goldilocks zone—roughly 1/4 inch. Keep an eye on your oven temperature. Overbake? Your cookie walls turn brittle and crumbly. Underbake? They slump mid-assembly.
Royal icing woes? If your mix refuses to stiffen, check your egg whites’ freshness and the cream of tartar amount. Old whites or skipping the tartar equals weak glue and soggy walls. Also, don’t rush the drying. Assemble, then let your masterpiece rest—at least 4 hours. I once moved mine too soon; half the roof tumbled. Lesson learned: patience is key.
Lastly, storage can make or break your showpiece’s shelf life. Keep your assembled house in a cool, dry spot—warmth invites sogginess. If you’re stashing panels, airtight containers are your best friends to keep them crisp until build day.
Chocolate Chip Cookie House FAQ
Can I use store-bought cookies instead?
Yes and no. Store-bought cookies might not have the right shape or sturdiness to hold your house together as well as homemade ones, and they usually lack the perfect golden-brown edge that tells you they’re just right for building.
How long does the royal icing take to dry?
Patience, my friend. The royal icing needs at least 4 hours to set completely. Rushing this step is like trying to build a sandcastle before the tide goes out—it just won’t hold.
Can children help with assembling?
Absolutely! This project is a blast with kids, especially when it comes to decorating. Just handle the piping bag and fragile parts yourself to avoid any cookie casualties.
Do I have to use cream of tartar in the royal icing?
Nope, but it helps stabilize the egg whites and keeps your icing stiff and shiny longer. If you don’t have it, you can skip it, but the texture might be a tad softer.
Is this cookie house sturdy enough to last more than a day?
Sort of. Store it in a cool, dry spot and it should last up to 3 days intact. But if you want to keep the panels for longer, stash them separately in an airtight container and assemble when ready.