
Garlic bread, but make it festive.
There’s something almost hypnotic about the scent of garlic and butter wafting through the kitchen, especially when you’re shaping that dough into a perfect ring — a bread wreath. I remember the first time I twisted those dough strips, feeling the soft elasticity under my fingers, and thinking, “This is comfort food with a twist.” It’s not just about the flavor; it’s the ritual, the anticipation as it rises, then turns golden brown in the oven.
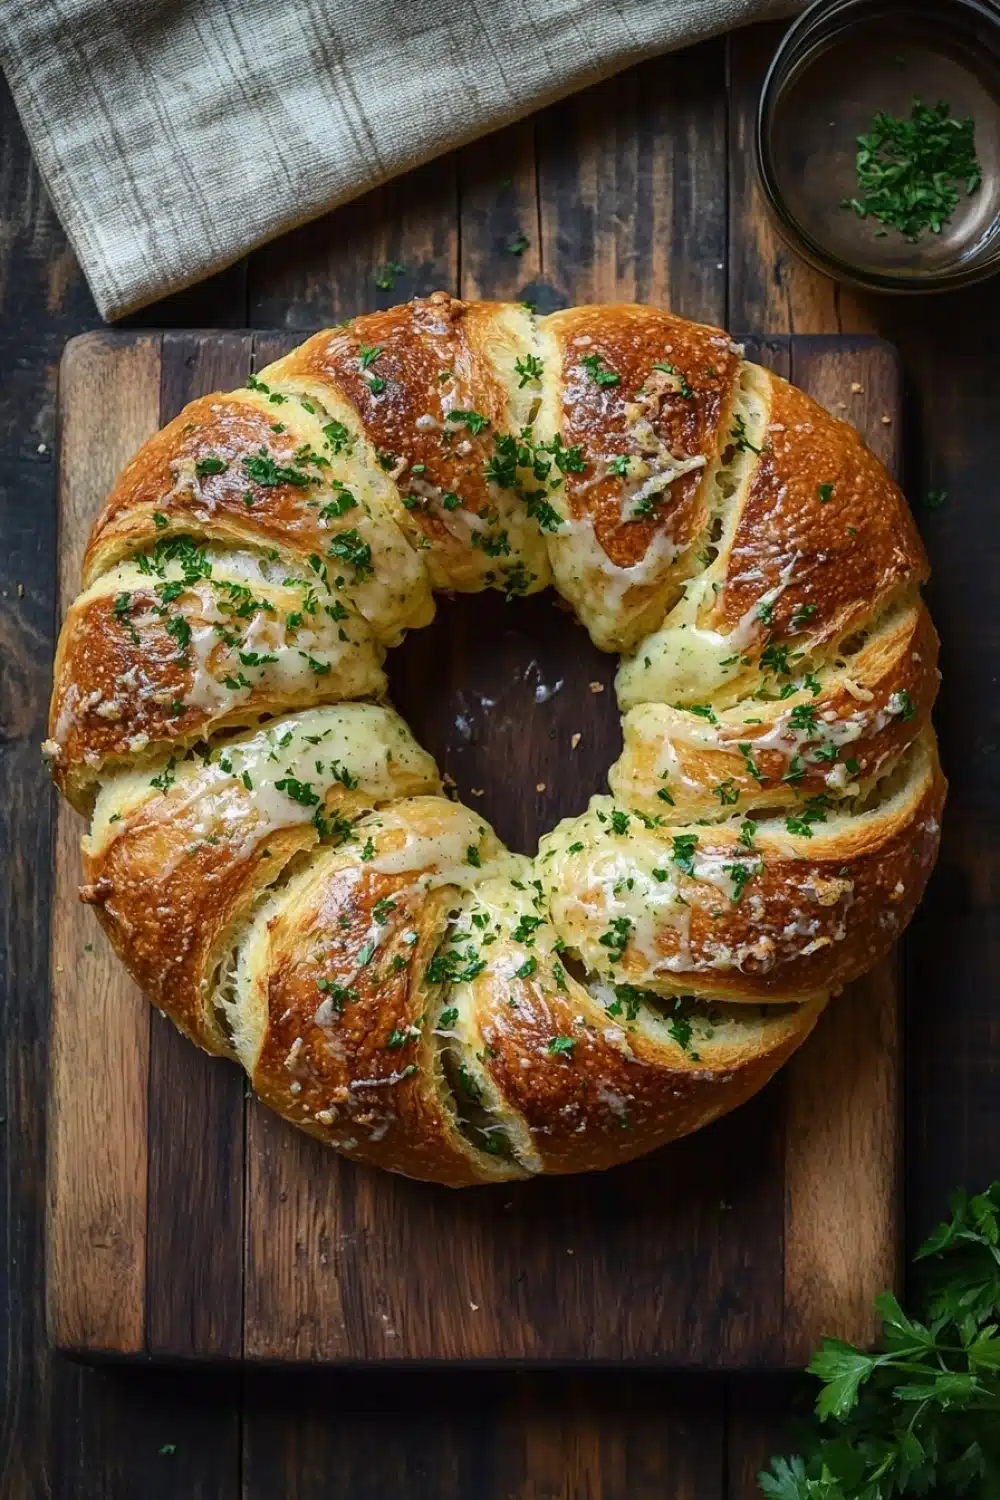
Making a garlic bread wreath is like throwing a little party in your oven. The layers of buttery garlic goodness meld with fresh parsley, creating that classic punch that has everyone reaching for seconds. The crispy outside, soft inside combo? Chef’s kiss. This recipe is a no-brainer when you want to wow guests or just treat yourself without breaking a sweat.
Bonus: it’s shareable, interactive, and downright fun. Perfect for dinner or any night you want that carb hit with some serious soul.
If you’re looking for a delicious side, try our amazing garlic bread wreath to complement your meal perfectly.
Real Life Benefits of Making a Garlic Bread Wreath
- Looks like you spent hours, but it’s ready in under an hour—easy peasy for last-minute guests.
- Hands-on fun: shaping and twisting the dough is oddly satisfying and makes the kitchen vibe instantly cozier.
- Turns basic garlic bread into a centerpiece—your friends will be asking for the recipe before the first bite.
- Leftovers reheat like a champ, so you’re not stuck with sad, soggy bread the next day.
- Perfect for sharing and portioning out, letting everyone grab a twisted strip without the mess.
Garlic Bread Wreath

A festive and delicious garlic bread wreath perfect for sharing. Soft, buttery garlic bread shaped into a beautiful wreath and baked until golden brown, then topped with fresh parsley for a vibrant finish.
- Prep Time: 15 minutes
- Cook Time: 25 minutes
- Total Time: 40 minutes
- Yield: 8
Ingredients
2 1/4 teaspoons active dry yeast (1 packet)
1 cup warm water (110°F/43°C)
2 1/2 cups all-purpose flour
1 teaspoon granulated sugar
1 teaspoon salt
2 tablespoons olive oil, plus extra for greasing
1/2 cup unsalted butter, softened
4 cloves garlic, minced
2 tablespoons fresh parsley, finely chopped
1/2 teaspoon salt
1/4 teaspoon freshly ground black pepper
Instructions
In a small bowl, combine warm water and sugar. Sprinkle the yeast over the water and let it sit for 5-10 minutes until foamy.
In a large mixing bowl, combine flour and salt. Add the yeast mixture and 2 tablespoons olive oil. Stir until a dough forms.
Turn the dough onto a floured surface and knead for about 8-10 minutes until smooth and elastic.
Place the dough in a lightly oiled bowl, cover with a clean kitchen towel, and let it rise in a warm place for about 1 hour or until doubled in size.
Preheat the oven to 375°F (190°C). Lightly grease a baking sheet or line it with parchment paper.
In a small bowl, mix softened butter, minced garlic, chopped parsley, salt, and black pepper until well combined.
Punch down the risen dough and roll it out into a 12-inch circle on a floured surface.
Spread the garlic butter mixture evenly over the dough circle.
Cut the dough into 16 equal strips by making cuts from the center to the edge, like slicing a pizza, but do not cut all the way through the center.
Carefully twist each strip twice and then pinch the ends together to form a ring shape, creating a wreath.
Place the wreath on the prepared baking sheet and bake for 20-25 minutes or until golden brown.
Remove from the oven and let cool for 5 minutes before serving.
Explore more:
Dinner Recipes
Garlic Bread Wreath: The Ultimate Shareable Twist
The Yeast Whisperer: Why Your Dough Needs That Warm Bubble Bath
Active dry yeast is the unsung hero here—no instant magic, just patient science. When you sprinkle yeast over warm water with a pinch of sugar, you’re basically waking up a sleeping giant. The yeast starts munching on sugars, releasing carbon dioxide that makes your dough rise like a champ. Skip this step or use water that’s too hot (above 120°F/49°C) and you’ll kill those little bubbles of life—resulting in a dense, sad bread. Trust me, I’ve seen more than one newbie baker dump their dough after neglecting this “proofing” ritual. The temperature and timing? Non-negotiable. Think of it as coaxing a groggy cat into action—gentle warmth and a bit of patience do the trick.
Butter Meets Garlic: The Spread That Makes or Breaks Your Wreath
Here’s a little secret—don’t just slap garlic on your bread and call it a day. The butter mixture is where flavor lives. Softened butter (never melted unless you’re in a bind) holds air pockets, so when baked, it seeps into every nook and cranny. Minced garlic? Fresh is king. That punchy, slightly spicy zing can turn flat garlic butter into a mouthful of umami goodness. Parsley isn’t just for looks; it cuts through the richness with a peppery snap. Salt and fresh black pepper? They’re the final handshake, balancing and enhancing every note. When I’m in a rush, I’m tempted to skimp here—but the texture and taste always remind me: this step’s worth the extra minute or two.
Twist It, Pinch It, Bake It: Fixing the Common Wreath Woes
Ever had your bread wreath puff unevenly or look like a sad circle? Here’s the lowdown—cut your dough strips evenly, and don’t slice all the way through the center. That center is your wreath’s anchor. When twisting each strip twice, be gentle but firm; too little twist and it looks limp, too much—breakage city. If the ends don’t stick, your wreath won’t hold its shape in the oven’s heatwave. Pinching those ends firmly (and a dab of olive oil if you’re feeling extra) is clutch. Baking too hot? You’ll get a crust that charred on the outside but doughy within. Too low? Pale, undercooked bread that’s a bummer to serve. I once popped mine in a convection oven and had to adjust the timing on the fly—lesson learned: keep an eye and trust your nose.
Garlic Bread Wreath FAQs
A: Yes, instant yeast works fine—just skip the proofing step and mix it directly with the flour and other dry ingredients. It speeds things up without messing with the texture.
A: Pop it in an airtight container at room temp—this keeps the moisture locked in. When ready to eat, a quick 5-7 minute reheat at 350°F will crisp the exterior without drying out the inside. No soggy bread nightmares here.
A: Absolutely! Adding shredded mozzarella or parmesan inside the garlic butter before twisting the strips amps up the flavor and gives you those gooey pockets that make everyone swoon. Just sprinkle evenly before cutting and twisting.
A: Totally. The dough is forgiving and the twisting step isn’t rocket science. I remember my first time—kinda messy but still tasted banging. Plus, it’s a crowd-pleaser no matter your skills.
A: Yes, you can freeze it before baking. Wrap tightly in plastic and foil, then bake straight from frozen—just add a few extra minutes to the baking time. Perfect for prepping ahead of a party or holiday meal.