
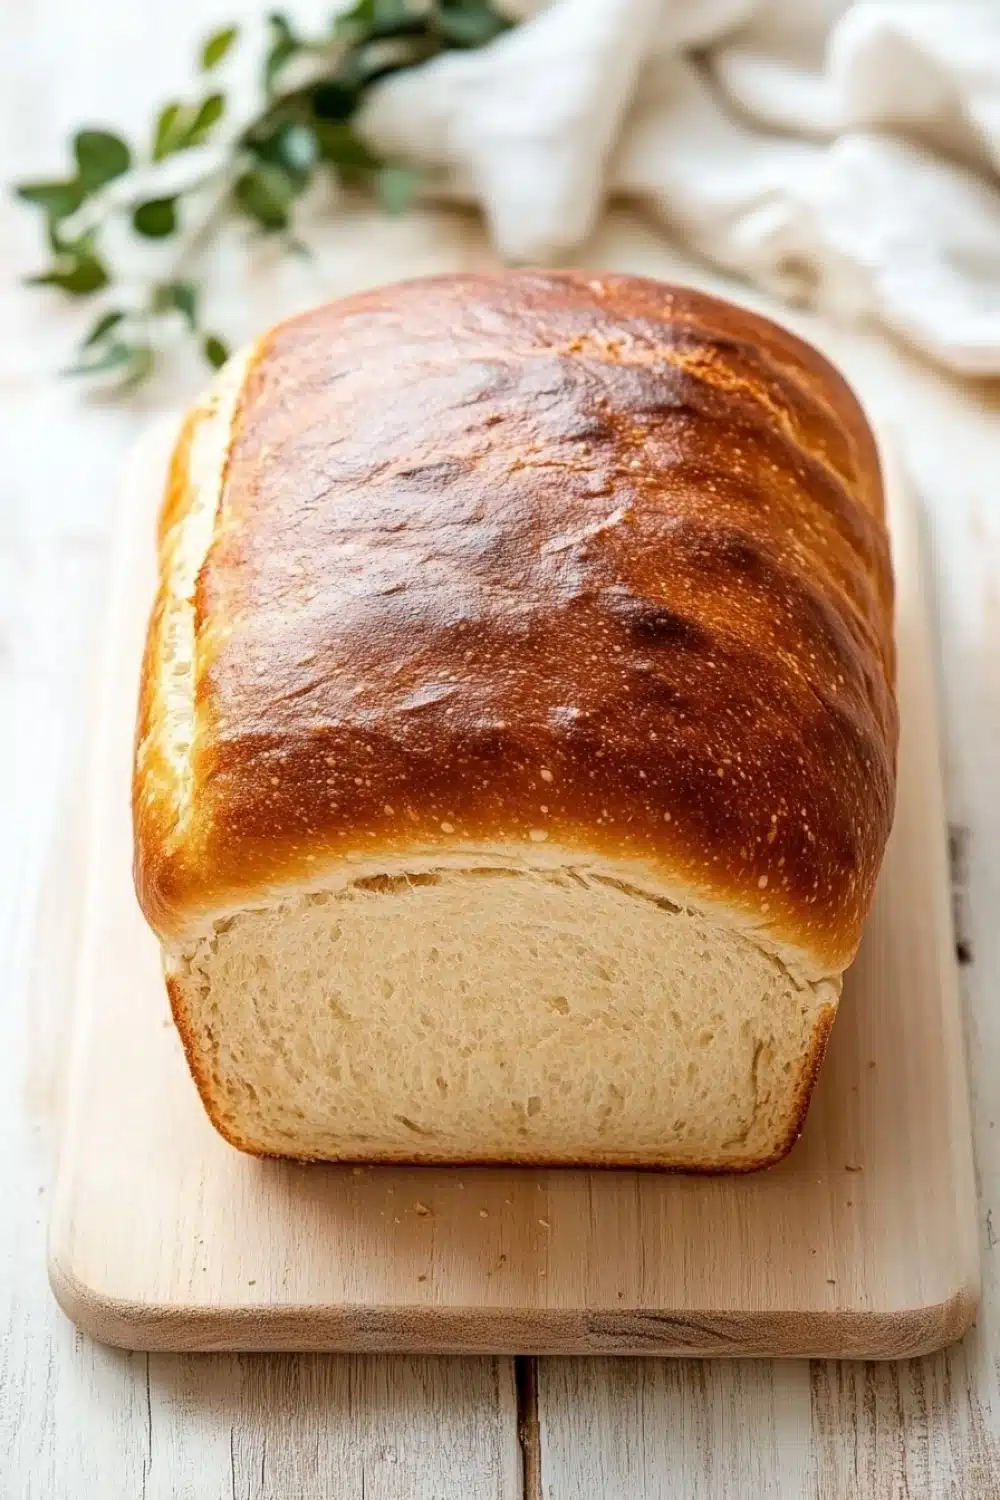
Fresh bread smell—nothing beats it.
I still remember the first time I tried baking sandwich bread from scratch. The kitchen was a mess, flour dusted every surface like snow, and the dough was sticky and rebellious. But that golden crust, the tender crumb—it was worth every sticky finger.
Making homemade sandwich bread isn’t just about the end result; it’s about the ritual. The slow rise, the kneading rhythm, the moment the yeasty aroma fills the air—these are the magic spells of old-school bread making. A loaf like this has character, unlike the uniform bricks from the store.
Trust me, once you nail this recipe, there’s no going back. Your sandwiches will have that extra oomph—like a secret handshake only true bread bakers know.
For those who love baking from scratch, try our tips on making homemade sandwich bread that pairs perfectly with creamy spreads.
Real Life Benefits of Baking Homemade Sandwich Bread
- Freshness on demand—No more rushing to the store when you run out of bread midweek.
- The smell alone fills your home with that warm, inviting vibe—better than any candle.
- Perfectly soft texture that holds up to your favorite sandwich fixings without turning soggy.
- Customizable—add seeds, herbs, or swap to whole wheat for your own spin.
- Saves cash over time—ditch the pricey artisanal loaves and make your own with pantry staples.
Homemade Sandwich Bread
This soft and fluffy homemade sandwich bread is perfect for making delicious sandwiches or toast. Made with simple ingredients, it yields a tender crumb and golden crust.
- Prep Time: 15 minutes
- Cook Time: 30 minutes
- Total Time: 1 hour 45 minutes
- Yield: 12 slices
Ingredients
3 1/2 cups (420 grams) all-purpose flour, plus extra for dusting
2 1/4 teaspoons (7 grams) active dry yeast
1 tablespoon (12 grams) granulated sugar
1 1/4 teaspoons (7 grams) salt
1 cup (240 milliliters) warm water (about 110°F / 43°C)
1/4 cup (60 milliliters) whole milk, warmed
2 tablespoons (30 grams) unsalted butter, melted
1 large egg
Instructions
In a small bowl, combine the warm water, warm milk, sugar, and active dry yeast. Stir gently and let it sit for 5 to 10 minutes until the mixture becomes foamy.
In a large mixing bowl, whisk together the all-purpose flour and salt.
Make a well in the center of the flour mixture and pour in the yeast mixture, melted butter, and egg.
Using a wooden spoon or dough hook attachment on a stand mixer, mix until the dough comes together.
Turn the dough onto a lightly floured surface and knead for about 8 to 10 minutes until smooth and elastic. Alternatively, knead with a stand mixer for 6 to 7 minutes on medium speed.
Form the dough into a ball and place it in a lightly greased large bowl. Cover the bowl with a clean kitchen towel or plastic wrap and let the dough rise in a warm, draft-free area for 1 to 1 1/2 hours, or until doubled in size.
Once risen, punch down the dough to release the air. Turn it onto a lightly floured surface and shape it into a loaf by flattening it into a rectangle, then rolling it tightly from the short end.
Place the shaped dough seam-side down into a greased 9×5-inch (23×13 cm) loaf pan. Cover again with a towel or plastic wrap and let it rise for 30 to 45 minutes until it has risen about 1 inch above the rim of the pan.
Preheat the oven to 350°F (175°C).
Bake the bread for 28 to 32 minutes, or until the top is golden brown and the loaf sounds hollow when tapped.
Remove the bread from the oven and immediately transfer it to a wire rack to cool completely before slicing.
Explore more:
Lunch Recipes
Mastering Homemade Sandwich Bread: Tricks & Fixes
The Yeast Awakening Dance: Why Timing Is Everything
Picture this—you’re coaxing your yeast to wake up from its slumber, but the water’s too hot or cold. That’s a rookie move that’ll kill the party before it starts. Yeast acts like a diva: too hot, and it curls up dead; too cold, and it’s a lazy bum refusing to rise. I’ve seen newbies dump boiling water in and wonder why their dough’s just a sad blob. You want that bubbly, foamy top after 5 to 10 minutes—that’s your yeast shouting, “I’m alive!” This foamy froth is the yeast’s way of saying it’s ready to work its magic, giving your bread that fluff and lift we all crave. Don’t skip this foaming step, or your dough might end up with the texture of a brick. Trust me, rushing this is like trying to sprint before you’ve tied your shoes.
The Art of the Stretch and Fold — Kneading But Not Killing
Kneading dough can feel like the endless slog of a Monday morning, but it’s the secret handshake to flaky texture and open crumb. Here’s the skinny—8 to 10 minutes by hand, or 6 to 7 in a mixer on medium speed, is your sweet spot. Go less, and your dough is a wet mess; go more, and it’s tough as your ex’s heart. When kneading, think rhythm — a steady push, fold, turn, repeat. I often hear bread newbies say, “How do I know when it’s done?” Easy: the windowpane test. Grab a small dough piece and stretch it thin; if it thins without tearing easily, you’re golden. If it rips like cheap tights, keep kneading. This shows that gluten strands have developed enough, giving that tender crumb inside the sandwich loaf. Forget this, and your bread will be a dense disappointment.
When Your Loaf Flops: Common Bread Fails and How to Fix Them
Ever baked your bread only to have it sink like a lead balloon after the oven? I’ve been there, and it stings. Why does this happen? Mostly a case of overproofing or underbaking. If your dough rises over the rim of the pan and then collapses, it’s thrown the yeast too big a party—too much gas, not enough structure. Remedy? Keep a hawk’s eye on that second rise time. When it’s puffed about an inch above the pan’s edge, it’s showtime. Another classic blunder: crust that’s pale and floppy. Solution — bake a tad longer or bump the oven temp by 10°F for the last 5 minutes. Also, cool your loaf on a wire rack. Leaving it in the pan traps steam, turning the crust into a soggy mess. Lastly, if your bread tastes flat or yeasty—check your salt balance. Salt isn’t just for flavor; it keeps yeast in check. Pulling these levers can flip your bread game from meh to must-have every morning.
FAQs About Homemade Sandwich Bread
Yes, you can swap active dry yeast for instant yeast. Use about 25% less instant yeast than active dry yeast since it’s more potent. Also, no need to proof it in warm water—just mix it right in with the dry ingredients.
Density usually means the dough didn’t get enough rise or kneading. Make sure your yeast is fresh and that the dough doubles in size during rising. Kneading develops gluten, giving that nice springy texture. Also, beware of adding too much flour; dough should feel slightly tacky but not sticky.
You can try, but whole wheat flour absorbs more liquid and can lead to a heavier loaf. If you want to experiment, replace half the all-purpose flour with whole wheat and increase the water slightly. Expect a nuttier flavor and denser crumb.
Simple—store it in an airtight container or plastic bag at room temperature. Avoid the fridge; it dries bread out fast. For longer shelf life, freeze it wrapped tightly in plastic wrap and foil. I usually slice before freezing so I can grab slices as needed without thawing the whole loaf.
Absolutely. Slicing warm bread is a rookie move—it compresses the crumb and turns your fluffy loaf gummy. Let it cool on a wire rack until fully set for clean slices and better texture.