
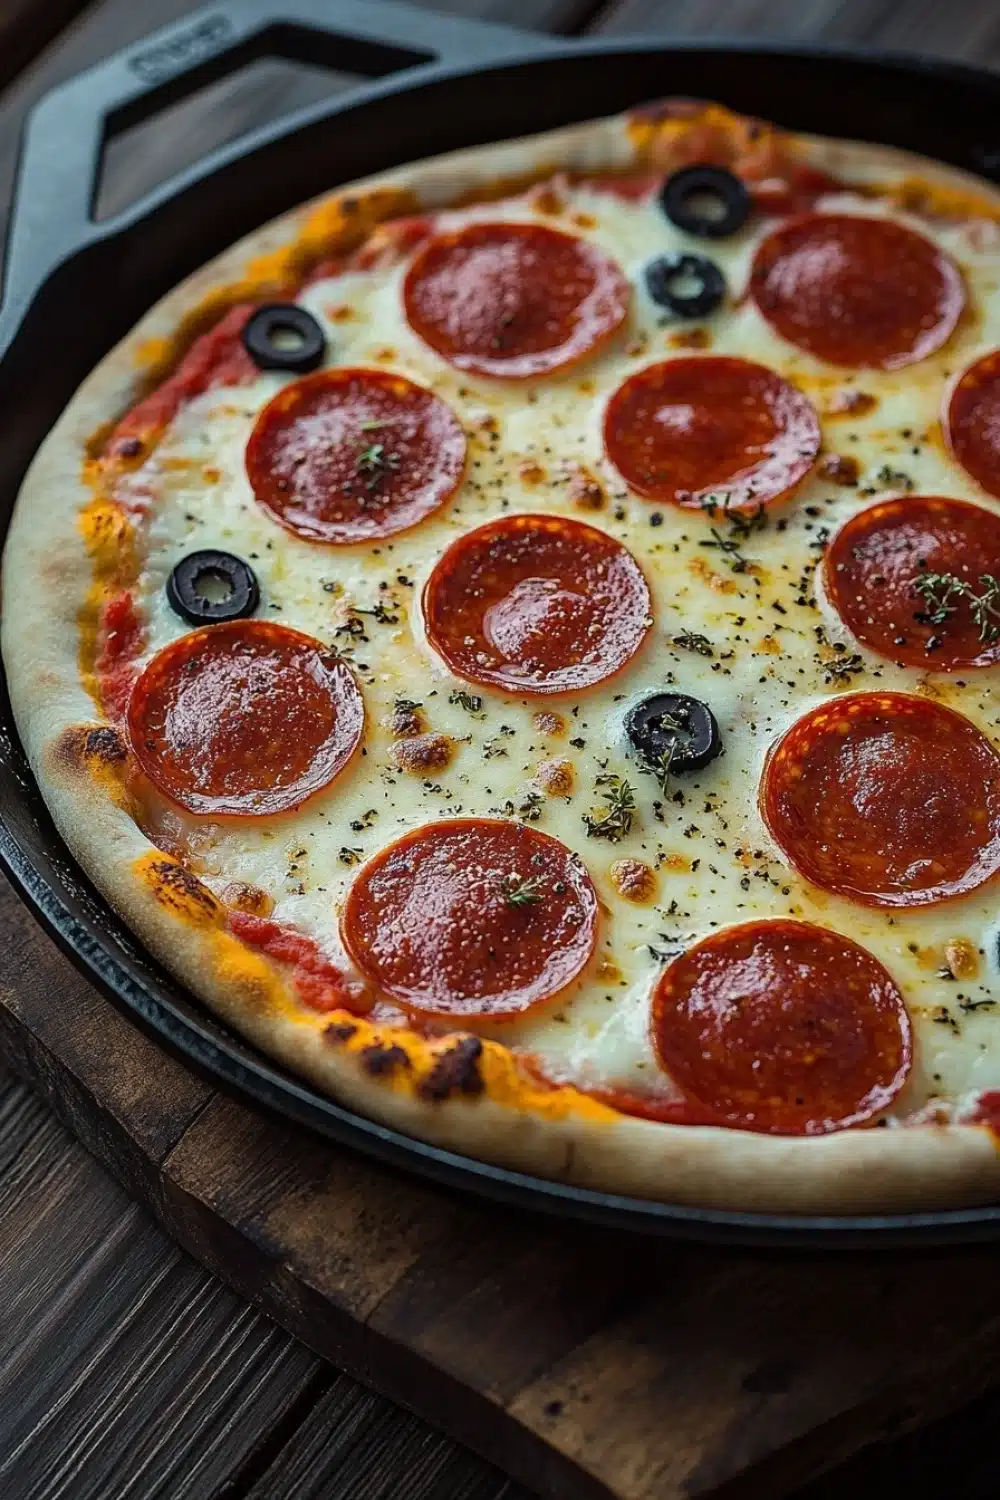
Nothing beats that first sizzle.
When I fire up my cast iron skillet, the kitchen instantly smells like the corner pizzeria I used to hit late nights in college. There’s this magic in the way the dough hits the hot, oiled surface — a hiss, a promise of a crust that’s crisp without being scorched. This isn’t just pizza; it’s a skillet soirée that marries crunch with melty mozzarella in a way the oven alone can’t.
Let’s talk dough that’s got some backbone. I mix warm water, yeast, and sugar—watching it foam like a good head on a craft beer—before folding in flour and salt. Pressing that dough into the skillet feels almost primal, like shaping a little edible canvas that’s about to get its pizzazz.
Then comes the fun part—layering sauce, cheese, pepperoni, and a sprinkle of oregano and crushed red pepper flakes. Hitting the stove first crisps the base just right, before sliding into the oven’s embrace to finish the job. You get a crust that’s firm, a cheese pull that’s gooey, and toppings that sing with every bite. Trust me, this skillet method slams way harder than your average round on a baking sheet.
For a delicious twist on homemade pizza, check out our cast iron skillet pizza recipe that delivers a perfectly crispy crust in just 35 minutes.
Real Life Perks of Cast Iron Skillet Pizza
- Get that insane crust crunch without firing up a fancy pizza oven — cast iron nails it every time.
- Ready in about half an hour, making it a killer weeknight dinner when you’re dead tired but craving something homey.
- Custom toppings? Hell yes. I’ve tossed on everything from jalapeños to pineapple without missing a beat.
- Leftovers reheat like a charm — no soggy mess, just that skillet-crisp goodness all over again.
- No fancy gear needed besides your trusty skillet; it’s perfect for small kitchens or when you want to keep it simple but tasty.
Cast Iron Skillet Pizza

A delicious homemade pizza cooked in a cast iron skillet for a perfectly crispy crust and melty cheese. This easy recipe allows you to customize toppings and enjoy a pizzeria-style pizza right at home.
- Prep Time: 15 minutes
- Cook Time: 20 minutes
- Total Time: 35 minutes
- Yield: 4
Ingredients
1 cup warm water (about 110°F)
2 1/4 teaspoons active dry yeast (1 packet)
1 teaspoon granulated sugar
2 1/2 cups all-purpose flour
1 teaspoon salt
1 tablespoon olive oil, plus more for skillet
1/2 cup pizza sauce
8 ounces shredded mozzarella cheese
1/2 teaspoon dried oregano
1/4 teaspoon crushed red pepper flakes
1/2 cup sliced pepperoni
1/4 cup sliced black olives
Instructions
In a small bowl, combine warm water, active dry yeast, and granulated sugar. Stir gently and let sit for 5-7 minutes until foamy.
In a large mixing bowl, combine all-purpose flour and salt. Add the yeast mixture and 1 tablespoon olive oil.
Mix with a wooden spoon until a dough forms. Transfer to a floured surface and knead for about 5 minutes until smooth and elastic.
Place the dough in a lightly oiled bowl, cover with a clean kitchen towel, and let rise in a warm place for 10 minutes.
Preheat your oven to 450°F (232°C).
Lightly oil a 10-inch cast iron skillet. Press the dough into the skillet evenly, forming a crust about 1/4 inch thick.
Spread pizza sauce evenly over the dough, leaving a small border around the edges.
Sprinkle shredded mozzarella cheese over the sauce.
Add sliced pepperoni and black olives evenly on top.
Sprinkle dried oregano and crushed red pepper flakes over the pizza.
Place the skillet on the stove over medium heat and cook for 3-4 minutes until the bottom crust starts to crisp.
Transfer the skillet to the preheated oven and bake for 12-15 minutes until the cheese is melted and bubbly and the crust is golden brown.
Remove from oven and let cool for 3-5 minutes before slicing and serving.
Explore more:
Dinner Recipes
Mastering Cast Iron Skillet Pizza: Tips, Tricks, and Fixes
The Dough Dance: Why Warm Water and Yeast Matter
Ever wondered why your pizza crust flops instead of cracking into that perfect crust? The yeast and water combo is where the magic begins—or fizzles out. Using water around 110°F wakes up the yeast, coaxing it into action, like a barista pulling a shot of espresso. Too hot? You kill the yeast dead; too cold? It’s a lazy party with no bubbles. That first 5-7 minute wait isn’t just sitting around—it’s yeast proofing, building the gas that later puffs your crust. I learned this the hard way, rushing the step and ending with a dough brick. Patience here turns your dough from a wallflower to the belle of the ball.
Swapping It Up: Ingredient Hacks That Won’t Kill Your Vibe
Not got all-purpose flour? No sweat—bread flour can amp your chewiness thanks to higher gluten, but it’ll tighten up the crust a bit. Cake flour? Forget it—too soft, like trying to build a house with marshmallows. Olive oil is your crust’s BFF, adding flavor and tenderness, but if you’re out, a neutral oil like canola works fine. And here’s a pro-tip: if you want a crispy bottom but your skillet isn’t seasoned enough, lay down some cornmeal or semolina before pressing the dough—it’s like tiny feet that keep your crust from sticking while adding crunch. Never underestimate the power of a good swap; it’s how I keep my pantry flexible and pizza nights rolling.
Fixing Flops: Crispy Bottoms and Cheese That Won’t Melt
Let’s talk flops—soft bottoms and cheese that’s still shy. The skillet is key. Medium heat pre-bake on the stove crisps the bottom. Skip this and you’re asking for a soggy crust; trust me, I’ve been there. If your cheese isn’t melting right, check your oven temp and timing. 450°F for 12-15 minutes is non-negotiable. Also, don’t overload toppings; too many wet veggies or sauce douse the dough, killing crispiness. Finally, after baking, let the pizza rest—those few minutes let residual heat finish the job, and you avoid that molten cheese lava situation. It’s a small step that pays off big time.
Cast Iron Skillet Pizza FAQs
Q: Can I make the dough ahead of time?
Absolutely. You can prepare the dough up to a day in advance. Just cover it tightly and stash it in the fridge. When ready, let it come to room temp before shaping.
Q: Does the cast iron have to be preheated?
Nope. Just lightly oil the skillet and press the dough straight in. You’ll crisp the crust on the stove before baking, which works wonders.
Q: Can I swap out toppings?
For sure, this recipe is a blank canvas. Throw on whatever you got—mushrooms, bell peppers, even pineapple if you’re feeling bold. Just keep an eye on moisture-heavy toppings so the crust stays crispy.
Q: Is this pizza gluten-free?
No. It uses all-purpose flour, so it’s not gluten-free. For gluten-free, you’d need a specialized flour blend and might tweak baking times.
Q: How do I keep the pizza crust crispy when reheating?
Best bet? Reheat in a dry skillet over medium heat or pop it in an oven at 350°F for a few minutes. Avoid microwaving unless soggy crust’s your jam.