
Patience is a virtue.
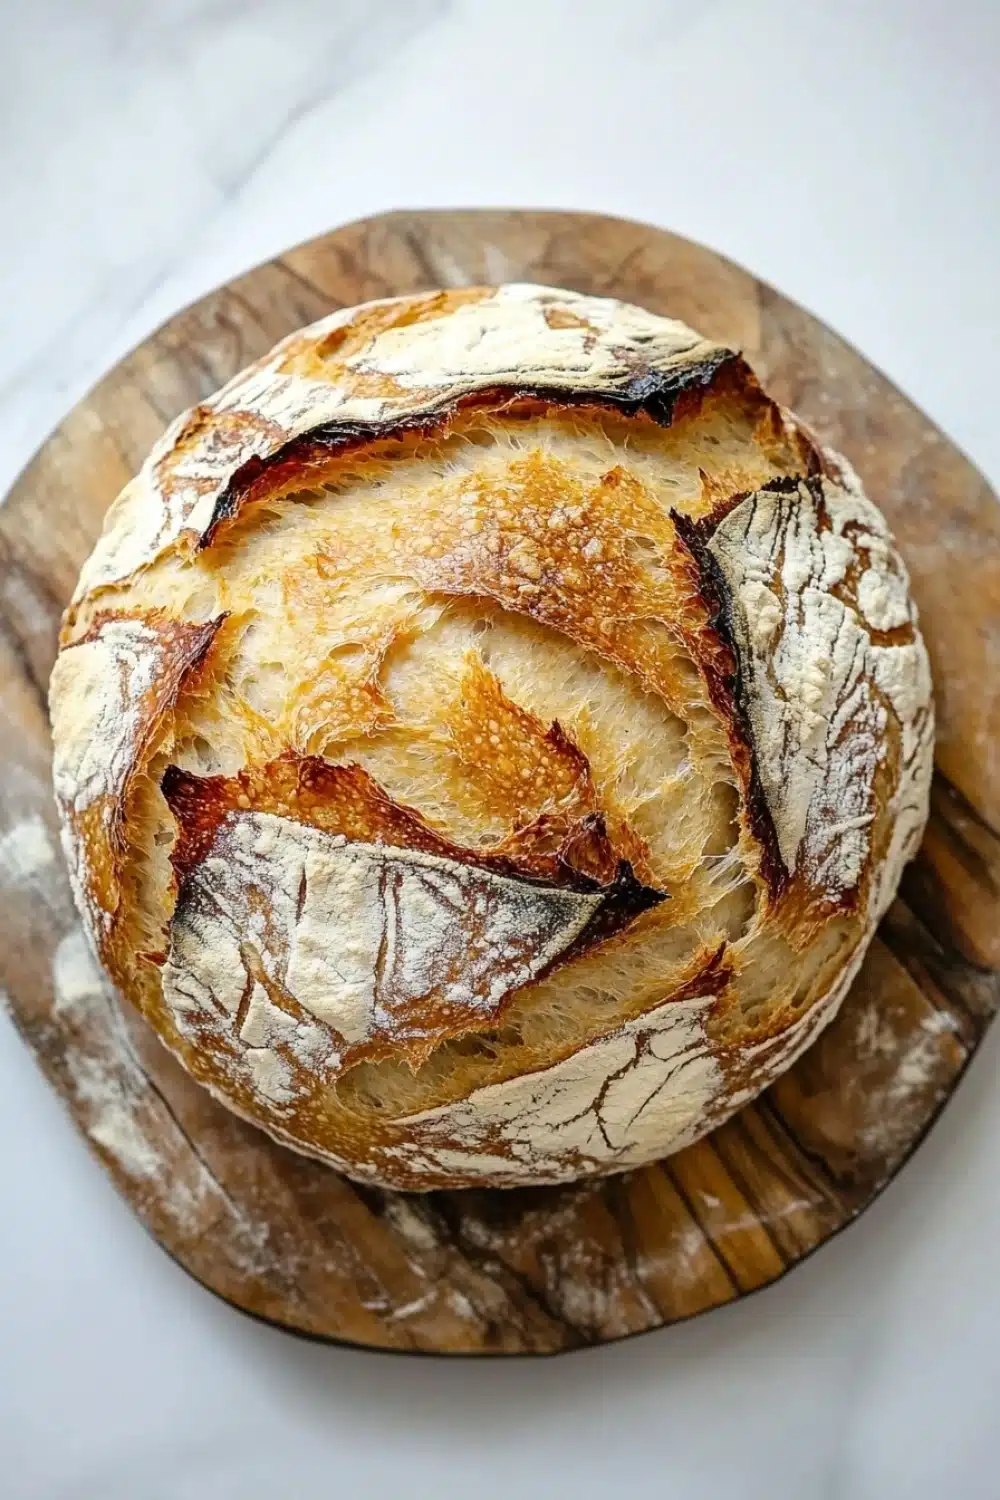
There’s something almost magical about watching a rustic no knead bread dough bubble and swell beneath a kitchen towel. It’s not just mixing flour and water—it’s about letting time do its heavy lifting. I remember the first time I tossed a shapeless mass into my Dutch oven, skeptical that such minimal fuss could yield bakery-quality crumbs and a crust that snaps with each bite.
The secret? The Dutch oven traps steam, creating an environment that’s just right for that golden, crackling crust. After the dough’s long, slow rise of 12 to 18 hours, it’s ready for its moment in the spotlight. The transformation that happens in that hot pot feels like alchemy—simple ingredients turning into something unexpectedly glorious.
Trust the process. Let the clock run while you sip your morning coffee, and come back to a loaf that makes the wait worthwhile.
For a delicious twist to your sandwiches, try making Quick Tuna Melt Sandwiches: Creamy, Crispy, and Perfectly Cheesy with no knead bread Dutch oven rise for extra flavor and texture.
Real-World Wins from No Knead Dutch Oven Bread
- Bake a crusty loaf with barely any elbow grease—great for lazy weekends when you want fresh bread but not a workout.
- Use that trusty Dutch oven sitting in your kitchen—no fancy bread pans needed, which saves money and cabinet space.
- Wake up to the smell of homemade bread after an overnight rise—zero early morning hustle, just grab and bake.
- The long fermentation makes the bread easy to digest, which is a godsend if you’re not the biggest fan of heavy, dense loaves.
- Perfect for impressing guests with rustic, bakery-style bread without sounding like a baking whiz—just tell ‘em it’s your secret weapon.
No Knead Bread with Dutch Oven Rise
A simple and rustic no knead bread recipe that uses a Dutch oven to create a perfect crust and airy crumb. This bread requires minimal effort and yields a delicious homemade loaf with a crispy exterior and soft interior.
- Prep Time: 15 minutes
- Cook Time: 45 minutes
- Total Time: 18 hours 0 minutes
- Yield: 8
Ingredients
3 cups (375 grams) all-purpose flour
1/4 teaspoon instant yeast
1 1/4 teaspoons salt
1 1/2 cups (360 ml) warm water
Instructions
In a large mixing bowl, combine the flour, instant yeast, and salt.
Add the warm water to the dry ingredients and stir with a wooden spoon or spatula until a shaggy, sticky dough forms.
Cover the bowl tightly with plastic wrap or a clean kitchen towel and let it rest at room temperature for 12 to 18 hours, until the surface is dotted with bubbles and the dough has doubled in size.
Lightly flour a clean work surface and turn the dough out onto it. With floured hands, fold the dough over on itself once or twice to shape it into a rough ball. Cover loosely with plastic wrap and let rest for 15 minutes.
Using just enough flour to keep the dough from sticking, gently and quickly shape the dough into a ball. Place the dough seam side down on a large piece of parchment paper. Cover with a kitchen towel and let rise for 1 to 2 hours, until it has nearly doubled in size.
About 30 minutes before the dough is ready, place a 5 to 6-quart Dutch oven with its lid in the oven and preheat to 450°F (232°C).
Carefully remove the hot Dutch oven from the oven. Using the parchment paper, lift the dough and place it into the Dutch oven. Cover with the lid and return to the oven.
Bake for 30 minutes with the lid on. Then remove the lid and bake for an additional 15 minutes, until the bread is deep golden brown and crusty.
Remove the bread from the Dutch oven and transfer it to a wire rack. Let cool completely before slicing.
Explore more:
Breakfast Recipes
Mastering No-Knead Bread with Dutch Oven Magic
The Secret to That Golden Crust—Why the Dutch Oven Rocks the Bake
Here’s the deal: the Dutch oven isn’t just a fancy pot; it’s a game changer. By trapping steam inside, it mimics the environment of a professional bread oven, coaxing out a crust that’s blistered and crackly—something you just can’t get from a bare baking sheet. The lid stays on for the first 30 minutes, holding in humidity so the dough can fully expand without drying out. Then, when the lid comes off, that steam escapes, and the crust hardens to a perfect, crunchy shell. Trust me, no matter how many times I’ve tried other methods, this trick consistently blows away my expectations.
Pro tip? Preheat the Dutch oven for at least 30 minutes at 450°F. It needs to be blazing hot so the dough hits that instant heat shock, which helps with oven spring—the rapid rise of the bread once it hits the heat.
Ingredient Swaps That Won’t Wreck Your Loaf
Alright, let’s talk flour. The recipe calls for all-purpose, but if you want to push your bread into the big leagues, swap half the flour for bread flour. More protein means more gluten, which means a chewier crumb that holds its air pockets better. No bread flour? No sweat. Just accept a slightly softer texture.
Instead of instant yeast, you can use active dry yeast—just dissolve it in the warm water for 5-10 minutes before mixing. The dough might take a bit longer to rise, but the endgame stays solid.
Also, water temperature matters. If it’s too hot, you kill the yeast; too cold, and the dough drags its feet rising. Aim for around 100°F to keep yeast happy and kicking.
Fixing Common No-Knead Slip-Ups—When Your Dough Plays Hard to Get
Ever waited 18 hours and your dough barely budged? Frustrating, right? If that’s happening, your yeast could be old or the water temperature was off—too cold and the yeast stays dormant. Next time, warm the water a bit more and double-check your yeast’s expiry date.
Sticky mess? That’s normal, but if it’s impossible to handle, resist the urge to dump in tons of flour. Instead, dampen your hands or scrape the dough with a wet spatula. Over-flouring kills the dough’s airiness and makes the crumb dense.
And if your bread flattens after shaping, you might have over-proofed. That dough is like a ticking time bomb—too long out and it collapses. Keep an eye on the rise; it should almost double, not triple.
No Knead Bread with Dutch Oven Rise: FAQs
A: Yes and no. A Dutch oven traps steam to crispen the crust just right, but if you’re in a pinch, a heavy oven-safe pot with a lid can work, or try adding a pan of water to your oven to create steam.
A: Not really. The long 12-18 hour ferment is what builds flavor and texture here—rushing it is like trying to sprint a marathon. Patience pays off with this bread.
A: That’s normal! Keep your hands and work surface lightly floured. The dough will be tacky but resist dumping tons of flour; that kills the airy crumb we want. Think gentle folds, not heavy-handed kneading.
A: Absolutely! Bread flour has more protein, which can give you a chewier bite and better structure. Just expect a slightly different crumb and maybe a teeny bit more chew.
A: No. Letting it cool completely (yes, it’s hard) prevents the crumb from turning gummy. Slicing hot bread is a rookie move—resist the urge!