
Patience wins again.
There’s something almost magical about waking up to a dough that’s been quietly bubbling away all night. No frantic kneading, no fancy mixers—just flour, water, a pinch of yeast, and a Dutch oven doing the heavy lifting. The ritual of setting up the dough before bed feels like a secret pact with tomorrow’s breakfast.
When I first tried this no knead method, I was skeptical—bread without kneading? Sounds like kitchen blasphemy. But the slow rise overnight lets gluten develop at its own pace, giving the dough that feather-light crumb with a crust that snaps just right. Using a Dutch oven traps steam, turning that crust into a golden, crackly masterpiece. This isn’t just bread; it’s a lesson in low-key patience and perfect timing.
So, if you’ve been chasing that elusive bakery loaf without the elbow grease, this no knead Dutch oven method might just become your go-to. Ready to let your oven and time do the heavy lifting? Let’s dive in.
If you’re looking to pair your Quick Tuna Melt Sandwiches: Creamy, Crispy, and Perfectly Cheesy with some fresh homemade bread, try this no knead bread dutch oven rise recipe for an easy and delicious option.
Real Life Wins from Making No Knead Bread in a Dutch Oven
- Hands-off rise: Pop the dough in before bed—wake up to the scent of fresh bread. Minimal fuss, max reward.
- Crust that snaps: The Dutch oven traps steam, giving you a crackly crust that’s the envy of any bakery.
- Airy crumb with zero elbow grease: No kneading means you avoid the arm workout but still get those irresistible air pockets inside.
- Flexible timing: Let it rise overnight or whenever you have time—your schedule calls the shots, not the recipe.
- Budget-friendly basics: Uses everyday pantry staples—no fancy ingredients or gadgets required. Perfect for the broke-but-bread-curious.
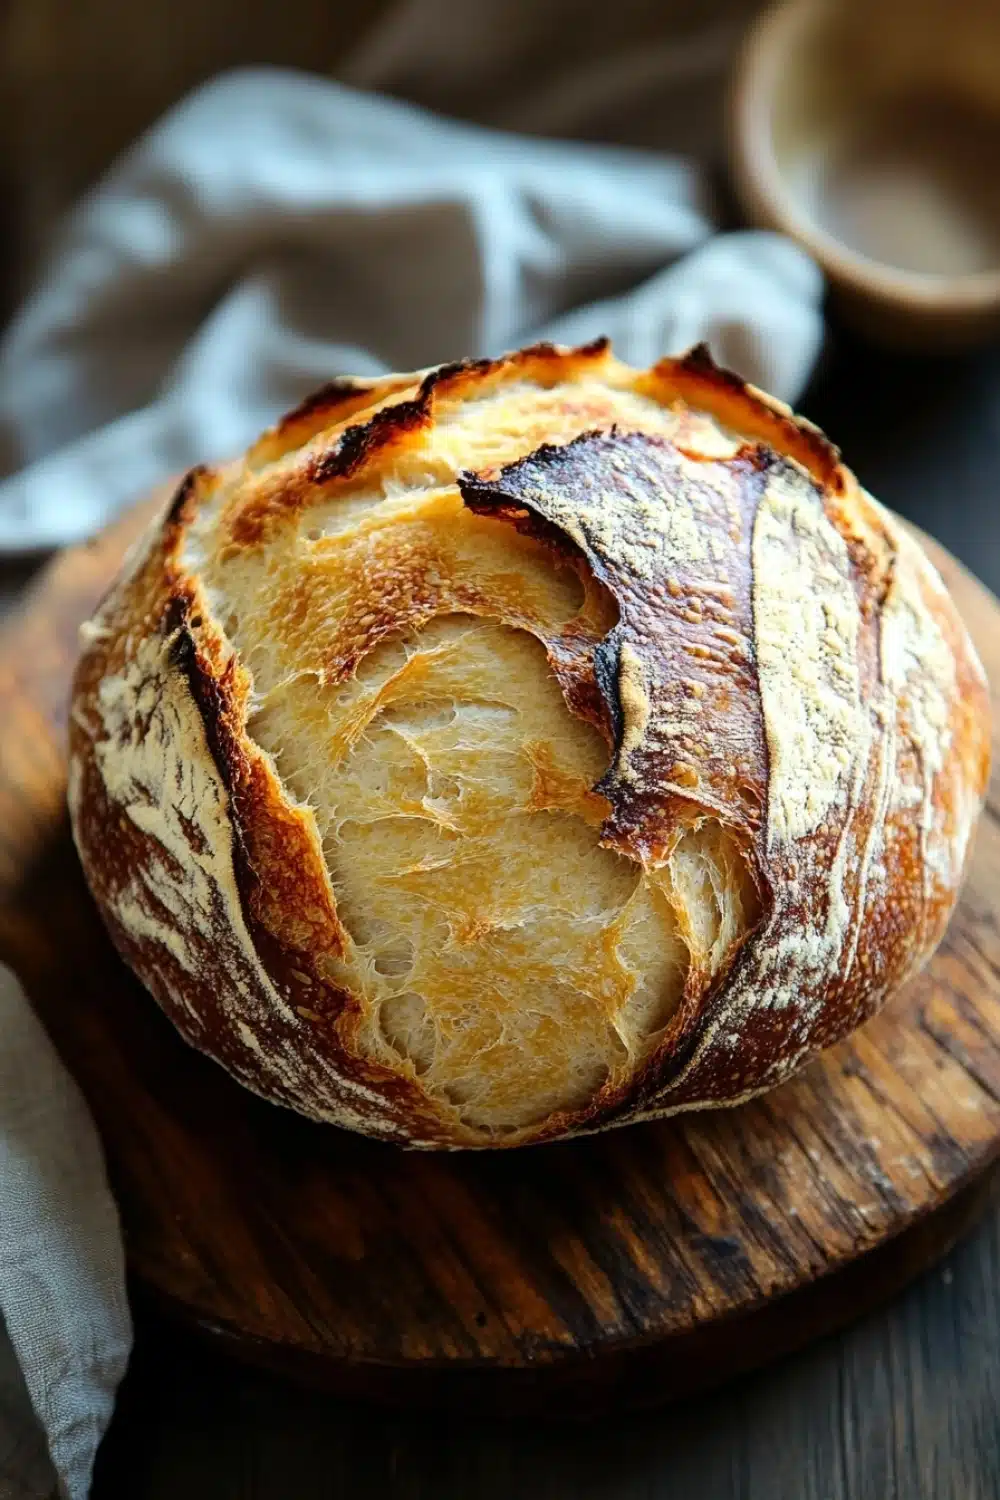
No Knead Bread Dutch Oven Rise
A simple and rustic no knead bread recipe that uses a Dutch oven to create a beautifully crusty loaf with a soft, airy interior. This bread requires minimal effort and rises overnight for convenience.
- Prep Time: 15 minutes
- Cook Time: 45 minutes
- Total Time: 12 hours 0 minutes
- Yield: 8
Ingredients
3 cups (360 grams) all-purpose flour
1 1/4 teaspoons salt
1/4 teaspoon instant yeast
1 1/2 cups (360 milliliters) warm water (about 110°F / 43°C)
Instructions
In a large mixing bowl, combine the all-purpose flour, salt, and instant yeast. Stir to mix evenly.
Add the warm water to the dry ingredients and stir with a wooden spoon or spatula until a shaggy, sticky dough forms.
Cover the bowl tightly with plastic wrap or a clean kitchen towel and let the dough rest at room temperature for 12 hours, or overnight, until the surface is dotted with bubbles and the dough has doubled in size.
After the dough has risen, lightly flour a clean work surface and turn the dough out onto it.
With floured hands, fold the dough over on itself once or twice to shape it into a rough ball. Do not knead.
Place a large piece of parchment paper on a kitchen towel and dust the towel with flour. Put the dough seam side down on the parchment paper and cover it loosely with another kitchen towel. Let it rise for 1 to 2 hours until it has nearly doubled in size.
About 30 minutes before the dough is ready, place a 5 to 6 quart Dutch oven with its lid inside your oven and preheat to 450°F (232°C).
Carefully remove the hot Dutch oven from the oven. Lift the dough using the parchment paper and place both into the Dutch oven.
Cover with the lid and bake for 30 minutes.
Remove the lid and bake for an additional 15 minutes, or until the bread is deep golden brown and crusty.
Using oven mitts, carefully remove the bread from the Dutch oven and transfer it to a wire rack to cool completely before slicing.
Explore more:
Breakfast Recipes
Mastering No-Knead Dutch Oven Bread
The Secret to That Golden Crust—Why Dutch Ovens Rule
Ever wondered why your no-knead loaf never quite nails that blistering crust? It’s all about the steamy seclusion inside your Dutch oven. When you preheat the heavy cast iron pot, it traps moisture released from the dough, essentially turning your oven into a mini steam chamber. That steam keeps the dough’s surface soft during the initial baking phase, allowing it to expand fully without cracking prematurely. Once you remove the lid, the dry heat crisps the exterior, delivering that coveted crust—crackly, dark, and full of character.
Trust me, I’ve fought the “flat loaf blues” more times than I can count—using a Dutch oven is the game changer that turned my bread from cookie to king.
Swapping Ingredients Without Losing Your Edge
Flour variety can make or break your loaf’s texture. All-purpose flour is your bread’s steady backbone here, but feel free to tinker. Want a nuttier flavor? Substitute up to half with whole wheat flour—but heads up, denser crumb follows. For that more open, airy crumb reminiscent of artisan baguettes, a bit of bread flour or high-gluten flour can be your secret weapon.
Yeast? Instant yeast keeps the timing straightforward, but if you only have active dry, just proof it in your warm water first—don’t skip this step or your dough will sulk and rise sluggishly. Salt isn’t just seasoning; it strengthens gluten bonds and controls yeast action. Never skimp.
Fixing the Common Flop: Flat, Dense Loaves
Flat results? Dense texture? Here’s the lowdown. The culprit is usually underproofing or too much flour. When the dough hasn’t bubbled and doubled overnight, it hasn’t built enough gas pockets—your bread ends up like a loaf-shaped rock. Patience is your ally here. Don’t rush the fermentation; the overnight rise is when the magic happens.
Another pitfall: heavy-handed flouring during shaping—too much flour kills the dough’s stretchiness and traps less air. Handle that shaggy dough gently with floured hands, fold it lightly, and embrace imperfections—it’s rustic bread, after all.
Lastly, temperature matters. Room temperature too cold? Yeast slows down. Too hot? You kill it. Aim for a cozy 70–75°F spot and watch your dough thrive instead of sulk.
No Knead Bread Dutch Oven Rise: FAQs
Do I really need to knead the dough?
Nope! That’s the beauty of this recipe. The long overnight rise does all the heavy lifting, letting gluten develop naturally without you breaking a sweat.
Why use a Dutch oven?
Great question. The Dutch oven traps steam during baking, which helps form that crackly crust and keeps the inside moist and fluffy. It’s like giving your bread a mini steam bath—total game changer.
Can I use whole wheat flour instead?
You can, but heads up: whole wheat absorbs more water and can make the dough denser. If you’re mixing flours, try 50/50 whole wheat and all-purpose, and maybe add a splash more water. Patience is key when adjusting hydration.
How do I know when the bread is done?
Look for a deep golden-brown crust and listen for a hollow thump when you tap the bottom. If it sounds dull, it needs more time. Oven temps can vary, so trust your senses over the clock.
Can I prep this bread during the day?
Absolutely! Just tweak your timing. Mix it in the morning and let it rise during the day, then bake in the evening. Or vice versa. The slow fermentation is what creates flavor, so play with the schedule to fit your rhythm.