
Introduction to Pumpkin Patch Pretzels
As the leaves turn and the air gets crisp, there’s nothing quite like the aroma of freshly baked Pumpkin Patch Pretzels wafting through the house. These delightful treats are not just a snack; they’re a warm hug on a chilly day. I know how busy life can get, especially for us moms juggling work, kids, and everything in between. This recipe is a quick solution for those fall festivities or a cozy family night in. Plus, they’re sure to impress your loved ones, making you the star of the season!
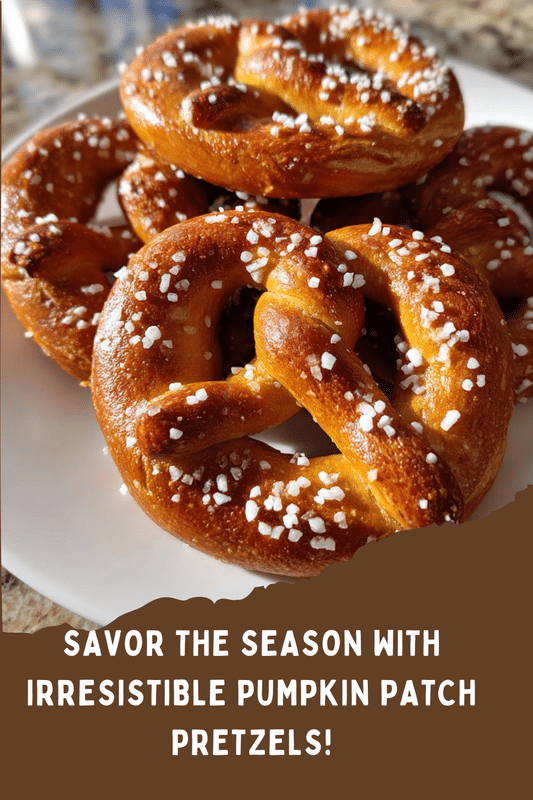
PrintPumpkin Patch Pretzels: Discover the Perfect Recipe Today!
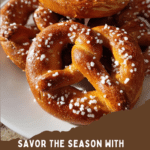
Delicious pumpkin-flavored pretzels that are perfect for fall festivities.
- Prep Time: 20 minutes
- Cook Time: 15 minutes
- Total Time: 1 hour 35 minutes
- Yield: 12 pretzels
- Category: Snack
- Method: Baking
- Cuisine: American
- Diet: Vegetarian
Ingredients
- 2 cups warm water
- 1 packet active dry yeast
- 1/4 cup granulated sugar
- 1/2 cup pumpkin puree
- 5 cups all-purpose flour
- 1 teaspoon salt
- 1/4 cup baking soda
- 1 egg (beaten)
- Coarse sea salt (for sprinkling)
Instructions
- In a large bowl, combine warm water, yeast, and sugar. Let it sit for 5 minutes until frothy.
- Add pumpkin puree, flour, and salt to the yeast mixture. Mix until a dough forms.
- Knead the dough on a floured surface for about 5 minutes until smooth.
- Place the dough in a greased bowl, cover, and let it rise for 1 hour.
- Preheat the oven to 425°F (220°C).
- Divide the dough into small pieces and shape them into pretzels.
- In a large pot, bring water and baking soda to a boil. Boil each pretzel for 30 seconds.
- Place the boiled pretzels on a baking sheet, brush with beaten egg, and sprinkle with coarse salt.
- Bake for 12-15 minutes until golden brown.
- Let cool slightly before serving.
Notes
- For a sweeter pretzel, add cinnamon sugar on top after baking.
- Store leftovers in an airtight container for up to 3 days.
- These pretzels can be served with a cream cheese dip for added flavor.
Why You’ll Love This Pumpkin Patch Pretzels
These Pumpkin Patch Pretzels are a delightful blend of ease and flavor. With just a handful of ingredients, you can whip up a batch in no time. They’re perfect for busy days when you crave something comforting yet impressive. Plus, the pumpkin adds a seasonal twist that your family will adore. Trust me, once you try them, they’ll become a fall favorite in your home!
Ingredients for Pumpkin Patch Pretzels
Gathering the right ingredients is the first step to creating these delightful Pumpkin Patch Pretzels. Here’s what you’ll need:
- Warm water: This activates the yeast, creating that fluffy texture we all love.
- Active dry yeast: The magic ingredient that makes your pretzels rise and become soft.
- Granulated sugar: Just a touch to feed the yeast and enhance the flavor.
- Pumpkin puree: The star of the show! It adds moisture and that lovely fall flavor.
- All-purpose flour: This forms the base of your dough, giving it structure.
- Salt: A must for balancing flavors and enhancing the overall taste.
- Baking soda: Used in the boiling process, it gives the pretzels their signature chewy crust.
- Egg (beaten): This will give your pretzels a beautiful golden color when baked.
- Coarse sea salt: For sprinkling on top, adding that perfect salty crunch.
For those who like a sweeter twist, consider adding cinnamon sugar on top after baking. You can find all the exact measurements at the bottom of the article, ready for printing. Happy baking!
How to Make Pumpkin Patch Pretzels
Now that you have your ingredients ready, let’s dive into the fun part—making these delicious Pumpkin Patch Pretzels! Follow these simple steps, and you’ll have a batch of warm, pumpkin-flavored goodness in no time.
Step 1: Prepare the Yeast Mixture
Start by combining warm water, active dry yeast, and granulated sugar in a large bowl. Stir gently and let it sit for about 5 minutes. You’ll know it’s ready when it becomes frothy and bubbly. This is the yeast waking up, and it’s a crucial step for fluffy pretzels!
Step 2: Mix in Pumpkin and Flour
Once your yeast mixture is frothy, it’s time to add the pumpkin puree, all-purpose flour, and salt. Mix everything together until a dough starts to form. Don’t worry if it looks a bit messy at first; that’s part of the fun! Just keep mixing until it all comes together.
Step 3: Knead the Dough
Now, sprinkle some flour on your countertop and turn the dough out onto it. Knead the dough for about 5 minutes until it’s smooth and elastic. Think of it as giving your dough a little workout! This step is essential for developing that perfect chewy texture.
Step 4: Let the Dough Rise
Place your kneaded dough in a greased bowl and cover it with a clean kitchen towel. Let it rise in a warm spot for about an hour. You want it to double in size, which means it’s working its magic. This is a great time to tidy up your kitchen or sip on a warm drink!
Step 5: Preheat the Oven
While your dough is rising, preheat your oven to 425°F (220°C). This step is crucial because a hot oven will give your pretzels that beautiful golden color and crispy crust. Trust me, you’ll want to get this right!
Step 6: Shape the Pretzels
Once the dough has risen, punch it down gently to release the air. Divide the dough into small pieces, about the size of a golf ball. Roll each piece into a long rope and twist it into a pretzel shape. Don’t worry if they aren’t perfect; they’ll still taste amazing!
Step 7: Boil the Pretzels
In a large pot, bring water and baking soda to a boil. Carefully drop each pretzel into the boiling water for about 30 seconds. This step is what gives your pretzels that signature chewy crust. Use a slotted spoon to remove them and place them on a baking sheet.
Step 8: Bake the Pretzels
Brush each boiled pretzel with the beaten egg and sprinkle with coarse sea salt. Then, pop them in the oven and bake for 12-15 minutes until they’re golden brown. The smell will be irresistible, and your family will be eagerly waiting!
Step 9: Cool and Serve
Once baked, let the pretzels cool slightly on a wire rack. This will help them set and make them easier to handle. Serve them warm, and watch as everyone enjoys these delightful Pumpkin Patch Pretzels!
Tips for Success
- Make sure your water is warm, not hot, to avoid killing the yeast.
- Don’t skip the boiling step; it’s key for that chewy texture.
- For even baking, space the pretzels apart on the baking sheet.
- Experiment with toppings like cinnamon sugar for a sweet twist.
- Use a kitchen timer to keep track of rising and baking times.
Equipment Needed
- Large mixing bowl: A sturdy bowl for combining ingredients; any large bowl will do.
- Measuring cups and spoons: Essential for accuracy; use a kitchen scale if you prefer.
- Rolling pin: Helpful for shaping dough; a wine bottle works in a pinch!
- Baking sheet: For baking pretzels; line it with parchment paper for easy cleanup.
- Slotted spoon: Perfect for boiling pretzels; a regular spoon can work too.
Variations of Pumpkin Patch Pretzels
- Cheesy Pretzels: Add shredded cheddar or mozzarella to the dough for a savory twist.
- Herbed Pretzels: Mix in dried herbs like rosemary or thyme for an aromatic flavor.
- Gluten-Free Option: Substitute all-purpose flour with a gluten-free flour blend for a gluten-free treat.
- Sweet Cinnamon Sugar: After baking, sprinkle with a mixture of cinnamon and sugar for a sweet finish.
- Chocolate Drizzle: Drizzle melted chocolate over the cooled pretzels for a decadent dessert version.
Serving Suggestions for Pumpkin Patch Pretzels
- Pair with a warm cream cheese dip for a delightful contrast.
- Serve alongside a cozy pumpkin spice latte for the ultimate fall experience.
- Present on a rustic wooden board for a charming autumn display.
- Offer with apple slices for a refreshing crunch.
FAQs about Pumpkin Patch Pretzels
Can I make Pumpkin Patch Pretzels ahead of time?
Absolutely! You can prepare the dough a day in advance and let it rise in the fridge overnight. Just bring it back to room temperature before shaping and boiling.
What can I serve with Pumpkin Patch Pretzels?
These pretzels pair wonderfully with a warm cream cheese dip or even a spicy mustard. For a sweet twist, try them with a caramel dip!
How do I store leftover pretzels?
Store any leftovers in an airtight container at room temperature for up to three days. You can also freeze them for longer storage; just reheat in the oven when you’re ready to enjoy!
Can I use fresh pumpkin instead of canned?
Yes, you can! Just make sure to cook and puree the pumpkin until smooth. It may require a bit more effort, but the flavor will be worth it!
Are these pretzels suitable for a gluten-free diet?
Yes! Simply substitute the all-purpose flour with a gluten-free flour blend. Just be sure to check that your baking soda is gluten-free as well.
Final Thoughts
Making Pumpkin Patch Pretzels is more than just baking; it’s about creating memories with your loved ones. The joy of kneading the dough, watching it rise, and finally pulling those golden pretzels from the oven fills your home with warmth and laughter. These delightful treats are perfect for cozy gatherings or a simple family snack. Plus, the pumpkin flavor adds a seasonal touch that everyone will love. So, roll up your sleeves, gather your family, and enjoy the deliciousness of these pretzels together. Trust me, they’ll become a cherished tradition in your home!