
Introduction to Spiderweb Brownies
As the leaves turn and the air gets crisp, I find myself craving cozy treats that bring a little magic to the season. Enter Spiderweb Brownies! These delightful, spooky desserts are not just a feast for the eyes; they’re a quick solution for busy days filled with Halloween festivities. With a rich chocolate base and a creamy spiderweb design, they’re sure to impress your loved ones. Whether you’re hosting a party or just want to indulge, these brownies are the perfect way to celebrate the season with a touch of fun!
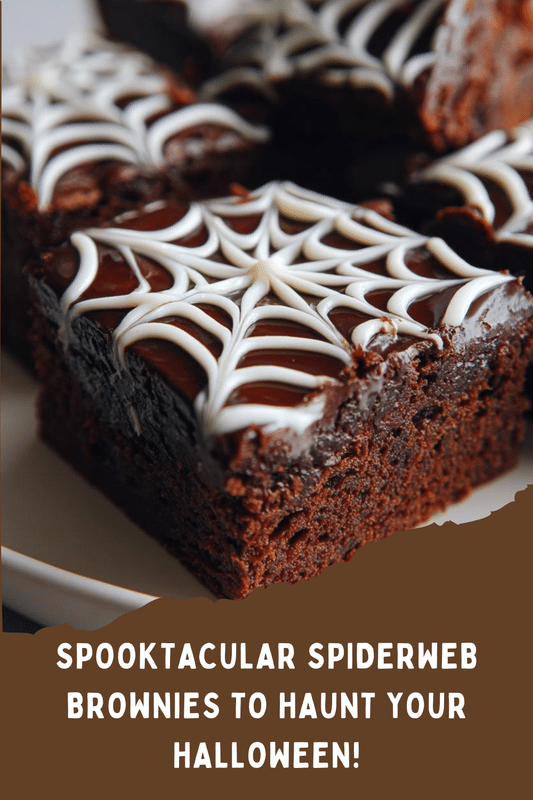
PrintSpiderweb Brownies: Discover the Perfect Halloween Treat!

Spiderweb Brownies are a delicious and spooky dessert perfect for Halloween celebrations, featuring a rich chocolate brownie base topped with a creamy spiderweb design.
- Prep Time: 20 minutes
- Cook Time: 30 minutes
- Total Time: 50 minutes
- Yield: 24 brownies
- Category: Dessert
- Method: Baking
- Cuisine: American
- Diet: Vegetarian
Ingredients
- 1 cup unsalted butter
- 2 cups granulated sugar
- 4 large eggs
- 1 teaspoon vanilla extract
- 1 cup all-purpose flour
- 1 cup unsweetened cocoa powder
- 1/2 teaspoon salt
- 1/2 teaspoon baking powder
- 1 cup white chocolate chips
- 1/2 cup heavy cream
Instructions
- Preheat the oven to 350°F (175°C) and grease a 9×13 inch baking pan.
- In a saucepan, melt the butter over medium heat, then stir in the sugar until well combined.
- Remove from heat and let cool slightly, then whisk in the eggs and vanilla extract.
- In a separate bowl, mix together the flour, cocoa powder, salt, and baking powder.
- Gradually add the dry ingredients to the wet mixture, stirring until just combined.
- Pour the brownie batter into the prepared pan and spread evenly.
- Bake for 25-30 minutes or until a toothpick inserted comes out with a few moist crumbs.
- While the brownies are baking, prepare the spiderweb topping by heating the white chocolate chips and heavy cream in a microwave until melted and smooth.
- Once the brownies are cooled, drizzle the white chocolate mixture in a spiderweb pattern on top.
- Let the brownies set before cutting into squares and serving.
Notes
- For a more intense chocolate flavor, use dark chocolate cocoa powder.
- Store leftovers in an airtight container at room temperature for up to 3 days.
- Feel free to add Halloween-themed sprinkles for extra decoration.
Why You’ll Love This Spiderweb Brownies
These Spiderweb Brownies are a dream come true for busy moms and professionals alike. They come together in just 50 minutes, making them a perfect last-minute treat for Halloween gatherings. The rich chocolate flavor is irresistible, and the whimsical spiderweb design adds a fun twist that kids adore. Plus, they’re easy to make, so you can whip them up without breaking a sweat. Who doesn’t love a dessert that’s both delicious and delightful?
Ingredients for Spiderweb Brownies
Gathering the right ingredients is half the fun of baking! For these Spiderweb Brownies, you’ll need a mix of pantry staples and a few special touches to create that spooky flair.
- Unsalted butter: This is the base of your brownies, adding richness and moisture. Always use unsalted for better control over the sweetness.
- Granulated sugar: Sweetness is key! It helps create that chewy texture we all love in brownies.
- Large eggs: Eggs bind everything together and add a lovely fluffiness to the batter.
- Vanilla extract: A splash of vanilla enhances the chocolate flavor, making it even more irresistible.
- All-purpose flour: This is your structure. It gives the brownies their body and helps them rise just enough.
- Unsweetened cocoa powder: The star of the show! It provides that deep chocolate flavor that makes these brownies so decadent.
- Salt: Just a pinch balances the sweetness and enhances the chocolate taste.
- Baking powder: This little leavening agent helps the brownies rise, giving them a light texture.
- White chocolate chips: These are for the spiderweb topping! They add a creamy sweetness that contrasts beautifully with the dark brownies.
- Heavy cream: This helps melt the white chocolate into a smooth, drizzle-able topping.
For those looking to switch things up, consider using dark chocolate cocoa powder for a richer flavor. And if you want to add a festive touch, Halloween-themed sprinkles can make your brownies even more fun! You can find the exact quantities for each ingredient at the bottom of the article, ready for printing.
How to Make Spiderweb Brownies
Step 1: Preheat and Prepare
First things first, preheat your oven to 350°F (175°C). This ensures your brownies bake evenly. While the oven warms up, grab a 9×13 inch baking pan and grease it well. You can use butter or cooking spray for this. A well-greased pan helps the brownies release easily after baking, so don’t skip this step!
Step 2: Melt the Butter
Next, melt 1 cup of unsalted butter in a saucepan over medium heat. Stir in 2 cups of granulated sugar until it’s well combined. The mixture should be smooth and glossy. This step is crucial because it creates that rich, fudgy texture we all crave in brownies. Just be careful not to let the butter brown; we want it melted, not toasted!
Step 3: Combine Wet Ingredients
Once your butter and sugar mixture has cooled slightly, whisk in 4 large eggs and 1 teaspoon of vanilla extract. This is where the magic happens! The eggs add fluffiness, while the vanilla enhances the chocolate flavor. Make sure everything is well blended, creating a luscious, creamy base for your brownies.
Step 4: Mix Dry Ingredients
In a separate bowl, mix together 1 cup of all-purpose flour, 1 cup of unsweetened cocoa powder, 1/2 teaspoon of salt, and 1/2 teaspoon of baking powder. This dry mixture is essential for the structure of your brownies. Whisk it well to ensure there are no lumps, especially with the cocoa powder. A smooth batter leads to perfectly baked brownies!
Step 5: Combine Mixtures
Now, it’s time to bring it all together! Gradually add the dry ingredients to the wet mixture, stirring gently until just combined. Be careful not to overmix; we want to keep that fudgy texture. The batter should be thick and rich, with a deep chocolate color that’s simply irresistible. You can almost taste the deliciousness already!
Step 6: Bake the Brownies
Pour the brownie batter into your prepared pan, spreading it evenly. Pop it into the preheated oven and bake for 25-30 minutes. Keep an eye on them! You’ll know they’re done when a toothpick inserted comes out with a few moist crumbs. This is the perfect time to enjoy the heavenly aroma wafting through your kitchen!
Step 7: Prepare the Spiderweb Topping
While the brownies are baking, let’s prepare the spiderweb topping. In a microwave-safe bowl, combine 1 cup of white chocolate chips and 1/2 cup of heavy cream. Heat in the microwave in 30-second intervals, stirring until melted and smooth. This creamy mixture will create the perfect contrast to the rich chocolate brownies. Just be patient; it’s worth the wait!
Step 8: Decorate and Serve
Once the brownies have cooled, it’s time to get creative! Drizzle the melted white chocolate mixture over the brownies in a spiderweb pattern. Let it set for a few minutes before cutting them into squares. The final touch? A sprinkle of Halloween-themed decorations if you’re feeling festive! These Spiderweb Brownies are now ready to impress!
Tips for Success
- Always measure your ingredients accurately for the best results.
- Let the melted butter cool slightly before adding eggs to prevent scrambling.
- Use a toothpick to check for doneness; a few moist crumbs are perfect!
- For a fun twist, add nuts or chocolate chips to the brownie batter.
- Allow the brownies to cool completely before cutting for cleaner edges.
Equipment Needed
- 9×13 inch baking pan: A standard size for brownies; you can use a glass or metal pan.
- Mixing bowls: Use medium and large bowls for mixing wet and dry ingredients.
- Whisk: A whisk is perfect for blending ingredients; a fork works in a pinch.
- Spatula: A rubber spatula helps scrape down the sides and mix well.
- Microwave-safe bowl: For melting the white chocolate; any heatproof bowl will do.
Variations
- Nutty Brownies: Add chopped walnuts or pecans to the batter for a delightful crunch.
- Gluten-Free Option: Substitute all-purpose flour with a gluten-free blend for a safe treat.
- Mint Chocolate: Mix in peppermint extract for a refreshing twist on the classic flavor.
- Spicy Kick: Add a pinch of cayenne pepper or chili powder for a surprising heat that complements the chocolate.
- Vegan Version: Replace eggs with flaxseed meal and use dairy-free chocolate chips for a plant-based treat.
Serving Suggestions
- Pair your Spiderweb Brownies with a scoop of vanilla ice cream for a delightful contrast.
- Serve with a warm cup of spiced apple cider to enhance the fall flavors.
- For a festive touch, plate the brownies on a Halloween-themed platter.
- Drizzle extra melted white chocolate on top for an elegant presentation.
- Add a sprinkle of colorful Halloween sprinkles for a fun, festive look!
FAQs about Spiderweb Brownies
Can I make Spiderweb Brownies ahead of time?
Absolutely! These brownies can be made a day in advance. Just store them in an airtight container at room temperature. They’ll stay delicious and moist, ready to impress your guests!
What can I use instead of white chocolate for the spiderweb topping?
If you’re not a fan of white chocolate, you can use milk chocolate or even dark chocolate. Just remember to adjust the cream ratio for a smooth drizzle. The spiderweb design will still look fantastic!
How do I store leftover Spiderweb Brownies?
Store any leftovers in an airtight container at room temperature for up to three days. If you want to keep them longer, you can freeze them for up to a month. Just thaw before serving!
Can I add other toppings to my Spiderweb Brownies?
Definitely! Feel free to sprinkle on some Halloween-themed sprinkles, crushed candy corn, or even a drizzle of caramel for an extra treat. Get creative!
Are Spiderweb Brownies suitable for a gluten-free diet?
Yes! You can easily make these brownies gluten-free by substituting all-purpose flour with a gluten-free flour blend. Just ensure your chocolate chips are also gluten-free!
Final Thoughts
Making Spiderweb Brownies is more than just baking; it’s about creating memories with your loved ones. The joy of watching your kids’ faces light up as they see the spooky design is priceless. These brownies are a delightful blend of rich chocolate and creamy sweetness, perfect for any Halloween gathering. Plus, they’re simple enough to whip up on a busy day! So, gather your ingredients, unleash your creativity, and enjoy the process. Trust me, these brownies will become a cherished tradition in your home, bringing smiles and sweet moments for years to come!