
Introduction to Vampire Fudge Recipe
As the leaves turn and the air gets crisp, I find myself dreaming of Halloween treats that are both spooky and delicious. That’s where my Vampire Fudge Recipe comes in! This delightful treat is not just a feast for the eyes; it’s a quick solution for busy moms like us who want to impress our loved ones without spending hours in the kitchen. With its rich flavors and vibrant colors, this fudge is sure to enchant your family and friends. So, let’s dive into this fun and easy recipe that will make your Halloween celebrations even sweeter!
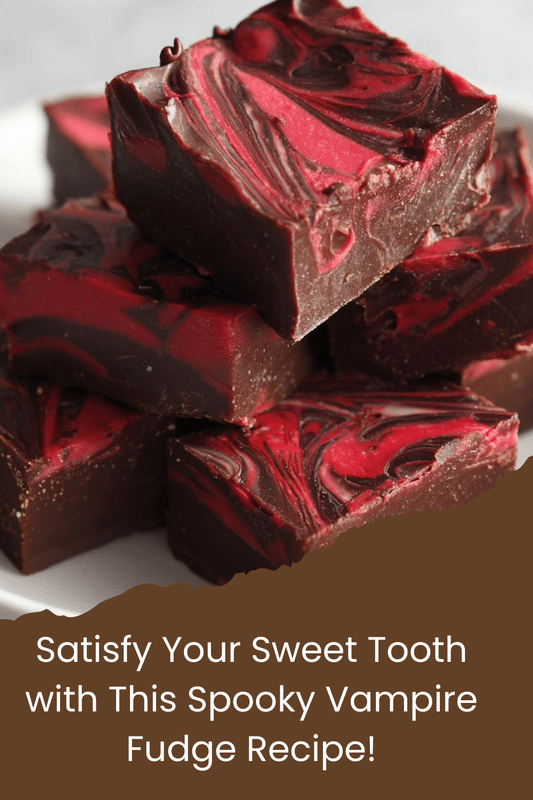
PrintVampire Fudge Recipe to Enchant Your Halloween Treats!
A spooky and delicious Vampire Fudge recipe perfect for Halloween celebrations.
- Prep Time: 15 minutes
- Cook Time: 10 minutes
- Total Time: 2 hours 25 minutes
- Yield: 24 pieces
- Category: Dessert
- Method: Stovetop
- Cuisine: American
- Diet: Vegetarian
Ingredients
- 2 cups of white chocolate chips
- 1 can (14 oz) of sweetened condensed milk
- 1/2 cup of unsweetened cocoa powder
- 1/2 cup of butter
- 1 teaspoon of vanilla extract
- Red food coloring
- Black food coloring
- Edible glitter (optional)
Instructions
- In a saucepan, melt the butter and white chocolate chips over low heat, stirring constantly.
- Once melted, add the sweetened condensed milk and vanilla extract, mixing well.
- Stir in the cocoa powder until fully combined.
- Divide the mixture into two bowls. In one bowl, add red food coloring to create a blood-like color. In the other bowl, add black food coloring.
- Layer the red and black fudge in a greased baking dish, swirling them together for a marbled effect.
- Refrigerate for at least 2 hours until set.
- Cut into squares and sprinkle with edible glitter if desired.
Notes
- Ensure the fudge is stored in an airtight container to maintain freshness.
- Feel free to adjust the amount of food coloring to achieve your desired shade.
- This fudge can be made a few days in advance for Halloween parties.
Why You’ll Love This Vampire Fudge Recipe
This Vampire Fudge Recipe is a game-changer for busy days. It’s incredibly easy to whip up, taking just 15 minutes of prep time. The rich, creamy texture combined with the playful colors makes it a hit with kids and adults alike. Plus, it’s a no-bake treat, so you can spend less time in the kitchen and more time enjoying the festivities. Trust me, this fudge will be the star of your Halloween spread!
Ingredients for Vampire Fudge Recipe
Gathering the right ingredients is the first step to creating this spooky delight. Here’s what you’ll need:
- White chocolate chips: These are the base of our fudge, providing a creamy sweetness that balances the cocoa.
- Sweetened condensed milk: This magical ingredient adds richness and helps bind everything together, making the fudge extra smooth.
- Unsweetened cocoa powder: For that deep, chocolatey flavor, cocoa powder is essential. It gives the fudge its dark, mysterious hue.
- Butter: A little butter goes a long way in adding creaminess and enhancing the overall flavor of the fudge.
- Vanilla extract: This adds a warm, inviting aroma and flavor that complements the sweetness of the fudge.
- Red food coloring: To create that blood-like effect, red food coloring is a must. It adds a fun, spooky twist!
- Black food coloring: This helps achieve the dark, dramatic look of the fudge, making it perfect for Halloween.
- Edible glitter (optional): For a touch of magic, sprinkle some edible glitter on top. It’s not necessary, but it sure makes the fudge sparkle!
For exact measurements, check the bottom of the article where you can find everything listed for easy printing. Now that you have your ingredients ready, let’s get cooking!
How to Make Vampire Fudge Recipe
Now that we have our ingredients ready, let’s get to the fun part—making the Vampire Fudge! Follow these simple steps, and you’ll have a spooky treat that’s sure to impress.
Step 1: Melt the Base
Start by placing a saucepan over low heat. Add the butter and white chocolate chips. Stir constantly to ensure they melt evenly. This is where the magic begins! The mixture should become smooth and creamy, like a warm hug on a chilly day.
Step 2: Combine Ingredients
Once your base is melted, it’s time to add the sweetened condensed milk and vanilla extract. Pour them in and mix well. This step is crucial for achieving that rich, velvety texture. You’ll want to make sure everything is blended perfectly, so no lumps remain.
Step 3: Add Cocoa Powder
Now, it’s time to bring in the cocoa powder. Gradually stir it into the mixture until fully combined. This will give your fudge that deep, chocolatey flavor we all crave. The color will start to darken, making it look even more enticing!
Step 4: Color the Fudge
Next, divide the fudge mixture into two bowls. In one bowl, add red food coloring to create a blood-like hue. In the other, add black food coloring for that dramatic effect. Mix each bowl until the colors are vibrant and well-distributed. Don’t be shy—feel free to adjust the colors to your liking!
Step 5: Layer and Swirl
Now comes the fun part! Grease a baking dish and start layering the red and black fudge. Pour a layer of red, followed by a layer of black, and continue until you’ve used up all the fudge. Use a knife or a skewer to swirl the colors together for a marbled effect. It’s like creating a spooky masterpiece!
Step 6: Chill and Cut
Once you’ve layered and swirled, pop the baking dish into the refrigerator. Let it chill for at least 2 hours until set. Once firm, take it out and cut it into squares. You’ll be left with delightful pieces of Vampire Fudge that are ready to enchant your Halloween gatherings!
Tips for Success
- Make sure to stir constantly while melting to avoid burning the chocolate.
- Use a rubber spatula for easy mixing and scraping the sides of the pan.
- For a more intense flavor, consider adding a pinch of sea salt to the fudge mixture.
- Let the fudge cool slightly before adding food coloring for better color distribution.
- Store any leftovers in an airtight container to keep them fresh and delicious!
Equipment Needed
- Medium saucepan: A non-stick pan works best for easy melting.
- Rubber spatula: Perfect for mixing and scraping the sides clean.
- Baking dish: Any size will do, but an 8×8 inch dish is ideal.
- Mixing bowls: Use two for dividing the fudge mixture.
- Knife or skewer: Essential for swirling the fudge colors together.
Variations
- Nutty Delight: Add chopped nuts like walnuts or pecans for a crunchy texture that complements the creamy fudge.
- Minty Twist: Incorporate a few drops of peppermint extract for a refreshing mint flavor that pairs beautifully with chocolate.
- Vegan Option: Substitute white chocolate chips with dairy-free chocolate chips and use coconut cream instead of sweetened condensed milk.
- Spicy Kick: Add a pinch of cayenne pepper or chili powder for a surprising heat that contrasts with the sweetness.
- Fruit Infusion: Mix in dried cranberries or cherries for a fruity burst that adds a delightful chewiness to the fudge.
Serving Suggestions
- Pair with Hot Cocoa: Serve your Vampire Fudge alongside a warm cup of hot cocoa for a cozy treat.
- Halloween-Themed Platter: Arrange the fudge on a spooky platter with Halloween decorations for a festive touch.
- Garnish with Sprinkles: Add some Halloween-themed sprinkles on top for extra flair and fun.
- Serve with Ice Cream: A scoop of vanilla ice cream complements the rich fudge perfectly.
- Gift in Mason Jars: Package the fudge in mason jars tied with a ribbon for a charming homemade gift.
FAQs about Vampire Fudge Recipe
Can I make Vampire Fudge ahead of time?
Absolutely! This fudge can be made a few days in advance. Just store it in an airtight container in the fridge to keep it fresh. It’s perfect for busy moms who want to get a head start on Halloween treats!
How do I store leftover Vampire Fudge?
To maintain its deliciousness, store any leftover fudge in an airtight container. It will stay fresh for up to a week in the refrigerator. Just make sure to let it come to room temperature before serving for the best texture!
Can I use different colors for the fudge?
Of course! While red and black are perfect for Halloween, feel free to get creative. You can use any colors you like to match your party theme. Just remember to adjust the food coloring to achieve your desired shades!
Is this Vampire Fudge Recipe suitable for vegetarians?
Yes! This fudge is vegetarian-friendly, as it contains no meat or animal-derived ingredients. Just double-check your chocolate chips to ensure they meet your dietary preferences.
What can I do if my fudge doesn’t set properly?
If your fudge doesn’t set, it might need more time in the fridge. If it’s still soft after a few hours, you can try placing it in the freezer for a short time. Just be careful not to freeze it for too long, or it may become too hard!
Final Thoughts
Creating this Vampire Fudge Recipe is more than just making a treat; it’s about crafting memories with your loved ones. The joy of swirling those vibrant colors together is like painting a masterpiece in your kitchen. Each bite is a delightful mix of creamy sweetness and a hint of chocolatey richness, perfect for Halloween festivities. Whether you’re sharing it at a party or enjoying it during a cozy movie night, this fudge brings a sprinkle of magic to any occasion. So, roll up your sleeves and let the fun begin—your Halloween celebrations are about to get a whole lot sweeter!