
Introduction to Witch Finger Breadsticks
As the leaves turn and the air gets crisp, I find myself craving fun, festive snacks that bring a little magic to the table. Enter Witch Finger Breadsticks! These spooky snacks are not just a treat for the eyes; they’re a quick solution for busy days filled with Halloween festivities. Whether you’re hosting a party or just looking to impress your family, these breadsticks are sure to delight. Plus, they’re easy to whip up, making them perfect for those of us juggling work, kids, and everything in between. Let’s get baking!
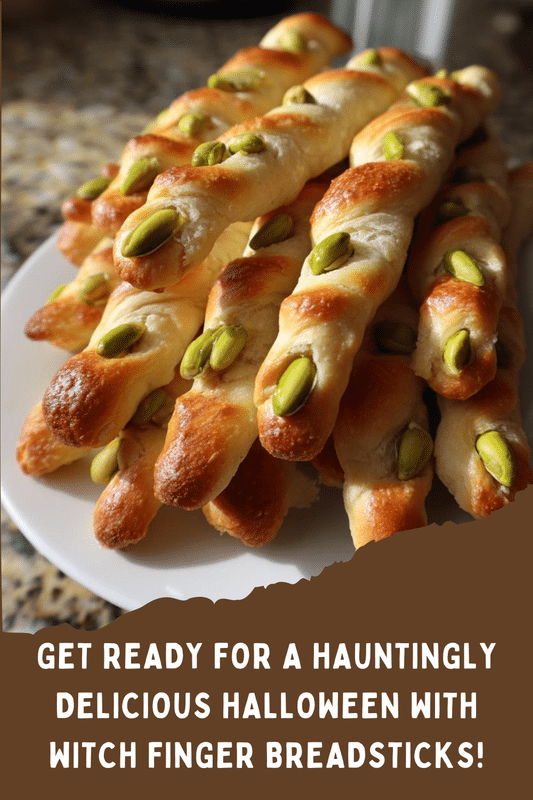
PrintWitch Finger Breadsticks: A Spooky Snack Idea!

Witch Finger Breadsticks are a fun and spooky snack perfect for Halloween parties or themed gatherings. These breadsticks are shaped like fingers and can be served with a variety of dips.
- Prep Time: 20 minutes
- Cook Time: 20 minutes
- Total Time: 40 minutes
- Yield: 12 breadsticks
- Category: Snack
- Method: Baking
- Cuisine: American
- Diet: Vegetarian
Ingredients
- 1 package of pizza dough
- 1/2 cup of sliced almonds
- 1/4 cup of marinara sauce (for dipping)
- 1 egg (for egg wash)
- 1 teaspoon of garlic powder
- 1 teaspoon of Italian seasoning
Instructions
- Preheat the oven to 400°F (200°C).
- Roll out the pizza dough on a floured surface.
- Cut the dough into strips about 1 inch wide and 5 inches long.
- Shape each strip into a finger by tapering one end and making knuckle indentations.
- Press an almond slice onto the tapered end to create a fingernail.
- Brush the breadsticks with egg wash and sprinkle with garlic powder and Italian seasoning.
- Place the breadsticks on a baking sheet lined with parchment paper.
- Bake for 15-20 minutes or until golden brown.
- Serve with marinara sauce for dipping.
Notes
- For a spicier version, add red pepper flakes to the dough.
- These breadsticks can be made ahead of time and reheated before serving.
- Experiment with different shapes for a unique presentation.
Why You’ll Love This Witch Finger Breadsticks
Witch Finger Breadsticks are the ultimate blend of fun and flavor. They’re quick to make, taking just 40 minutes from start to finish, which is a lifesaver for busy moms like me. The kids will love their spooky shape, and you’ll appreciate how easy they are to customize. Plus, they pair perfectly with marinara sauce, making them a tasty treat that everyone can enjoy. What’s not to love?
Ingredients for Witch Finger Breadsticks
Gathering the right ingredients is half the fun! Here’s what you’ll need to create these delightful Witch Finger Breadsticks:
- Pizza Dough: The star of the show! You can use store-bought or homemade dough. It’s soft, stretchy, and perfect for shaping.
- Sliced Almonds: These serve as the creepy fingernails. They add a nice crunch and a hint of nuttiness. If you’re not a fan, feel free to swap them for sunflower seeds!
- Marinara Sauce: A classic dipping sauce that complements the breadsticks beautifully. You can also try ranch or garlic butter for a twist.
- Egg: This is for the egg wash, giving your breadsticks a lovely golden color. If you prefer a vegan option, a bit of olive oil works too!
- Garlic Powder: A sprinkle of this adds a savory kick. It’s a must for flavor lovers!
- Italian Seasoning: A blend of herbs that brings warmth and depth to the breadsticks. You can use fresh herbs if you have them on hand.
For exact measurements, check the bottom of the article where you can find everything listed for easy printing. Now, let’s get ready to create some spooky magic in the kitchen!
How to Make Witch Finger Breadsticks
Now that we have our ingredients ready, let’s dive into the fun part—making these Witch Finger Breadsticks! Follow these simple steps, and you’ll have a spooky snack that’s sure to impress.
Step 1: Preheat the Oven
First things first, preheat your oven to 400°F (200°C). Preheating is crucial because it ensures that your breadsticks bake evenly and achieve that perfect golden-brown color. Trust me, you don’t want to skip this step!
Step 2: Prepare the Dough
Next, roll out your pizza dough on a floured surface. This prevents it from sticking and makes it easier to shape. Use a rolling pin to get it nice and even. Aim for about ¼ inch thick; this thickness will give you a good texture without being too doughy.
Step 3: Cut the Dough
Now, cut the dough into strips about 1 inch wide and 5 inches long. A pizza cutter works wonders here! If you want to get creative, you can vary the lengths for different finger sizes. Just remember, the more fingers, the more fun!
Step 4: Shape the Fingers
Here comes the spooky part! Take each strip and taper one end to create a finger shape. Use your fingers to make knuckle indentations along the length of the breadstick. This adds character and makes them look extra creepy. Your kids will love this part!
Step 5: Add the Fingernails
Press an almond slice onto the tapered end of each breadstick to create a fingernail. This little detail makes all the difference! If you’re using sunflower seeds, just press them in the same way. It’s all about that realistic touch!
Step 6: Season the Breadsticks
Brush the breadsticks with an egg wash made from the beaten egg. This gives them a beautiful shine. Then, sprinkle garlic powder and Italian seasoning over the top. The aroma will have your family gathering in the kitchen, ready to dig in!
Step 7: Bake the Breadsticks
Place your breadsticks on a baking sheet lined with parchment paper. Bake them for 15-20 minutes or until they’re golden brown. Keep an eye on them; ovens can be sneaky! You want them crispy on the outside and soft on the inside.
Step 8: Serve with Dipping Sauce
Once they’re out of the oven, let them cool for a few minutes. Serve your Witch Finger Breadsticks with marinara sauce for dipping. You can also try ranch or garlic butter for a twist. Enjoy the spooky fun with your family and friends!
Tips for Success
- Make sure your dough is at room temperature for easier handling.
- Use a sharp knife or pizza cutter for clean cuts.
- Experiment with different seasonings to find your favorite flavor.
- For extra crunch, bake a few minutes longer, but watch closely!
- Let the breadsticks cool slightly before serving to avoid burns.
Equipment Needed
- Baking Sheet: A standard baking sheet works great. If you don’t have one, a large oven-safe dish will do.
- Parchment Paper: This helps prevent sticking. If you’re out, lightly greasing the baking sheet is a good alternative.
- Rolling Pin: Essential for rolling out dough. A wine bottle can work in a pinch!
- Pizza Cutter or Knife: For cutting the dough into strips. A sharp knife will also do the trick.
Variations
- Spicy Witch Fingers: Add red pepper flakes to the dough for a kick of heat. Perfect for those who love a little spice!
- Cheesy Fingers: Sprinkle shredded cheese on top before baking for a gooey, cheesy twist. Who doesn’t love cheese?
- Herb-Infused Dough: Mix in fresh herbs like rosemary or thyme into the dough for an aromatic flavor boost.
- Gluten-Free Option: Use gluten-free pizza dough to make these spooky snacks suitable for those with dietary restrictions.
- Sweet Version: For a fun dessert, shape the dough into fingers, sprinkle with cinnamon sugar, and serve with chocolate sauce for dipping!
Serving Suggestions
- Pair your Witch Finger Breadsticks with a side of fresh veggies for a colorful platter.
- Serve with a spooky-themed drink, like a dark grape soda or a Halloween punch.
- For a fun presentation, arrange the breadsticks in a cauldron or a spooky bowl.
- Garnish with fresh herbs for a pop of color and flavor.
FAQs about Witch Finger Breadsticks
Can I make Witch Finger Breadsticks ahead of time?
Absolutely! You can prepare the breadsticks in advance and store them in the fridge. Just bake them right before serving for that fresh-out-of-the-oven taste. They’re perfect for busy days!
What dips pair well with Witch Finger Breadsticks?
While marinara sauce is a classic choice, you can also try ranch dressing, garlic butter, or even a spicy salsa. The options are endless, so feel free to get creative!
Can I use homemade pizza dough for this recipe?
Yes, homemade pizza dough works wonderfully! Just make sure it’s well-kneaded and has risen properly for the best texture. It adds a personal touch to your spooky snacks!
How do I store leftover breadsticks?
Store any leftovers in an airtight container at room temperature for up to two days. You can also freeze them for longer storage. Just reheat in the oven when you’re ready to enjoy!
Are Witch Finger Breadsticks suitable for kids?
Definitely! Kids love the fun shape, and they can even help with the shaping process. Just keep an eye on the oven, and you’ll have a spooky snack that’s kid-approved!
Final Thoughts
Creating Witch Finger Breadsticks is more than just a cooking project; it’s a delightful experience that brings the family together. The laughter and excitement as you shape the dough into spooky fingers are priceless. Plus, the aroma wafting through your kitchen will have everyone eagerly awaiting snack time. These breadsticks are not only fun to make but also a tasty treat that adds a festive touch to any gathering. So, gather your loved ones, roll up your sleeves, and let the magic of Halloween fill your home with joy and deliciousness!