
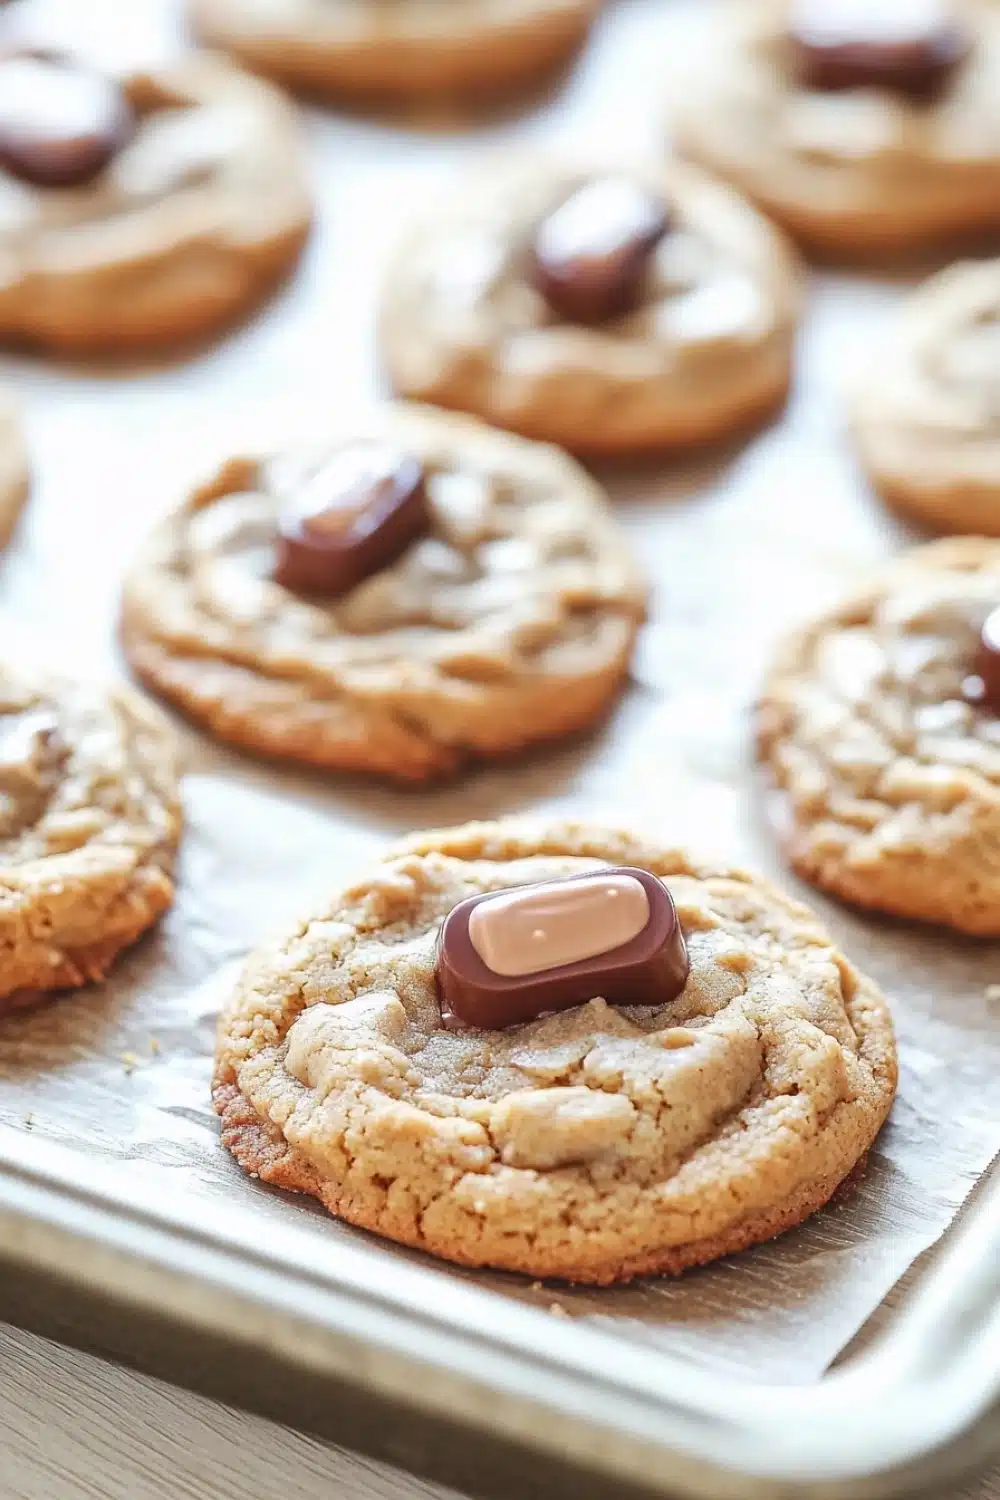
Peanut butter meets chocolate kiss—yes, please.
There’s something so nostalgic about these cookies. I remember my grandma’s kitchen, where the warm aroma of peanut butter cookies filled the air, and chocolate kisses were always nearby, ready to press into the warm dough. The magic moment is when you pop that shiny Hershey’s Kiss on top right out of the oven—the chocolate softens just enough, creating that melty center everyone fights over.
Getting these just right is part science, part art. You want the dough tender and chewy, with a slight crisp around the edges, but the real clincher is the smooth peanut butter flavor that balances the sweet kiss perfectly. No fancy ingredients, just old-school goodness.
These cookies don’t just bring smiles—they bring memories.
For a delicious twist on classic treats, check out our Perfect Sugar Cookie Platter: Soft, Chewy, and Easy to Share featuring cookie peanut butter Hershey’s Kisses.
Why You’ll Love These Peanut Butter Hershey’s Kisses Cookies
- Quick bake—ready in just 25 minutes, making them a perfect last-minute sweet fix.
- Soft, chewy texture with that iconic Hershey’s Kiss smack dab in the center—an instant crowd-pleaser.
- Simple ingredients you probably already have in your pantry—no fancy shopping runs required.
- Great for gifting or potlucks: they hold up well in airtight containers and freeze like a champ.
- Perfect balance of salty and sweet that keeps you coming back for one more (or two).
Peanut Butter Hershey’s Kisses Cookies

Deliciously soft and chewy peanut butter cookies topped with classic Hershey’s Kisses chocolates. These cookies are perfect for any occasion and easy to make with simple ingredients.
- Prep Time: 15 minutes
- Cook Time: 10 minutes
- Total Time: 25 minutes
- Yield: 24 cookies
Ingredients
1 cup creamy peanut butter
1 cup granulated sugar
1 large egg
1 teaspoon baking soda
24 Hershey’s Kisses chocolates, unwrapped
Instructions
Preheat the oven to 350°F (175°C). Line a baking sheet with parchment paper.
In a medium bowl, mix together the peanut butter, granulated sugar, egg, and baking soda until well combined and smooth.
Roll the dough into 24 equal-sized balls and place them on the prepared baking sheet about 2 inches apart.
Bake the cookies in the preheated oven for 8 to 10 minutes, or until the edges are lightly golden.
Remove the cookies from the oven and immediately press one Hershey’s Kiss into the center of each cookie.
Allow the cookies to cool on the baking sheet for 5 minutes before transferring them to a wire rack to cool completely.
Explore more:
Breakfast Recipes
Mastering Peanut Butter Hershey’s Kisses Cookies
The Lowdown on Ingredient Swaps — Keeping It Real
Listen, peanut butter cookies don’t have to be a one-trick pony. If creamy peanut butter ain’t your jam, try chunky to add crunch—just don’t go crazy; it’ll mess with the texture. Sugar? Granulated’s the OG here. Swap it for brown sugar and you’ll get a moister, slightly fudgier vibe, but watch your bake time ’cause it can brown faster. Eggs? No room for skimping—one large egg binds everything tight. Baking soda is your secret sauce for that subtle puff and chew, so don’t skip it or double it without a plan. And those Hershey’s Kisses? Think outside the chocolate box with peanut butter cups or dark chocolate if you want to snag more flavor layers. But beware, switching out the classics can throw off your rhythm, so test small batches first.
The Nitty-Gritty: Why Press the Kiss Warm and Fast?
Okay, here’s the scoop. You pull the cookies out at just the right golden moment—the edges firm, the middles still soft. That’s the sweet spot. Why? Because the kiss needs a soft landing zone to nestle in without melting into a puddle or cracking the cookie. I’ve botched this step before—left the cookie too cool, tried to shove in the kiss, and ended up with a sad chocolate casualty and a cracked cookie. The trick? Get the kiss in immediately after the oven. The residual heat softens the cookie top just enough to gently hug the chocolate but keeps the structure intact. This step feels like a sprint in a marathon, but it’s worth the hustle.
Fixing Cookie Fails — When Your Dough Turns Into a Hot Mess
Ever had your dough stick to your hands like it’s auditioning for a glue commercial? Happens. First, chill your dough for at least 15 minutes—cold dough is your friend, trust me. If cookies spread like they’re on a slip-n-slide, you likely used too much peanut butter or skipped the chill step. Solution? Add a touch more baking soda or even a sprinkle of flour (just a bit, don’t go rogue) to tighten things up. Overbaked cookies become rock-hard; underbaked ones feel like dough balls masquerading as cookies. Timing is king, so keep your eyes glued and check early. And when the kisses melt too much or slide off? That usually means you pressed them in too soon or the oven temp was off. No shame in adjusting your rack position or dialing down your oven by 10 degrees next round.
Peanut Butter Hershey’s Kisses Cookies FAQ
- Can I use crunchy peanut butter?
- Absolutely! Crunchy peanut butter adds a nice texture contrast to the soft cookie base — a little extra chew and nuttiness that wakes up your taste buds.
- Do I have to unwrap the Hershey’s Kisses?
- Yes, always unwrap them first. The foil can burn or stick to your cookies, turning your sweet treat into a foil catastrophe.
- Will these cookies stick to the pan?
- Not if you line your baking sheet with parchment paper as instructed. It’s the slick move to keep your cookies intact and your cleanup easy-peasy.
- Can I make the dough ahead of time?
- For sure! Chill the dough balls for about 30 minutes before baking. It helps them hold their shape and prevents the cookies from spreading out too much. I’ve done this on busy nights — total game changer.
- Are these cookies gluten-free?
- Yes, they are gluten-free since the recipe contains no flour. Just double-check your peanut butter and baking soda labels to avoid any sneaky additives. Easy win for those dodging gluten.