
Expect the unexpected.
When I first read “chocolate chip cookie no chocolate chips,” I thought, what’s the point? But then—bam—I discovered cocoa nibs. These little powerhouses pack a serious punch of pure cocoa flavor without the melty mess of traditional chips. Trust me, they’re the unsung heroes of the cookie world.
Picture this: a warm kitchen, the scent of toasted butter mingling with brown sugar, and the faint crunch of nibs under your teeth. This recipe isn’t about faking it; it’s about flipping the script. The nibs provide that bitter-sweet pop, a nod to the old school while keeping the cookie tender and chewy—no soggy chip puddles here.
I’ll admit, this cookie has become my go-to when I want to impress without the usual cliches. It’s like the cookie went to a secret party, swapped its usual outfit, and came back cooler than ever. The cookie game just got interesting—time to ditch the chips and embrace the nibs.
For a delicious treat that’s a bit different, check out our Moist Banana Cake No Butter: A Lighter, Oil-Based Twist recipe.
Why Choose Cocoa Nibs Over Chocolate Chips? Real-World Perks
- Crunch Factor: Cocoa nibs bring a gritty, almost nutty crunch that chocolate chips can’t match—think of it as the jazz hands of cookie texture.
- Less Sweet, More Bite: They ditch the sugar rush, giving you a deep, slightly bitter cocoa hit that balances perfectly with the sweetness of the dough.
- Antioxidant Boost: Unlike your run-of-the-mill chocolate chips, cocoa nibs pack a punch of antioxidants—snacking smarter, not harder.
- Stay-Fresh Power: Cocoa nibs don’t melt or get mushy, so your cookies keep their structure and snap, even days after baking.
- Versatile Kick: Use them in other recipes like granola or smoothies—if you’re anything like me, you’ll get hooked on their rich, raw cocoa vibe.
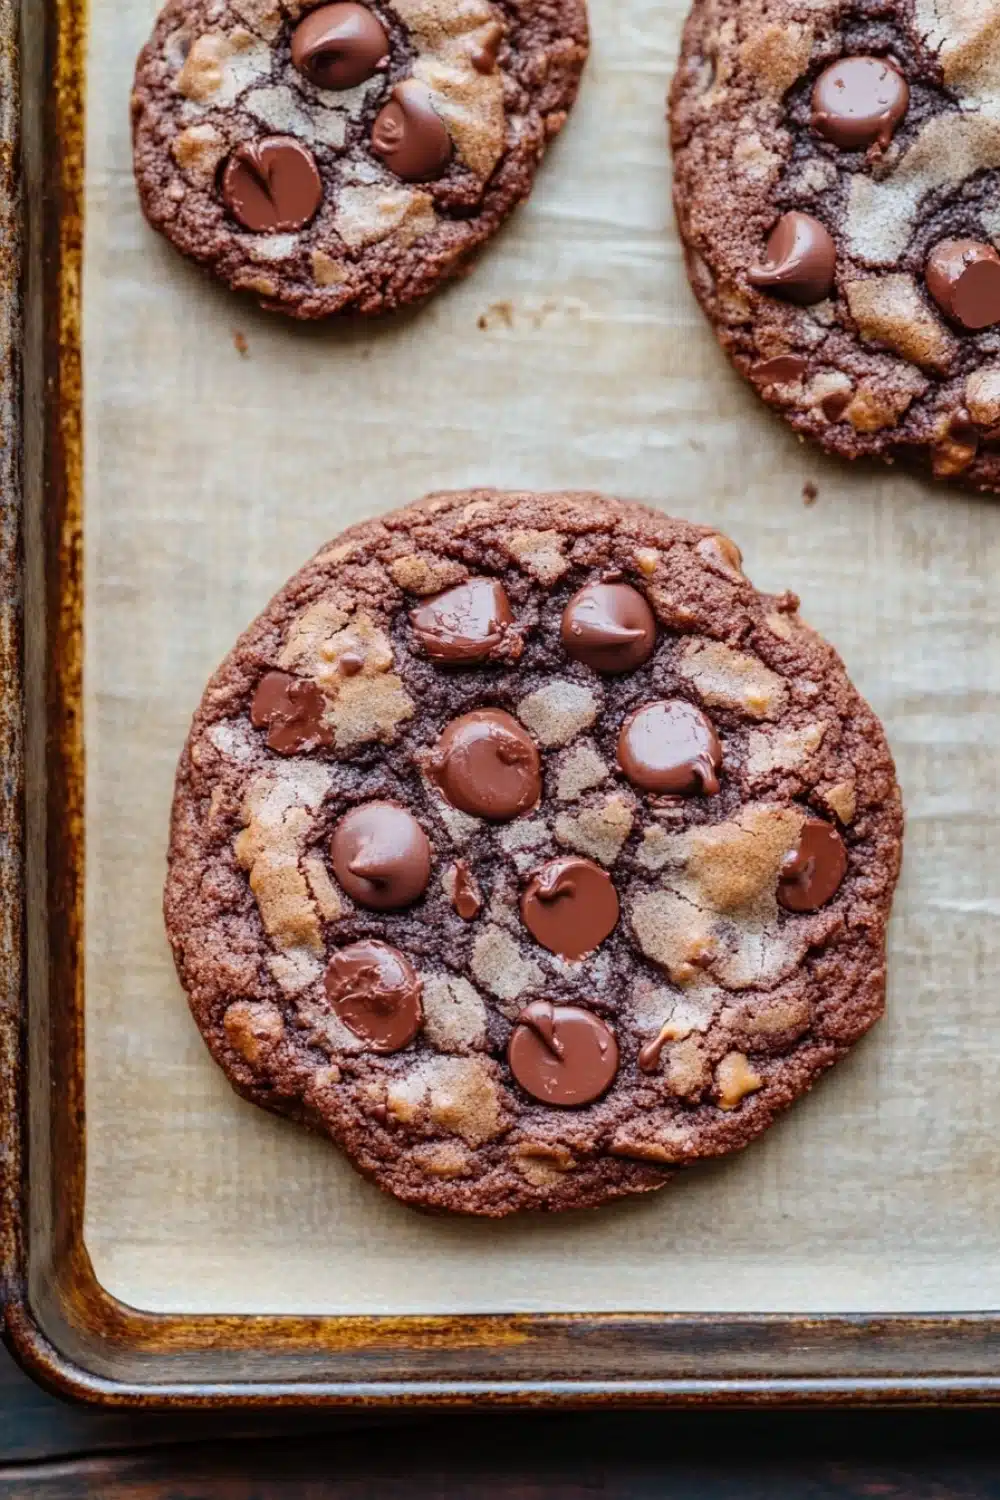
Chocolate Chip Cookie Without Chocolate Chips
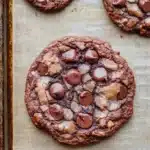
A delicious chocolate chip cookie recipe that uses cocoa nibs instead of traditional chocolate chips, delivering the classic taste and texture without any chocolate chips.
- Prep Time: 15 minutes
- Cook Time: 12 minutes
- Total Time: 27 minutes
- Yield: 24 cookies
Ingredients
2 1/4 cups all-purpose flour
1/2 teaspoon baking soda
1/2 teaspoon salt
3/4 cup unsalted butter, melted and cooled
1 cup packed brown sugar
1/2 cup granulated sugar
1 tablespoon vanilla extract
1 large egg
1 large egg yolk
1 cup cocoa nibs
Instructions
Preheat the oven to 325°F (163°C). Line two baking sheets with parchment paper.
In a medium bowl, whisk together the all-purpose flour, baking soda, and salt. Set aside.
In a large bowl, mix the melted unsalted butter, brown sugar, and granulated sugar until well combined.
Add the vanilla extract, egg, and egg yolk to the butter and sugar mixture. Beat until light and creamy.
Gradually add the flour mixture to the wet ingredients, mixing until just combined.
Fold in the cocoa nibs evenly throughout the dough.
Using a tablespoon or cookie scoop, drop rounded dough balls onto the prepared baking sheets, spacing them about 2 inches apart.
Bake in the preheated oven for 12 minutes or until the edges are lightly golden but the centers remain soft.
Remove from oven and let the cookies cool on the baking sheets for 5 minutes before transferring them to a wire rack to cool completely.
Explore more:
Breakfast Recipes
Nailing That Chocolate Chip Cookie Without Chocolate Chips
The Cocoa Nib Game Changer: Why It Works
Swapping traditional chocolate chips for cocoa nibs isn’t just a quirky twist—it’s a game changer. Cocoa nibs bring that deep, raw cacao crunch and earthy bitterness that chocolate chips simply can’t mimic. Unlike standard chips, which deliver a predictable melt, nibs hold their shape through the bake, giving each bite a rustic snap and a burst of intense flavor. I remember the first time I tried this swap; it almost felt like eating a grown-up secret—no sugar bomb, just pure cocoa punch. If you’re after that classic cookie vibe but want to keep it a little wild, nibs are your go-to.
Mixing Magic: The ‘Why’ Behind the Ingredients
Here’s the lowdown on the dough’s backbone—melted butter. Using melted instead of softened butter flips the cookie’s texture from cakey to chewy, which is the holy grail in chip cookies. The brown sugar is your sticky sweet glue, packing moisture and depth with its molasses. The duo of egg plus egg yolk? That’s the secret sauce for a tender crumb and rich mouthfeel. And don’t even get me started on that 325°F oven temp—low and slow is the name of the game here, preventing the edges from crisping too fast while the center gets that gooey hold. It’s a tightrope walk that’s worth every second.
When Cookies Go Sideways: Fixing Common Fails
Ever pull cookies from the oven only to find them flat as a pancake or brick-hard? Here’s the quick fix rundown—too much butter or sugar can cause sprawling, so measure like a hawk. Overmixing the dough wakes the gluten beast, turning cookies tough. Fold gently, folks. If your cookies come out dry or crumbly, you might be overbaking—those last few minutes in the oven are a make-or-break moment. And if nibs are scorching and bitter? Toss ‘em in last minute or reduce oven heat a tad. Remember, cookies are temperamental little beasts, but with these tips, you’ll tame the wild ones.
Chocolate Chip Cookie Without Chocolate Chips — FAQ
A: Absolutely, but keep in mind that cocoa nibs provide a crunchier, more bitter profile compared to the smooth sweetness of chocolate chips. It’s a texture and taste trade-off — your call if you want that classic melty chunk vibe or a nuttier, roasted touch.
A: Not at all. Cocoa nibs are naturally less sweet but pack a deep, roasted chocolate flavor that balances beautifully with the brown sugar’s molasses notes. The cookie’s softness and the buttery base help mellow out any sharp edges, making for a complex but approachable bite.
A: No. The egg yolk adds richness and helps keep the cookies chewy—a yolk-less batch will turn out cakier and less tender. If you’re out of egg yolks, maybe try a yolk substitute, but the texture will definitely shift.
A: Store your cookies in an airtight container at room temp for up to 5 days. To trap that perfect chewiness, throw in a slice of bread — yes, really. The cookies soak up moisture from the bread, staying soft. Freeze any extras in airtight containers for up to 3 months and thaw at room temp before munching.
A: Yes, chilling the dough overnight actually amps up the flavor and helps control spread during baking. Just cover it tightly and give it a good stir or gentle reshaping before scooping out those cookies the next day.