
Hands off the dough!
There’s something magical about bread that doesn’t demand elbow grease. When I first stumbled upon the no knead Dutch oven bread method, I was skeptical — no kneading, no fuss? It sounded like kitchen witchcraft. But after that first slow rise, with bubbles dotting the dough like little islands, I knew I was onto something different. This method lets time do the heavy lifting, transforming simple ingredients into a crusty masterpiece.
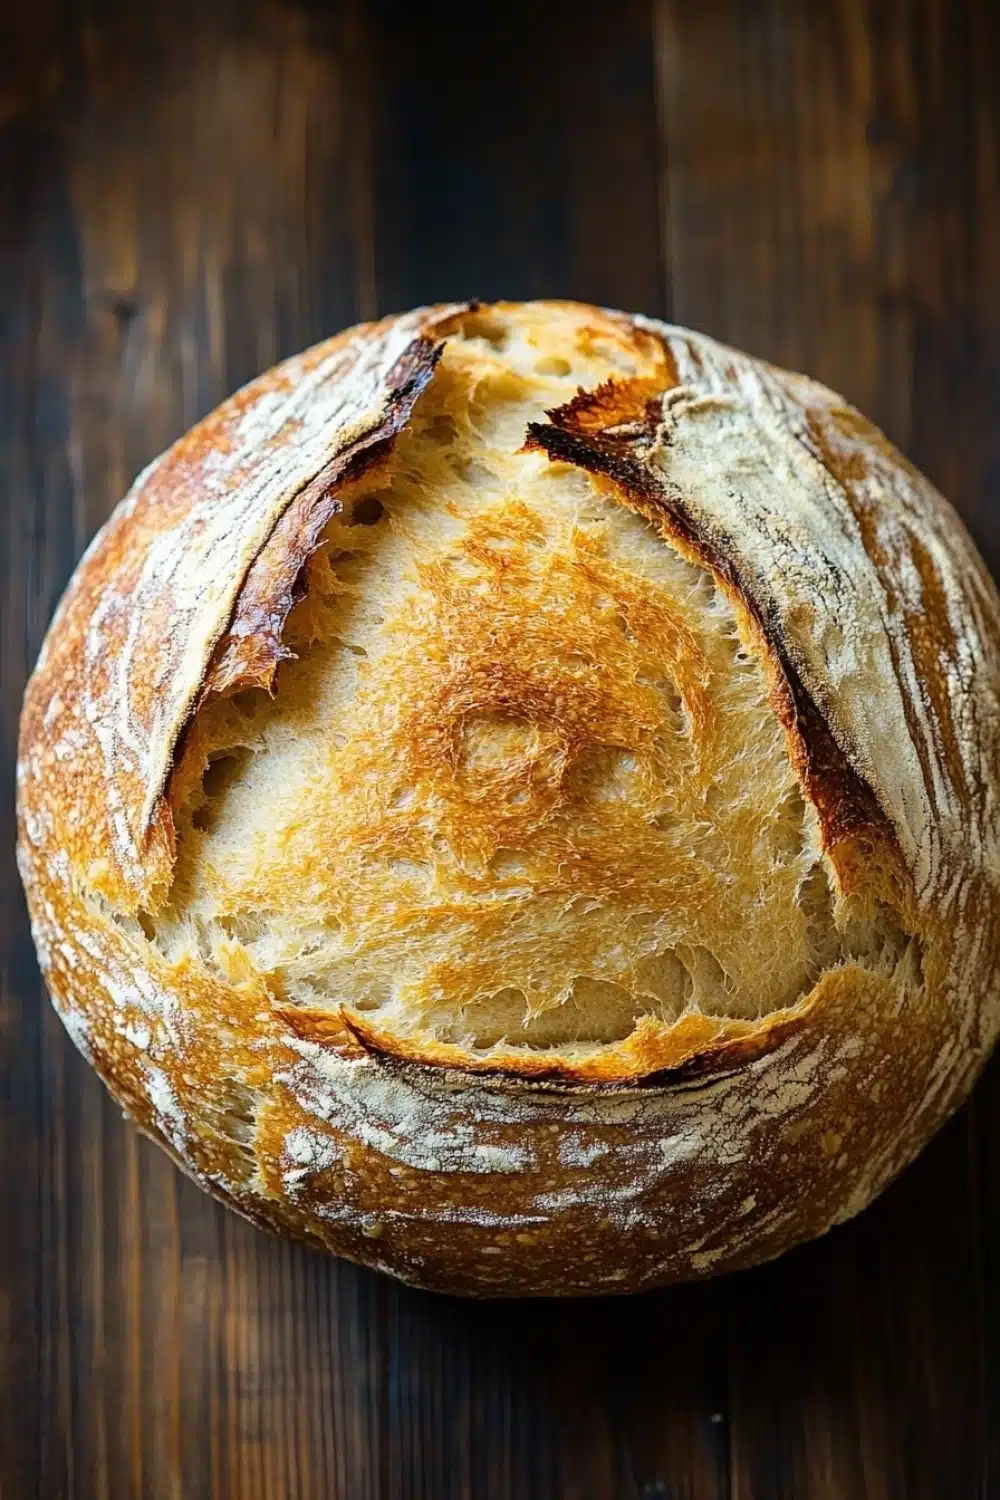
The kitchen fills with the warm, yeasty aroma as the Dutch oven works its magic. That dark, crackly crust cracks audibly beneath my knife, a satisfying “snap” that signals success. Inside, the crumb is airy and tender, a total contrast to the crust’s rugged exterior — a balance only a Dutch oven can coax out.
For anyone who’s ever dreaded kneading sticky dough or worried about overworking it, this loaf is a godsend. It’s rustic, homey, and downright approachable. I’m telling you—this is bread baking at its most chill and rewarding.
If you’re interested in a simple and delicious recipe, check out our Easy Homemade Bread Using Self-Rising Flour in 40 Minutes for a great no knead Dutch oven bread option.
Real Life Benefits of Baking No Knead Dutch Oven Bread
- Saves hands-on time—just mix and wait, perfect for busy folks who want fresh bread without babysitting dough.
- Beginners-friendly—no fancy kneading skills needed; even if you’ve never baked bread before, you’ll nail it.
- Uses minimal ingredients—simple pantry staples make it budget-friendly and easy to whip up anytime.
- The Dutch oven traps steam, creating a crackling crust that’s hard to beat from store-bought loaves.
- Long fermentation develops flavor naturally, so you get a depth of taste without adding yeast heaps or fancy starters.
No Knead Dutch Oven Bread
A simple and rustic no knead bread baked in a Dutch oven, resulting in a crusty exterior and soft, airy interior. Perfect for beginners and requires minimal hands-on time.
- Prep Time: 15 minutes
- Cook Time: 45 minutes
- Total Time: 16 hours
- Yield: 8 slices
Ingredients
3 cups (360 grams) all-purpose flour
1/4 teaspoon instant yeast
1 1/4 teaspoons salt
1 1/2 cups (360 ml) warm water
Instructions
In a large mixing bowl, combine the flour, instant yeast, and salt. Stir to combine.
Add the warm water to the dry ingredients and mix with a wooden spoon or spatula until a shaggy, sticky dough forms. Ensure all flour is incorporated.
Cover the bowl tightly with plastic wrap or a clean kitchen towel and let the dough rest at room temperature for 12 to 16 hours, until the surface is dotted with bubbles and the dough has doubled in size.
Lightly flour a clean work surface and gently turn the dough out onto it. Using floured hands, fold the dough over on itself once or twice to shape it into a rough ball. Do not knead.
Place a piece of parchment paper inside a large bowl or proofing basket and set the dough seam-side down on the parchment. Cover with a towel and let it rest for 1 to 2 hours, until it has risen again and nearly doubled.
About 30 minutes before baking, place a 5 to 6 quart Dutch oven with its lid in the oven and preheat to 450°F (232°C).
Carefully remove the hot Dutch oven from the oven. Lift the dough with the parchment paper and place it into the Dutch oven.
Cover with the lid and bake for 30 minutes.
Remove the lid and bake for an additional 15 minutes, until the bread is deep golden brown and crusty.
Using oven mitts, carefully remove the bread from the Dutch oven and transfer it to a wire rack to cool completely before slicing.
Explore more:
Breakfast Recipes
No Knead Dutch Oven Bread Mastery
The Magic of Minimalism: Why No Knead Works Wonders
When I first encountered no knead bread, I was skeptical. Flour, water, a pinch of yeast, and a dash of salt—no fancy gadgets or elbow grease? It felt like baking heresy. But here’s the kicker: that long, slow fermentation (12 to 16 hours) is the unsung hero. During this time, natural enzymes and wild yeasts do the heavy lifting, breaking down gluten and developing flavor. It’s like letting your dough marinate in its own personality. The result? A crust that’s crackly and a crumb that’s airy enough to make you rethink store-bought loaves. Forget kneading—it’s all about patience and trust. If you rush this, you’ll get a dense brick. Embrace the slow game and let time do the heavy lifting—your taste buds will thank you.
Ingredient Swaps That Won’t Break the Bank—or the Dough
All-purpose flour is the baseline here, but don’t get stuck thinking you must stick to it religiously. Want a nuttier flavor with a bit more chew? Swap half the flour for bread flour—its higher protein content gives the gluten a little extra oomph without needing kneading. Got whole wheat sitting around? Replace up to a cup of all-purpose with it, but keep in mind it’ll suck up more water, so add a splash extra to keep that dough loose and tacky, not a dry mess.
Instant yeast is your go-to for ease, but feel free to experiment with active dry yeast—just proof it first in that warm water. And if you’re looking to go wild, toss in a tablespoon of sourdough starter to the mix. It’ll add complexity, but extend your ferment time by a few hours. Remember—this dough is sticky and shaggy by design. Trying to add more flour to fix stickiness? That’s a rookie move. It’ll kill your rise and give you a dense loaf. Embrace the tackiness; it means good things.
Fixing Common Pitfalls: When Your Bread Goes Rogue
It happens to everyone. You pull your bread out and it’s either too flat, too dense, or missing that golden crust. First, flat bread? That’s usually under-proofed dough or a too-short fermentation. Don’t skimp on the overnight rest. Your bubble cues are the bread’s way of texting you—no bubbles, no party.
Dense crumb? Could be over-proofed or flour overload (yeah, that pesky extra flour again) or the water temperature was off—cool water slows yeast; too hot kills it. Aim for warm, like a cozy bath, around 75-80°F.
And that crust? If it’s pale or soft, your Dutch oven might not have been hot enough or the lid stayed on too long. The lid traps steam, which is good for crust development early on, but removing it halfway lets the crust crisp up. It’s like giving your bread a sauna session followed by a quick sunbath. Timing here is king. When in doubt, crank that oven up and give it a few extra minutes under the open lid. The payoff? A crust that snaps when you bite, not just flops.
No Knead Dutch Oven Bread FAQs
Q: Do I really need to wait 12 to 16 hours?
Yes! This long rest is what gives the dough its character—no kneading, just time. The slow fermentation lets flavors develop and that magic airy texture form. Try not to rush it; patience is your bread’s best friend.
Q: Can I use active dry yeast instead of instant yeast?
Absolutely. Just proof the active dry yeast in warm water for about 5 minutes until it gets foamy before mixing it with your flour and salt. Instant yeast skips this step, but either works fine for this recipe.
Q: What if I don’t have a Dutch oven? Can I bake it another way?
Short answer: No. The Dutch oven traps steam, creating that coveted crust and soft crumb. Without it, your bread won’t brown or rise the same way. If you don’t have one, try using a heavy oven-safe pot with a lid or a covered roasting pan.
Q: Why don’t we knead the dough at all?
Skipping kneading is the whole point! This no knead approach relies on time and gentle folding to develop gluten. It’s a lazy baker’s hack that saves effort but still delivers a chewy, airy loaf with a rustic vibe. If you’re used to punching and folding, this method might feel like heresy—but trust me, it works.
Q: How do I store leftover bread without it going stale?
Store it loosely wrapped in a paper bag or bread box at room temperature for up to three days to keep the crust crisp. For longer life, wrap it tightly in plastic wrap and freeze—thaw on the counter before slicing. Avoid sealed plastic bags at room temp; they’ll turn your crust limp and sad.