
Crust dreams, no sweat.
There’s something wild about bread that rises while you’re off living your life. I’ve always been tangled up in the notion that bread demands hours of elbow grease and sticky dough battles. But the no knead Dutch oven bread flips that script—minimal fuss, maximum crunch.
Picture this: a sticky, shaggy dough bubbling under a towel on your countertop overnight, quietly expanding like a slow-motion magic trick. By morning, the air is thick with the scent of yeasty promise, and the real fun begins.
Sliding that dough—wrapped in parchment—into a smoking-hot Dutch oven is where the alchemy happens. The oven’s steamy embrace crisps the crust to crackly perfection while the crumb inside stays light and airy. No kneading, no drama. Just old-school, honest bread, ready for whatever you want to slap on it.
If you’re interested in a simple and quick recipe, check out our Easy Homemade Bread Using Self-Rising Flour in 40 Minutes for a no knead dutch oven bread alternative.
Why You’ll Love Making No Knead Dutch Oven Bread
- Zero muscle—no kneading means you skip the arm workout but still get that artisan crust.
- Set it and forget it: 12 hours of hands-off fermentation lets the dough develop complex flavors without babysitting.
- The Dutch oven traps steam perfectly, locking in that crackling crust that turns heads at your dinner table.
- Minimal ingredients, maximum impact—only four pantry staples needed to create something that tastes way fancier than it is.
- Perfect for rookie bakers and busy folks alike; just mix, wait, and bake—no flour-dusted chaos in your kitchen.
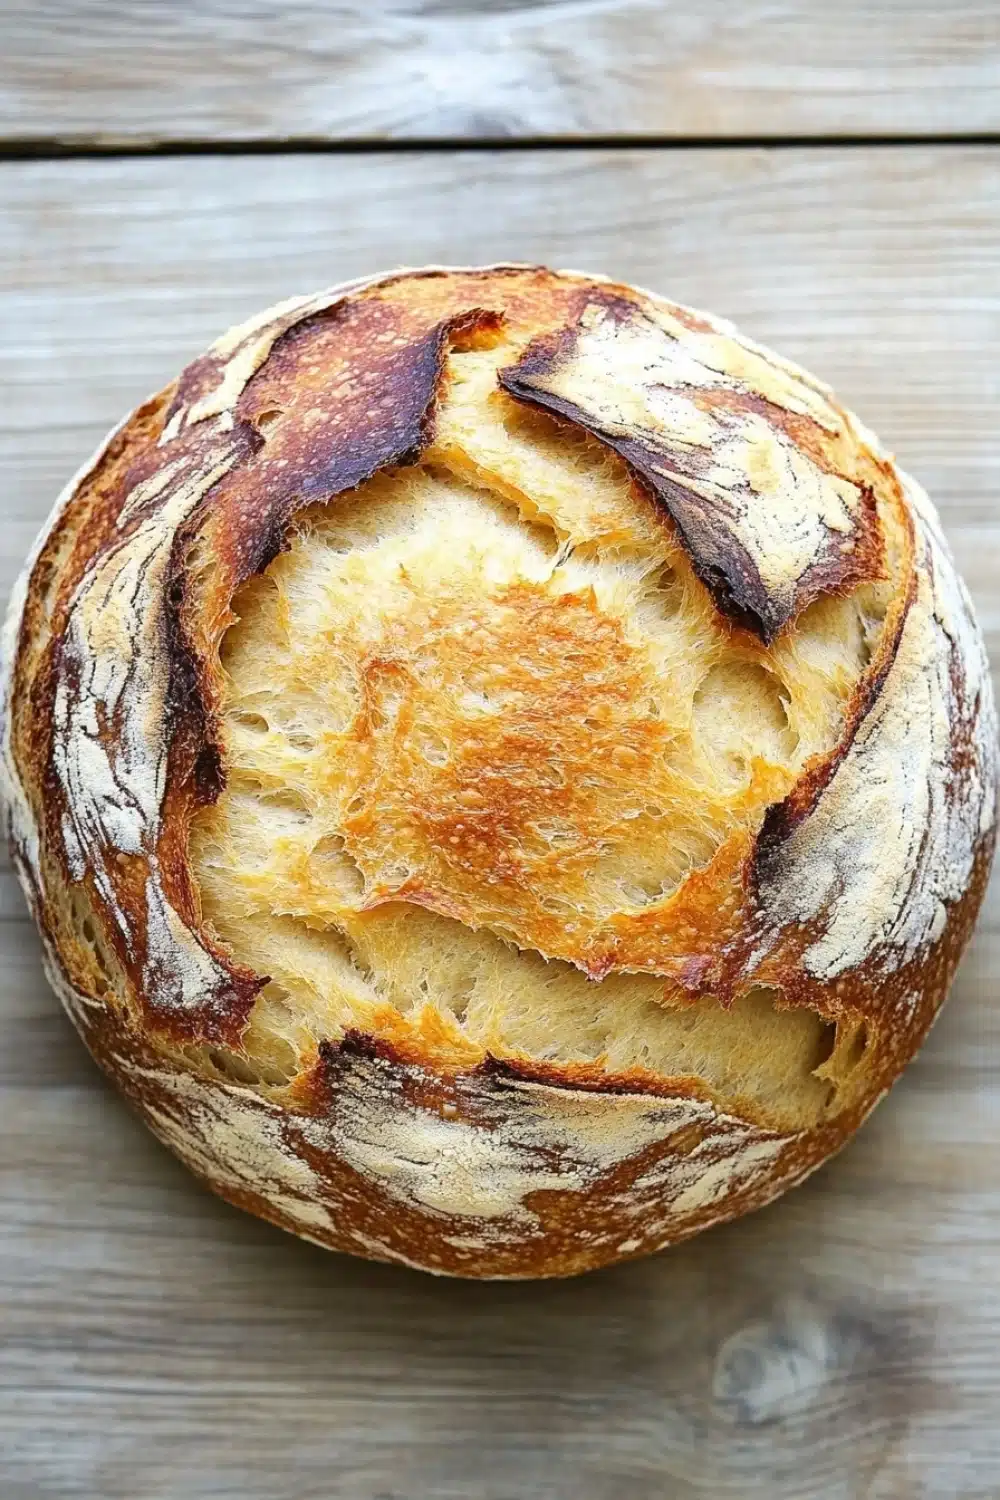
No Knead Dutch Oven Bread
A simple and rustic no knead bread recipe baked in a Dutch oven for a perfect crust and airy crumb. This easy recipe requires minimal effort and yields a delicious homemade artisan loaf.
- Prep Time: 15 minutes
- Cook Time: 45 minutes
- Total Time: 12 hours
- Yield: 8
Ingredients
3 cups (375 grams) all-purpose flour
1/4 teaspoon instant yeast
1 1/4 teaspoons salt
1 1/2 cups (360 ml) warm water
Instructions
In a large mixing bowl, combine the all-purpose flour, instant yeast, and salt. Stir to mix evenly.
Add the warm water to the dry ingredients and stir with a wooden spoon or spatula until a shaggy, sticky dough forms. Ensure all flour is incorporated.
Cover the bowl tightly with plastic wrap or a clean kitchen towel. Let the dough rest at room temperature for 12 hours, or overnight, until the surface is dotted with bubbles and the dough has risen and expanded.
After the dough has risen, generously flour a clean surface and gently turn the dough out onto it. Fold the dough over itself once or twice to shape it into a rough ball. Do not knead.
Place a large piece of parchment paper on the surface and transfer the dough onto it. Cover with a kitchen towel and let it rest for 1 hour.
About 30 minutes before the dough is ready, place a 5 to 6-quart Dutch oven with its lid inside your oven and preheat to 450°F (230°C).
Carefully remove the hot Dutch oven from the oven. Lift the dough by the parchment paper and place both into the Dutch oven.
Cover with the lid and bake for 30 minutes.
After 30 minutes, remove the lid and bake for an additional 15 minutes until the bread is golden brown and crusty.
Remove the bread from the Dutch oven and transfer it to a wire rack. Let it cool completely before slicing.
Explore more:
Breakfast Recipes
Mastering No Knead Dutch Oven Bread: Tricks, Tweaks, and Troubleshooting
The Flour Factor: Why All-Purpose Works & When to Switch It Up
All-purpose flour gets the nod here because it strikes a fine balance — not too heavy, not too light. I often get asked, “Can I swap it out?” Sure, but tread carefully. Bread flour, boasting higher protein, cranks up gluten development, which might lead to a firmer, chewier crumb — not the airy cloudiness we chase. Whole wheat? It adds a nutty punch but also steals some of that rise, demanding a hydration tweak. I recall one lazy Sunday where I threw in half whole wheat on a whim; the dough was a bit grumpier, yet the depth of flavor made me rethink my usual routine. If you’re experimenting, consider upping water slightly — think of it as feeding your dough a little extra TLC. The instant yeast dose here is whisper-light, perfect for that slow ferment and flavor build. Messing with it? You might speed things up but lose that subtle tang and texture. In short: all-purpose flour and just a pinch of yeast are the unsung heroes of this lazy bread’s charm.
Shaping Without Kneading: The Art of the Rough Fold — No Glove Needed
Here’s where many bakers hit a snag. The recipe says “don’t knead,” but that’s not code for “ignore the dough.” After the 12-hour bubble party, the dough is sticky, lively, and ready for a gentle fold. I liken this step to coaxing a shy cat; you don’t wrestle, you softly encourage. Flour your hands generously — this is your shield against the sticky beast — and fold the dough over itself once or twice, creating surface tension without deflating the precious air pockets. No need to get fancy; this rough shaping sets the stage for that perfect oven spring. Skip this, and you’re left with a misshapen loaf, lacking structure and the coveted open crumb. One of my early attempts skipped this step entirely — ended up with a pancake of bread, flat and sad. Lesson learned: a light touch and respect for the dough’s mood make all the difference.
Baking in a Dutch Oven: The Secret Steam Chamber and How to Avoid Bread Blunders
Preheating your Dutch oven is non-negotiable — this thing acts like a mini steam chamber. When you throw in that dough on parchment, trapped steam creates a moist environment that keeps the crust from setting too soon, letting the bread puff up gloriously. But watch out: removing the lid too early or not preheating correctly can wreck your crust game. I’ve seen home bakers yank the lid off immediately, losing that precious steam, resulting in a tough, dull crust — not what we want. Also, be careful when handling the hot Dutch oven. It’s a beast, heavy and unforgiving. I always use long oven mitts and avoid any slapdash moves. Baking times? Stick to the 30 minutes covered, then 15 uncovered. Any less, and you risk a doughy middle. Too long, and you’re dealing with a crust that could moonlight as armor. Finally, cooling on a wire rack is key — cutting hot bread is a rookie mistake that’ll gum up your crumb and leave you with a gummy mess. Patience, my friend. Let it cool, then slice.
No Knead Dutch Oven Bread FAQs
Can I use bread flour instead of all-purpose?
Yes! Bread flour has a higher protein content, which can give your loaf a chewier texture and a bit more rise. Totally worth a try if you have it on hand.
Do I have to preheat the Dutch oven?
Absolutely. Preheating the Dutch oven ensures that when you drop the dough in, it gets that blast of heat needed for a killer crust and oven spring. Skipping this is like showing up to the party half-dressed.
What’s the point of not kneading?
No knead means you’re letting time do the heavy lifting. The long fermentation develops gluten naturally without the arm workout. If you’re someone who hates kneading or just wants a lazy Sunday bake, this is your jam.
How long can I keep the bread fresh?
Keep it in a paper bag at room temp for 1-2 days to keep that crust crispy. Beyond that, wrap it tight in plastic and toss it in the freezer. Thaw before slicing, and you’re back in business.
Can I add herbs or seeds?
Definitely. Mix in your favorite add-ins right when you combine the flour, yeast, and salt—think rosemary, flaxseeds, or even chopped olives. Just don’t go overboard; this bread loves simplicity.